2 applying relay hold time zones – DoorKing Remote Account Manager User Manual
Page 32
3.3.2
Applying Relay Hold Time Zones
Once the required time zones are created, you can then apply them to the system relay(s) that you want to
operate under the time zone.
1.
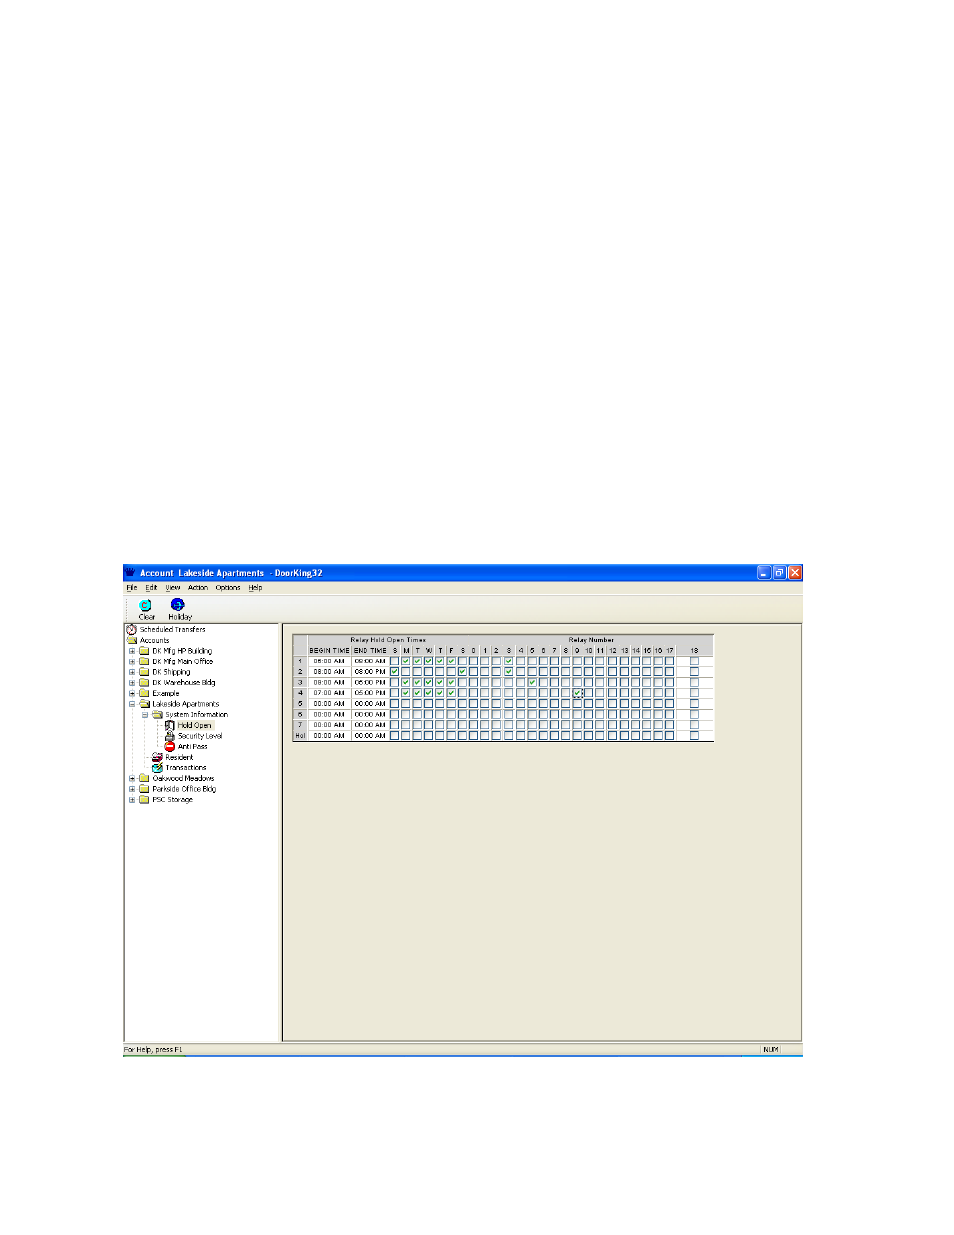
Click the relay(s) next to the time zone that you want to apply the time zone to. A check will
appear in the box (Fig 21).
2.
Use the scroll button under the relay number table to access system relays 11-18.
3.
Click OK to save the time zones and return to the System Info screen.
4.
Click CANCEL to return to the System Info screen without saving any changes.
5.
Click CLEAR to clear all time zones.
In the example below, four time zones have been created. Referring back to Figure 19 on page 25, Relay 3 has
been labeled Res Veh Gate (Resident Vehicle Gate). Time zones 1 and 2 have been applied to Relay 3, which
means that on Monday through Friday, the resident vehicular gate will automatically open at 6:00 AM and remain
open until 8:00 PM. On Saturday and Sunday, this gate will open at 8:00 AM and remain open until 8:00 PM.
Again refereeing back to Figure 19 on page 25, Relay 5 has been labeled Office. Time zone 3 has been applied
to Relay 5, which means that the office door will unlock at 9:00 AM and remain unlocked until 5:00 PM Monday
through Friday. This door will remain locked on the weekends.
Relay 9 is labeled the Serv Ent (Service Entrance). Time zone 4 has been created and applied to this entry only
(relay 9) meaning that this door will open at 7:00 Am and relock at 5:00 PM Monday through Friday, and will
remain locked on the weekends.
Figure 21
Page 32
1835-066-N-7-13