Pg20, Replacing the engine belt, Engine throttle screw – Diamond Products UDM User Manual
Page 23
3. Turn the belt adjustment shaft nut clockwise
to tighten the belt. Retest the tension and
readjust the nut as necessary to reach the
required tension setting. DO NOT exceed
the manufacturer’s setting.
4. Retighten the four nuts (under the frame) to
secure the alternator.
Replacing the Engine Belt
1. Loosen the nut on the four screws (under the
frame) securing the alternator to the frame.
2. Loosen the belt adjustment shaft nut. DO NOT
remove the nut.
3. Slide the alternator toward the engine to loosen
the belt.
4. Remove the belt from the alternator sheave.
5. Remove the two screws securing the hydraulic
pump to the pump mount. Holding the
hydraulic pump, move the pump over to
remove the coupling assembly from the pump
mount. Note: There is no need to remove any
hoses from the hydraulic pump.
6. Remove three of the four screws securing the
pump mount to the engine, the fourth must be
loosened.
7. Move the pump mount away from the engine
to provide access to the engine sheave.
8. With the pump mount loose, guide belt around
sheave, pull belt out through pump end.
9. Insert loop of new belt through rear opening
and out the side of pump toward generator.
Guide belt around coupler and into position on
the engine sheave.
10. Secure the pump mount to the engine.
11. Holding the hydraulic pump, place the coupling
assembly into the pump mount and fit the end
of the coupling assembly onto the engine
crankshaft.
12. Secure the hydraulic pump to the pump mount.
13. Retighten the coupling assembly setscrew to
secure the coupling assembly to the engine
crankshaft.
14. Loop and align the belt around the alternator
sheave.
15. Slide the alternator toward the side of the
machine (this will tension the belt slightly).
16. Turn the belt adjustment shaft nut clockwise to
tighten the belt. Test the tension and readjust
the nut as necessary to reach the required
tension setting. DO NOT exceed the
manufacturer’s setting.
17. Retighten the four nuts (under the frame) to
secure the alternator.
Engine
•
Let the engine cool down prior
to servicing the machine.
•
DO NOT service the machine
with the engine running unless
stated otherwise.
Refer to the engine manual and manufacturer for a
full maintenance schedule and additional
maintenance information.
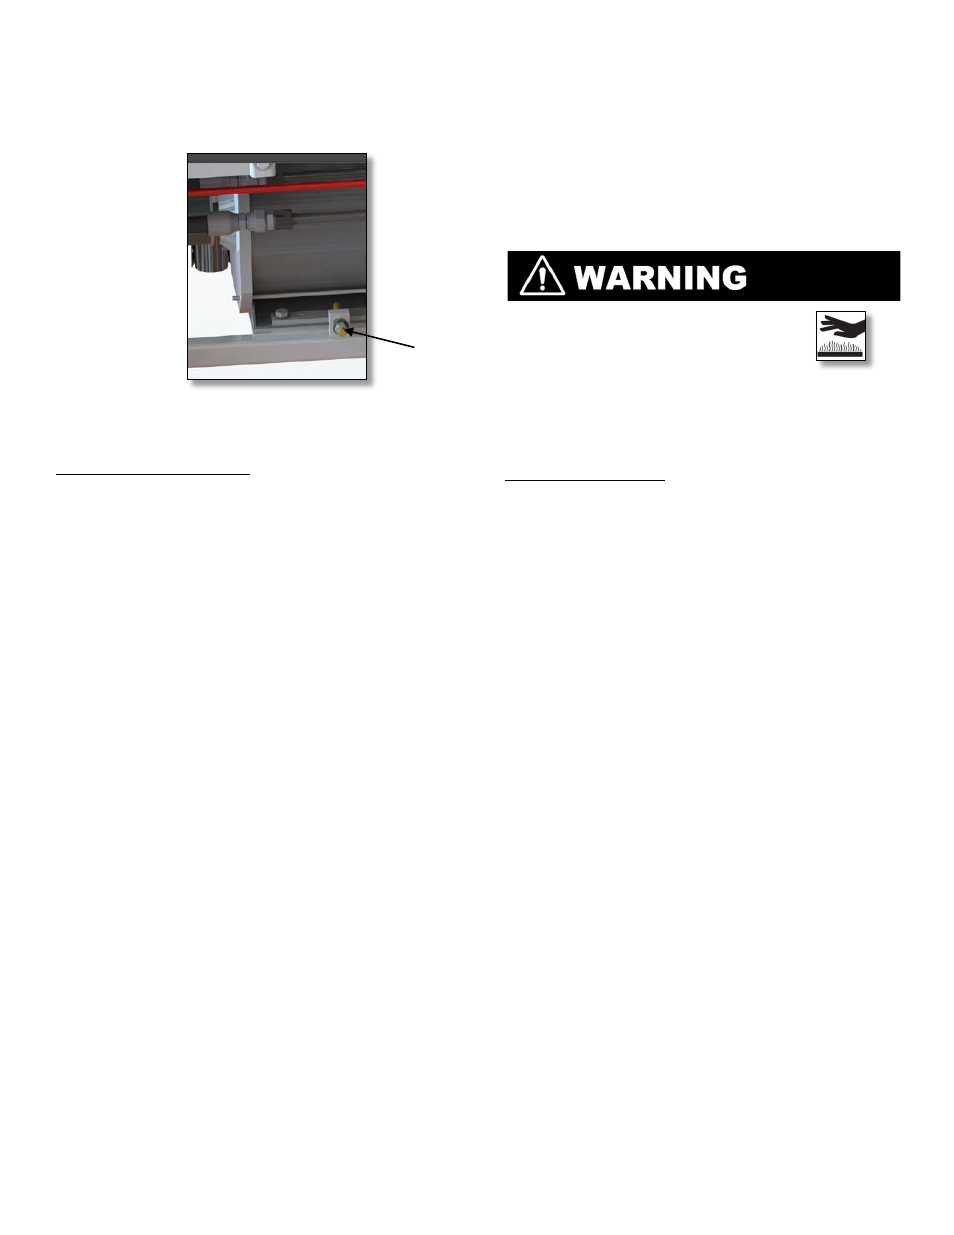
Engine Throttle Screw
The engine throttle screw (located at the top of the
engine) is factory set at 3,550 rpm. The screw
regulates the maximum no-load engine rpm.
Occasionally check the setting on the rear control
panel tachometer and adjust the screw as
necessary.
•
Turn off the engine.
•
Adjust the throttle screw.
•
Remove all tools from the area and restart
the engine. Check the engine rpm on the
rear control panel tachometer while at full
throttle.
•
Turn off the engine and readjust the throttle
screw as necessary.
Cleaning the Engine
•
Wipe down the engine’s exterior and oil
cooler daily/regularly to prevent high
operating temperatures. DO NOT spray the
engine with water to prevent engine
damage.
Storing
Complete the tasks listed below prior to storing the
machine for longer time frames:
•
Drain the water lines/hoses.
•
Drain all fluids.
•
Turn off all switches and controls (including
the master battery disconnects).
•
Clean and wipe down the machine to
remove dust, debris, and slurry from
components (especially fans).
•
Remove the battery and store in a proper
location, out of reach from children.
•
Store the machine in a dry area, protected
from outdoor elements, and out of reach
from children.
20