Fig. 3.2 – Magnum Venus Plastech UltraMAX VLS-2400 Series User Manual
Page 28
VLS-2400 Series Fluid Section Manual
Rev. 08/2013
Page | 28
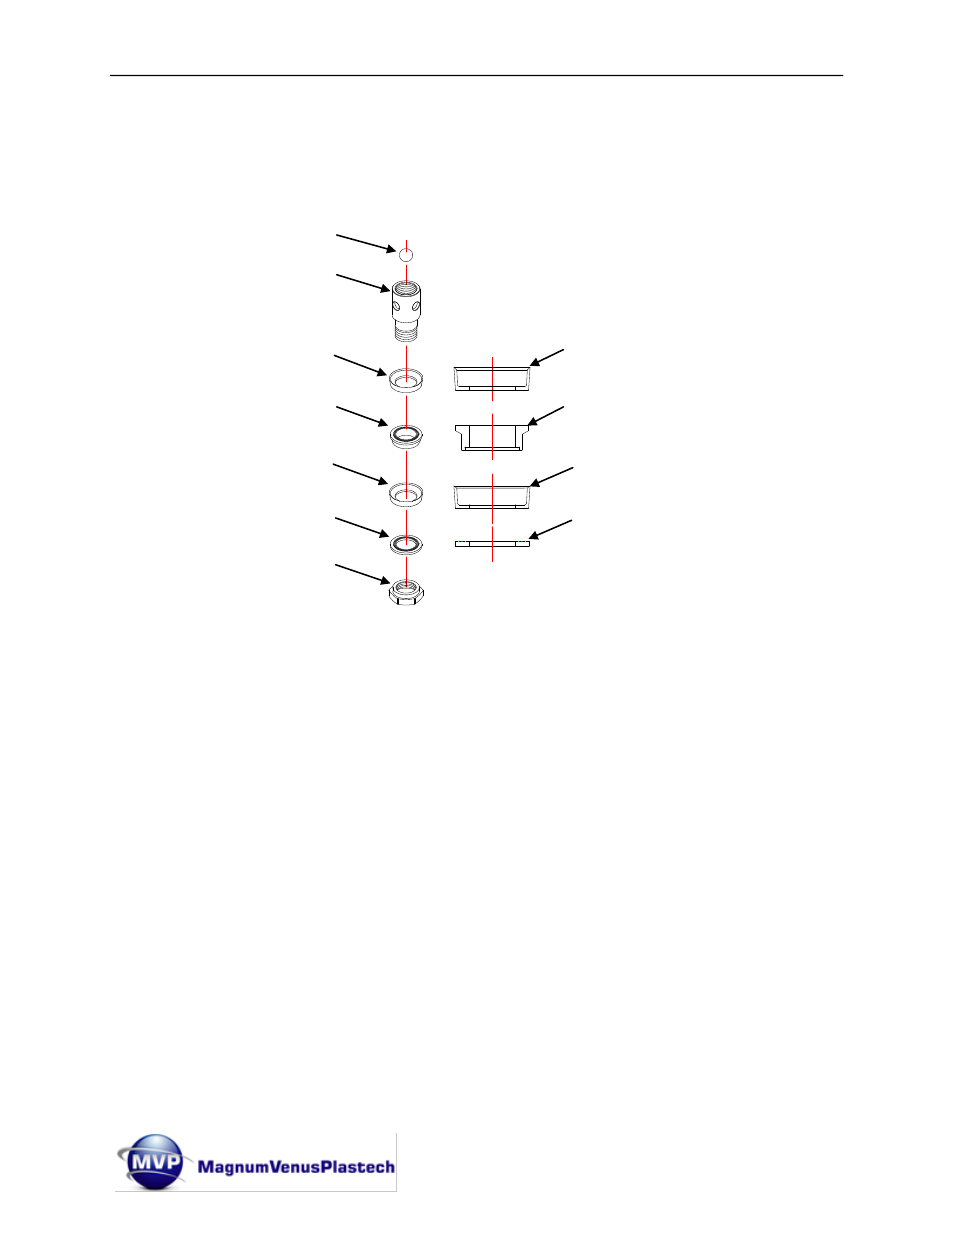
7. Install the Piston Cup Backup (VLS-2417) onto the Piston Body (VLS-2419) with the
side with the ridges facing up. Next install one of the Piston Cups (VLS-2415) followed
by the Piston Cup Spacer (VLS-2416) followed by the second Piston Cup, followed by
the Piston Cup Compression Ring (VLS-2429). See fig. 3.2.
Fig. 3.2
8. Install the Piston Ball Spring (VLS-2414) over the Dowel Pin (VLS-2425) inside the
Piston Rod (VLS-2409). Put a light coating of Red Grease (6706-2-1) on the 1
/2”
Chrome Ball (VLS-2426) and install over the Piston Ball Spring.
Note: Do not drop, dent or scratch the
1/2” Chrome Ball (VLS-2426).
9. Coat the threads of the Piston Body (VLS-2419) and screw it into the Piston Rod
(VLS-2409
). Tighten “wrench tight”.
10. Check the Piston Rod (VLS-2409) for burrs, scratches or other damage and replace
if necessary. Slide the Piston Rod up through the Packing assembly in the Outlet
Body (VLS-2401). Be careful not to damage the Packing set assembly.
11. Tighten the Packing Nut (VLS-2407) enough to hold the Piston Rod in place.
12. Lightly coat the
3/4” Chrome Ball (VLS-2427) with Red Grease (6706-2-1) and install
it and the 4 Lobed Ball Guide (VLS-2428) into Foot Valve Body (VLS-2402).
13. Compress the Ball Stop (VLS-2420) and insert it into the groove of the Foot Valve
Body (VLS-2402)
Chrome Ball
Piston Body
Piston Cup
Piston Cup Spacer
Piston Cup
Piston Cup Back Ring
Piston Nut
Piston Cup
– facing up
Piston Cup
– facing up
Piston Cup Spacer
Piston Cup Backup Ring
–
Grooves Face Up