CognitiveTPG A776 User Manual
Page 15
1
1
1
1
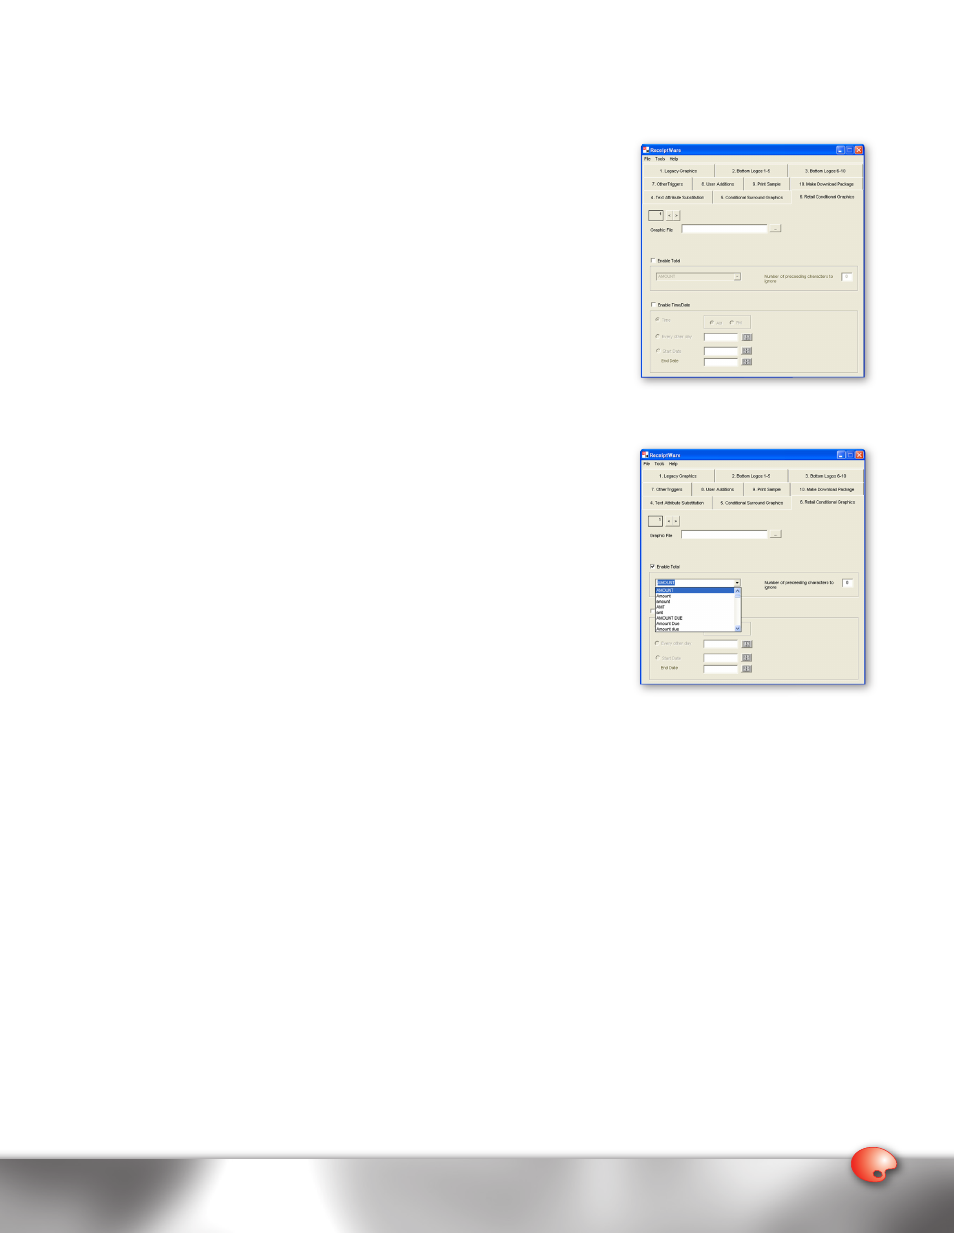
To use Retail Conditional Graphics:
1. Open the ReceiptWare software application.
2. Click on the Retail Conditional Graphics tab.
3. Click on the Enable Total and/or Enable Time/Date button.
Note: You must click on Enable Total and/or Enable Time/Date before you can
define a Retail Conditional Graphic.
4. Identify the graphics that you want to print. You may want graphics for the
holidays, one for a local sports team or school, or special ones to reward loyal
customers. If you have these graphics but they are not in an LGO format, then
ReceiptWare’s Bitmap Conversion Tool can be used to translate the files.
To open the conversion tool, proceed to the Tool drop-down menu and choose
the Bitmap Conversion Tool. Please see the section called ReceiptWare
Bitmap Conversion Tool for detailed instructions on how to use it.
5. The ReceiptWare utility supports 112 separate “Retail Conditional Graphics
Trigger sets.” Select a trigger number by scrolling through the Trigger Index
located on the top left side of your screen directly above Graphic File.
6. Choose "Enable Time" and/or "Enable Date" and specify the associated
trigger string. Then, specify the graphic that you want printed based upon the
associated trigger string. In the field labeled Graphic File, you can either type
in the full pathname to the LGO file or click on ”…” the button to the right of
the text box to specify it through Windows
®
Explorer. Once you have selected
the LGO file, a smaller version of it appears on the screen that looks different
than when it is actually printed.
7. Once you have finished specifying your Retail Conditional Graphics Trigger
set, move to the next one, if you desire another. To scroll to the next set, use
the > button. To go back to a previously defined set use the < button.
8. Repeat steps 4–6 to define all the Retail Conditional Graphics that you want
to include.
Retail Conditional Graphics Guidelines
• Make sure that you choose trigger strings that will not appear in other parts of the receipt or the printer will print the
Retail Conditional Graphic at an undesired location.
• To disable Retail Conditional Graphics, click on the check box of any trigger. To disable other Retail Conditional Graphics,
scroll to the next set, use the > button. To go back to a previously defined set use the < button.