Chapin 1180 User Manual
Warning, Advertencia, Parts, piezas, pièces
Hazard: Improper use or failure to follow instructions can result in explosive failure causing serious
eye or other injury.
For safe use of this product you must read and follow all instructions. Do not leave
a pressurized sprayer in the hot sun. Heat can cause pressure build-up. Do not store or le
ave solution in
tank after use. Always wear goggles, gloves, long sleeve shirt, long pants and full foot protection when
spraying. Never use any tool to remove pump if there is pressure in sprayer. Never stand with face or
body over
top of tank when pumping or loosening pump to prevent ejecting pump assembly and/or
solution from striking and injuring you. Never pressurize sprayer by any means other than the original
pump. Do not attempt to modify or repair this product except with original manufacturer’s parts. Never
spray flammable materials or heat, pressure, or gas producing chemicals. Always read and follow
manufacturer’s instructions before use with this sprayer as some chemicals may be hazardous when
used with this sprayer.
WARNING!
Sk-1113-1
Parts, Piezas, Pièces
6-6136
Hose
Manguera
Tuyau
6-3337
Carrying Strap
Correa para cargar
Sangle de transport
6-6000
Nozzle
Tobera
Buse
Printed in U.S.A., Impreso en E.U.A, Imprimé aux U.S.A.
1) Do: Check tightness of hose nut to be sure hose is securely attached to the tank outlet.
2) Do: Inspect hose for deterioration, cracks, softness, or brittleness. If any of these conditions are found,
replace hose before using. Replace with original manufacturer’s parts only.
3) Do: Remove pump (see Filling, Pressurizing and Spraying Instructions), inspect interior and exterior
of tank for signs of deterioration of body and bottom. Any sign of deterioration indicates possible
tank weakening and could result in explosive bursting under pressure. If any of these signs are found,
discard tank immediately and replace. Do not attempt to patch leaks, etc., as this could result in
serious injury.
4) Do: Follow Filling, Pressurizing and Spraying Instructions, except use water only.
5) Do: Pump plunger 8-10 strokes and inspect for leaks.
6) Do: Direct shut-off away from you and open to make sure discharge is not clogged.
7) Do: If unit passes this test, release pressure (see Pressure Releasing Instructions), empty tank, and
proceed with Filling, Pressurizing and Spraying Instructions.
3. Pre-Use Check
4. Filling
1) Do: Turn pump handle counterclockwise and remove pump
2) Do: Prepare spray solution following all directions and safety warnings on chemical label.
3) Do: Fill tank to no more than the proper gallon marker. Do NOT: overfill to accommodate
pump.
4) Do: Check pump to make sure that no grass or dirt is stuck to barrel. Replace pump in tank
and tighten securely.
5. Pressurizing and Spraying
7. Care, Storage and Maintenance
1) Do: Rinse tank thoroughly with water only, empty, refill with water. Follow Filling,
Pressurizing and Spraying Instructions, except pump unit only 8-10 strokes.
2) Do: Open shut-off and allow water to run through discharge assembly.
3) Do: Release pressure (Follow Pressure Release Instructions), remove pump and empty sprayer.
4) Do: Store sprayer tank upside down, with pump removed, in a warm dry location.
5) Do: Periodically oil pump by dropping 10-12 drops of light oil down pump rod
through opening in cover.
ADVERTENCIA!
Peligro: El uso inapropiado o el no seguir las instrucciones puede resultar en una falla explosiva
y causar serias lesiones oculares o de otro tipo.
Para el uso seguro de este producto, usted debe leer y
seguir todas las instrucciones. No deje el pulverizador presurizado expuesto al sol. El calor puede causar
el aumento de la presión. No almacene o deje la solución en el tanque después de usar. Cuando utilice
el pulverizador siempre utilice anteojos protectores, guantes, camisa de manga larga, pantalones largos y
protección completa en los pies. Nunca utilice ninguna herramienta para retirar la bomba si hay presión en
el pulverizador. Nunca se ubique con el rostro o cuerpo sobre la parte superior del tanque cuando bom-
bee o suelte la bomba para evitar que la eyección del montaje de la bomba y/o la solución lo golpee y lo
lastime. Nunca presurice el pulverizador con cualquier otro elemento que no sea la bomba original.
No trate de modificar o reparar este producto, excepto con las partes originales del fabricante. Nunca
pulverice material inflamable o químicos que produzcan calor, presión o gas. Siempre lea y siga las
instrucciones del fabricante antes de usar el producto ya que algunos químicos pueden ser peligrosos
al usarse con este pulverizador.
ADVERTENCIA!
Sk-1113-2
6-1866
Shut-off Handle
Mango de cierre
Poignée du robinet
WARNING!
WARNING:
Handling the brass parts of this product will expose you to lead, a chemical known to the
State of California to cause birth defects and other reproductive harm.
Wash hands after handling.
PRECAUCIÓN:
El manejo de las partes de latón de este producto lo expondrá al plomo, un agente
químico que en el Estado de California es conocido por provocar defectos congénitos y otros daños
reproductivos.
Lávese las manos después de usarlo.
2-1051-44 (A) R0908
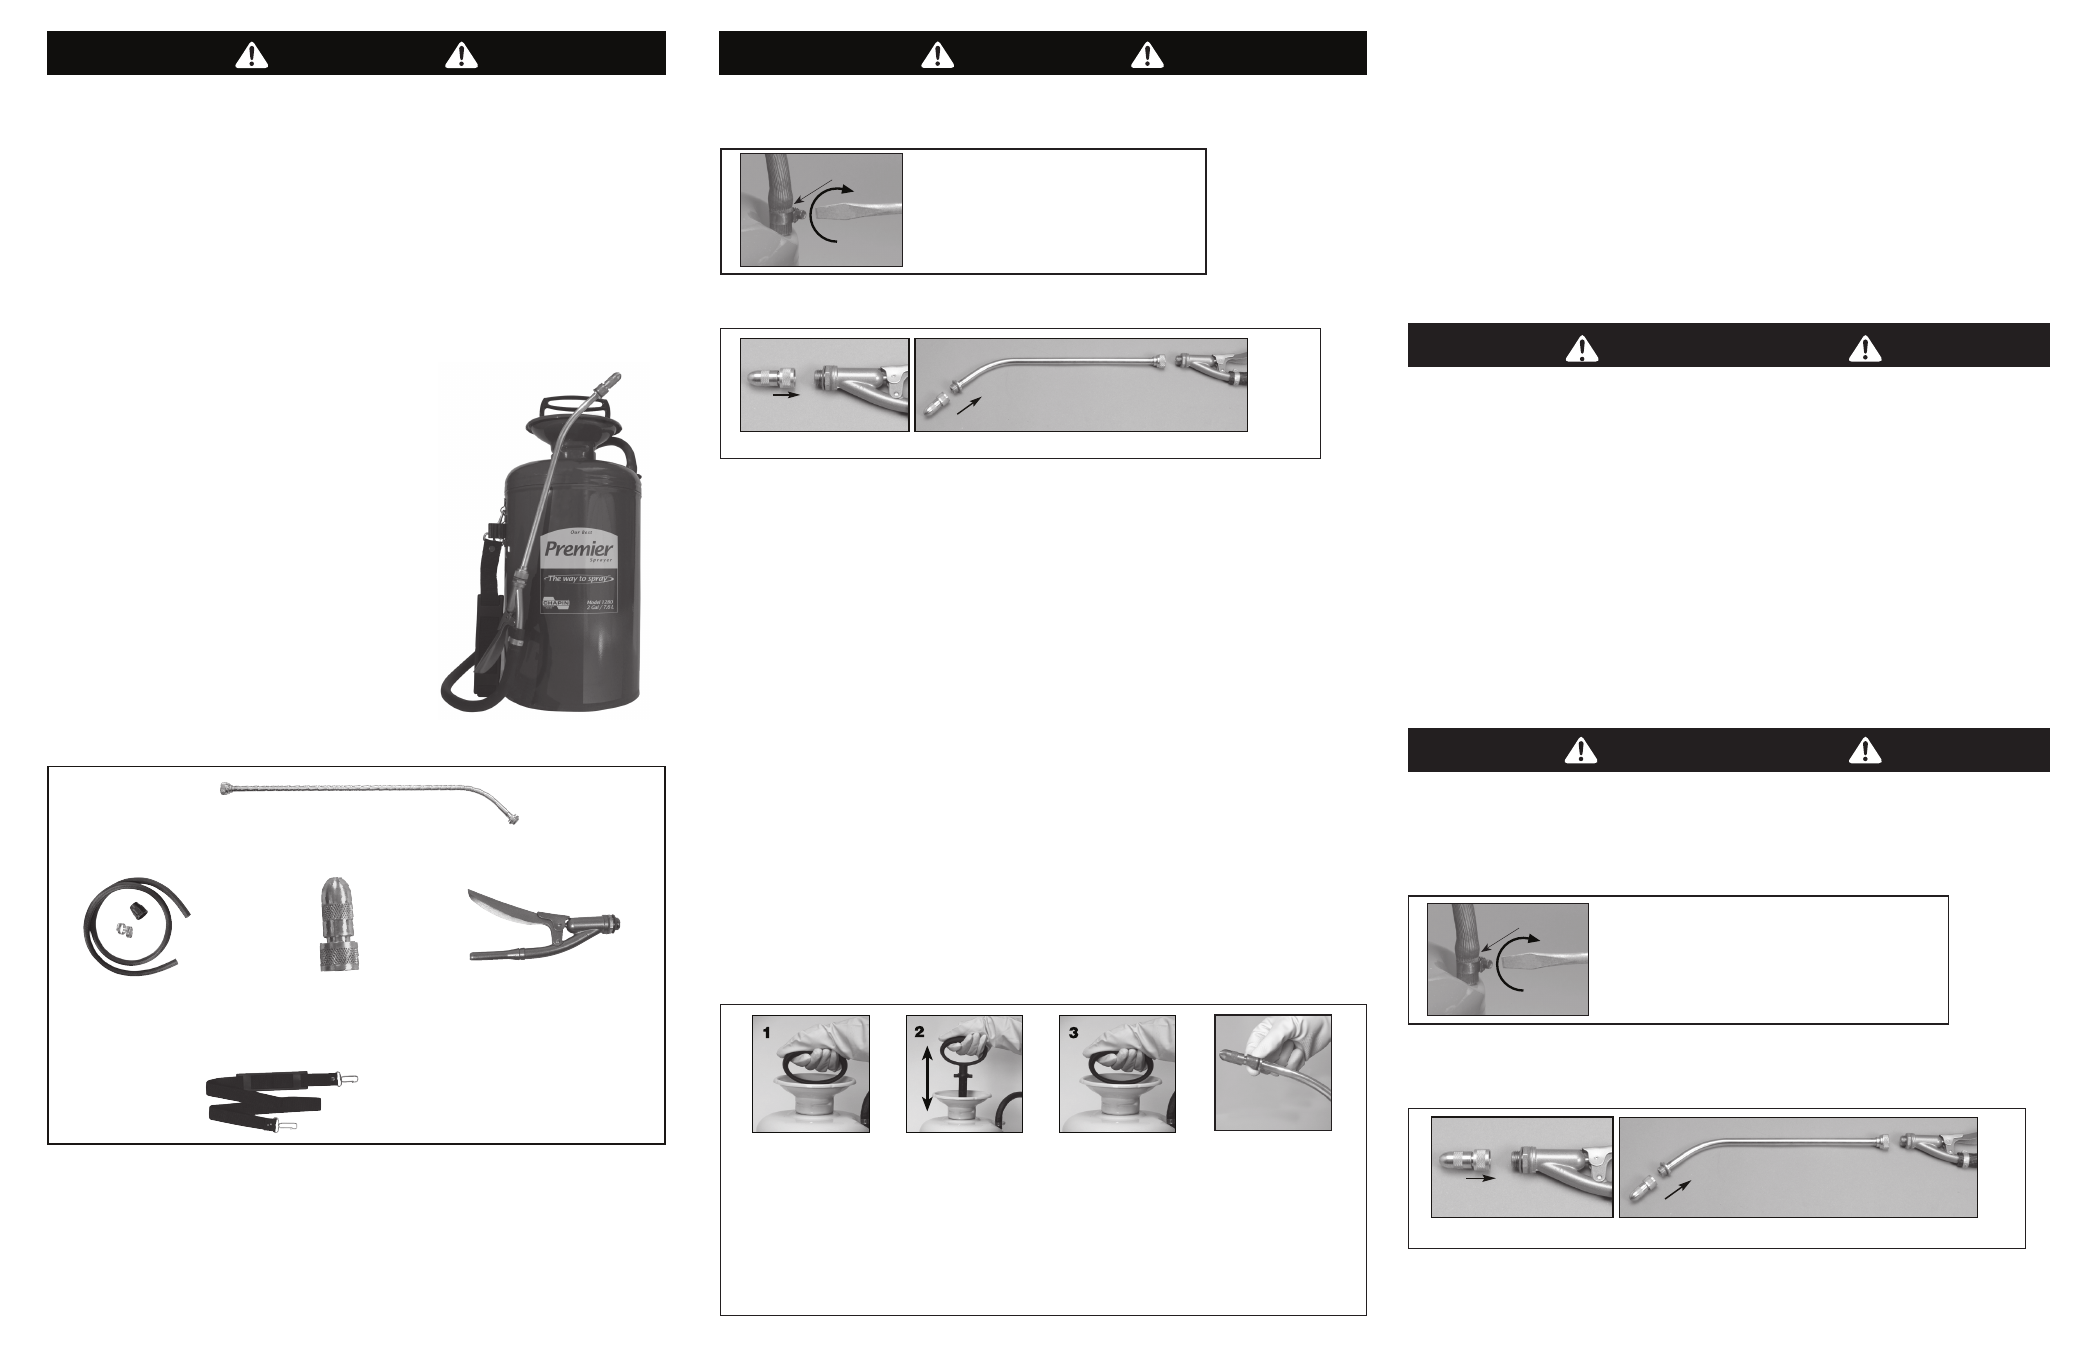
2. Nozzle
To prevent hose from blowing off, hose must cover both barbs and touch flange (fig. 2) before hose nut
is tightened (fig. 3).
6-7711
Extension wand
Vara de extensión
Rallonge
Attach nozzle to shut-off handle or extension wand.
1. Manguera Para el Tanque
Para evitar fugas en la manguera, ésta debe cubrir las dos puntas y tener contacto con la pestaña (fig. 2)
antes de ajustar la tuerca de la manguera (fig. 3).
Congratulations!
You have just purchased a quality Chapin product.
Register Your Sprayer Online @ www.chapinmfg.com
Questions?
Do Not Return To Store.
Call us @ 1-800-950-4458 or www.chapinmfg.com
¡
Felicitaciones!
Usted acaba de adquirir un producto de calidad Chapin.
Registre su pulverizador en línea en www.chapinmfg.com
¿Preguntas?
No regrese a la tienda;
llámenos al 1-800-950-4458 o visite www.chapinmfg.com
Félicitations!
Vous avez acheté un produit de qualité Chapin.
Enregistrez dès que possible votre pulvérisateur en ligne à l'adresse suivante:
www.chapinmfg.com
Questions ?
Ne retournez pas au magasin.
Appelez-nous 1-800-950-4458 ou visitez le www.chapinmfg.com
Repair Parts Kit Gaskets and Seals (not included),
Juego de piezas de reparación, empaquetaduras y juntas (no incluido)
Kit de pièces de réparation, joints et garniture d’étanchéité (non inclus)
6-4627
Note:
Your particular sprayer may not include all parts pictured above.
Nota:
Es posible que este pulverizador en particular no incluya todas las partes que se ilustran arriba.
Remarque :
Votre pulvérisateur particulier pourrait ne pas inclure toutes les pièces illustrées plus haut.
Make sure hose is pushed all the way to the
tank. Make sure hose clamp is tight and
below the hose barb. Turn clockwise with a
screwdriver to tighten.
Hose Barb
Asegúrese de que la manguera sea empujada hacia el
tanque. Asegúrese de que la abrazadera de la manguera
esté ajustada y debajo de la punta de la manguera.
Ajuste dando vuelta en sentido de las agujas del reloj
con un destornillador.
Lengüeta de
la Manguera
1. Hose to Tank
2. Boquilla.
Encaje la boquilla en la manija de la unidad de cierre o la vara de extensión.
Pump until you
feel resistance.
Turn handle
clockwise to
tighten.Push
handle down,
turn 1/4 turn
counterclockwise
to release.
Push handle,
down, turn 1/4
turn clockwise
to lock. Begin
spraying.
Re-pump sprayer
as required to
maintain spray
force.
Adjust spray pattern
by turning nozzle cap.
Do not turn cap more
than 2 turns or cap
may come off allowing
spray material to spray
back on you.
6. To Release Pressure
1) Do: With pump facing away, turn locked handle counterclockwise until air begins to escape.
Stop turning handle when you hear air escaping.
2) Do: Stay away from the sprayer until all air has escaped.
4