Part 1 – initial configuration (standard model), Adde r, Admin – Adder Technology AdderLink iPEPS User Manual
Page 17
Part 1 – Initial configuration (Standard or Dual Access models)
To perform the initial local configuration
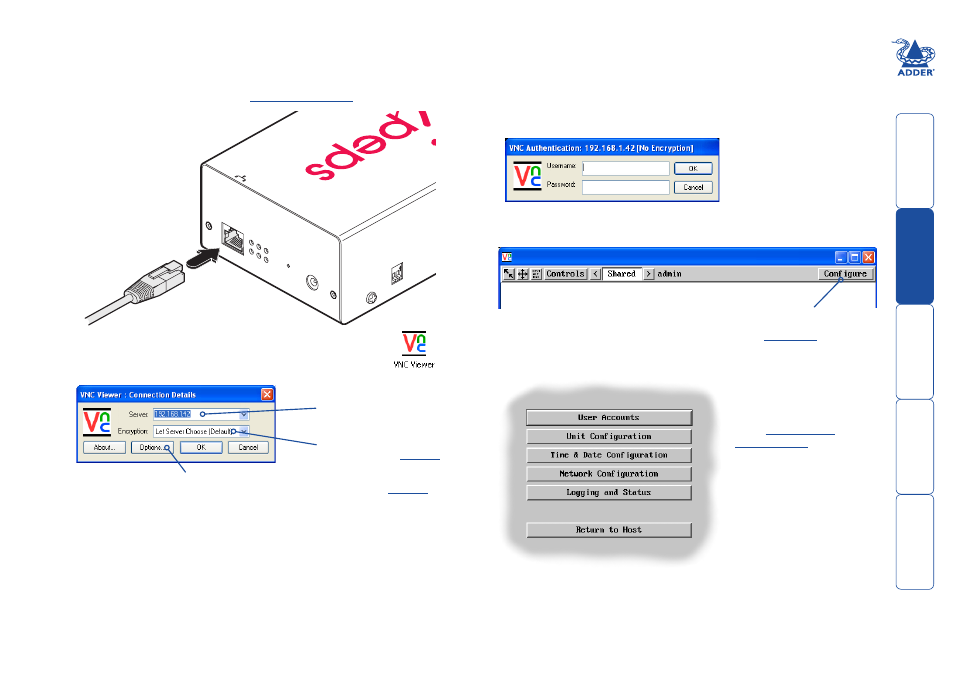
1 Connect the iPEPS to an IP network where a suitable computer is available
on the same subnet (please see the
1
ON
2
ADDERLINK
DU
ALACCESS
www
.adder
.com
LNK
100
LOC
PWR
POW
ER
REM
VNC
(K/M
)
(VM
)
CO
MPU
TER
KVM
CO
NSO
LE
ADDE
R
®
2 Use a computer connected to the same subnet of the network.
On that computer, locate and select the VNC viewer icon
A connection details dialog will be displayed:
3 In the ‘Server:’ entry, type the address:
192.168.1.42
4 Click the OK button. Depending on the options selected, you may need to
confirm certain items. A connection attempt will be made and if successful,
an authentication dialog will be displayed:
Options button
Provides a range of viewer and connection settings -
Enter the iPEPS address here
and click OK
If required, select the
encryption mode - MORE [+]
5 Enter
admin
as the Username, leave the password entry blank and click
the OK button. The viewer window should now open:
Click the Configure button
You are now ready to
begin
Use the various options
(particularly the ‘Unit
Configuration’ and ‘Network
Configuration’ options) to
arrange the iPEPS to suit
your requirements.
If the iPEPS does not respond, then please see the
for details
of actions that you can take.
6 Click the Configure button to display the Configuration menu: