Part a air spring installation – Hellwig Power Lift 6097 User Manual
Page 3
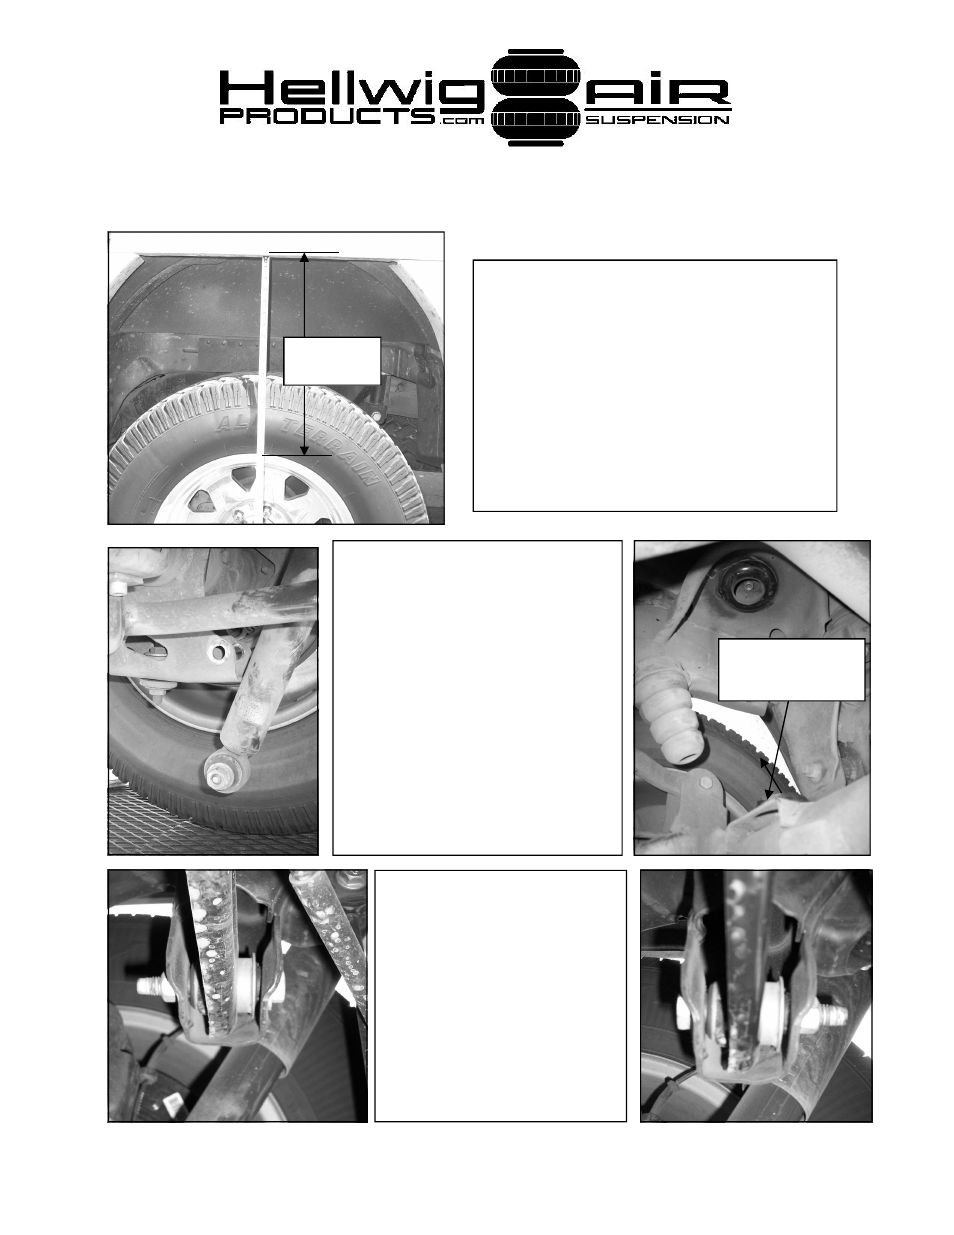
Part A Air Spring Installation
1. Prepare vehicle for installation by
chocking front tires and setting emer-
gency brake. Before starting installa-
tion, measure the distance from the top
of rear wheel to fender lip as shown.
This is the original ride height of the ve-
hicle. Write this measurement down as
this will be used to set the height of the
air springs later in the installation.
2. For ease of installation, posi-
tion the rear wheels on automo-
tive ramps. Ensure vehicle is
secure and disconnect shock
absorbers from rear axle. Raise
vehicle frame until coil springs
are unloaded. Support frame
with jack stands and remove
coil springs and insulators from
vehicle. Do not remove bump
stops from frame.
Remove insulators
from frame and axle
Measure this
distance
3. Remove Panhard Rod
bolt on passenger side and
reinstall with bolt head fac-
ing front of vehicle to pro-
vide additional clearance to
air spring on passenger
side. Torque to factory
specification.
6097 ( R-6097)
10/03/2007
- Pro Series Silence (2 pages)
- Pro Series 61610 (2 pages)
- Pro Series 61901 (2 pages)
- Pro Series 61905 (2 pages)
- Pro Series Standard (2 pages)
- Load Pro Series LP 25 (2 pages)
- Load Pro Series LP 15 (1 page)
- Load Pro Series 9640 (1 page)
- Load Pro Series 9655 (2 pages)
- EZ 1000 (1 page)
- EZ 991 (1 page)
- Front Helper Spring 14114 (1 page)
- Front Helper Spring 14139 (2 pages)
- Helper Spring 820 (1 page)
- Helper Spring 979 (3 pages)
- Helper Spring 982 (2 pages)
- Helper Spring 1250 (1 page)
- Helper Spring 1251 (1 page)
- Helper Spring 1510 (2 pages)
- Helper Spring 1515 (1 page)
- Helper Spring 1520 (2 pages)
- Helper Spring 1555 (1 page)
- Helper Spring 1560 (1 page)
- Helper Spring 1565 (1 page)
- Helper Spring 1901 (3 pages)
- Helper Spring 1902 (2 pages)
- Helper Spring 1906 (1 page)
- Air 6005 (6 pages)
- Sway Bar 5909 (3 pages)
- Air 6006 (7 pages)
- Air 6012 (8 pages)
- Air 6014 (7 pages)
- Air 6016 (7 pages)
- Air 6090 (21 pages)
- Air 6091 (9 pages)
- Air 6102 (7 pages)
- Air 6106 (6 pages)
- Air 6108 (8 pages)
- Air 6107 (6 pages)
- Air 6110 (9 pages)
- Air 6111 (8 pages)
- Air 6118 (7 pages)
- Air 6150 (6 pages)
- Air 6154 (6 pages)
- Air 6210 (6 pages)