J&M GC-31T Assembly User Manual
Page 12
GC31
t
-1 G
rain
C
art
a
ssembly
-12-
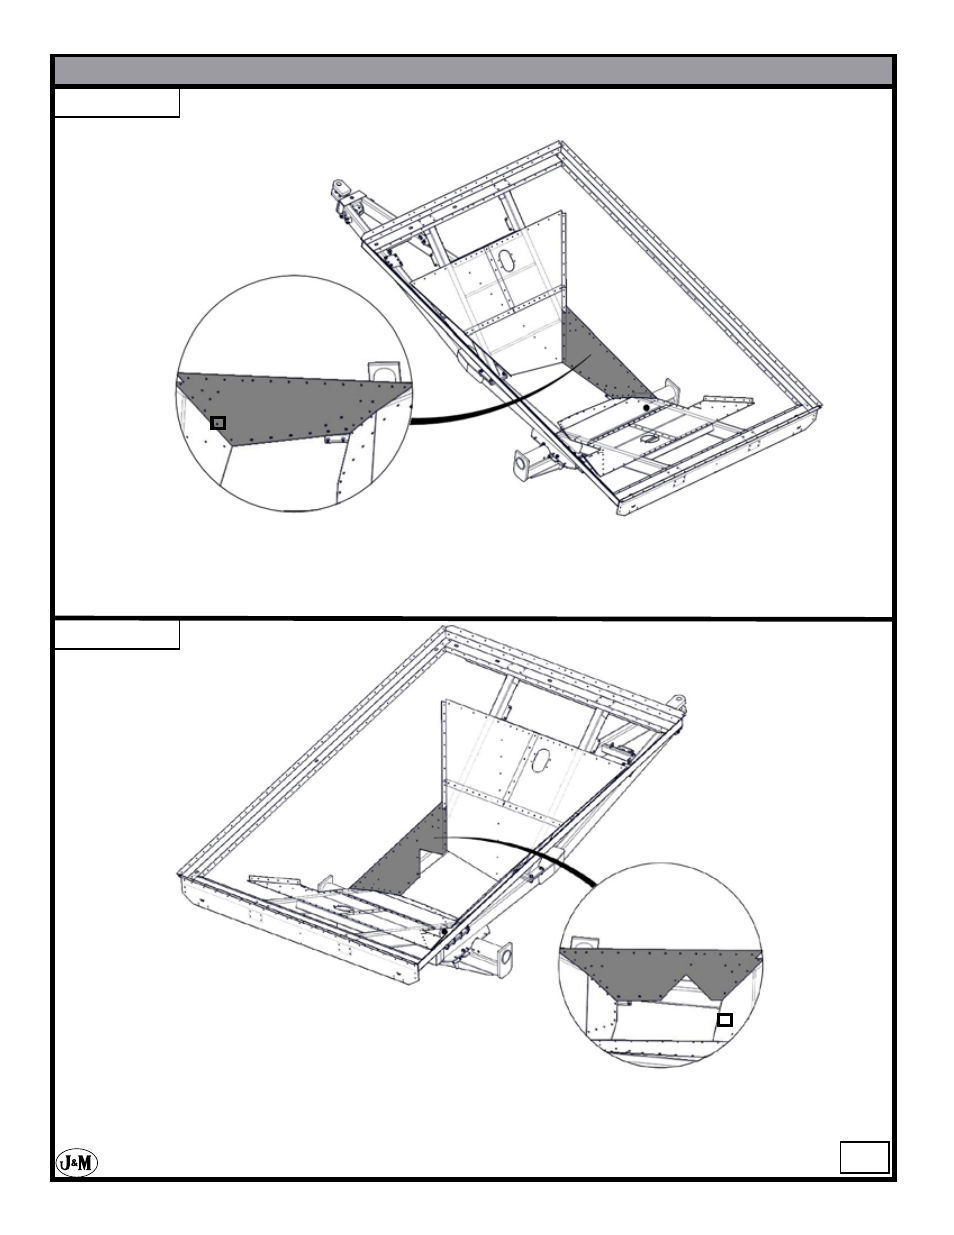
STEP - 21
Attach the OAS bottom panel. Use (1) 8.8 M10 x 25 MM serrated flange hex head bolts and (1)M10
serrated flange hex head nuts to attach the OAS bottom panel. Insert the hardware into the hole that is
highlighted in the outlined area in the above figure.
Attach the OAS bottom panel. Use (1) 8.8 M10 x 25 MM serrated flange hex head bolt and (1)
M10 serrated flange hex head nut to attach the OAS bottom panel. Insert the hardware into the
hole that is highlighted in the outlined area in the figure above. If the front bottom panels have
any sag in them, move your front legs forward. Once finished tighten the front leg.
STEP - 22
See also other documents in the category J&M Gardening equipment:
- 525-14W (31 pages)
- 750-16 (33 pages)
- 750-18 (34 pages)
- 1000-20 (31 pages)
- 1050-20 (37 pages)
- 1130-20 (36 pages)
- 1325-20 (36 pages)
- GC-24T Manual (39 pages)
- GC-31T Manual (38 pages)
- GRAIN CARTS Leaner Setup (18 pages)
- 250-7S (12 pages)
- 385SD (13 pages)
- 440SD (13 pages)
- 680SD (13 pages)
- 750SD (13 pages)
- GW15t-1 (20 pages)
- 275ST (62 pages)
- 375ST (62 pages)
- 500ST (51 pages)
- 375ST Remote (24 pages)
- 500ST Remote (23 pages)
- PRO 450 (31 pages)
- TF2 (37 pages)
- HT-974 (16 pages)
- TB-3500-6000A (20 pages)
- TB-3500-6000H (21 pages)
- TB-8000H-42 (20 pages)
- 4WS15 (27 pages)
- 750-14 (29 pages)
- 818 (35 pages)
- 875-16 (29 pages)
- 1000-20S (34 pages)
- 1050-18S (28 pages)
- 1050-18D (22 pages)
- 1050-20S (33 pages)
- 1050-20D (33 pages)
- 1050-22S (23 pages)
- 1050-22D (14 pages)
- 1051-22S (33 pages)
- 1051-22D (33 pages)
- 1075-18R (23 pages)
- 1075-22R (23 pages)
- 1325-20S (33 pages)
- 1325-20D (33 pages)
- 1325-22S (23 pages)