A.O. Smith BFC - 28 User Manual
Page 59
Week programme
Release R.1.3 UK
59
gis
2. Scroll with L to
PROGRAM OVERVIEW
.
Confirm with E.
The display will show the week program sub-menu, see
3. Scroll with L to
DELETE
.
Confirm with E.
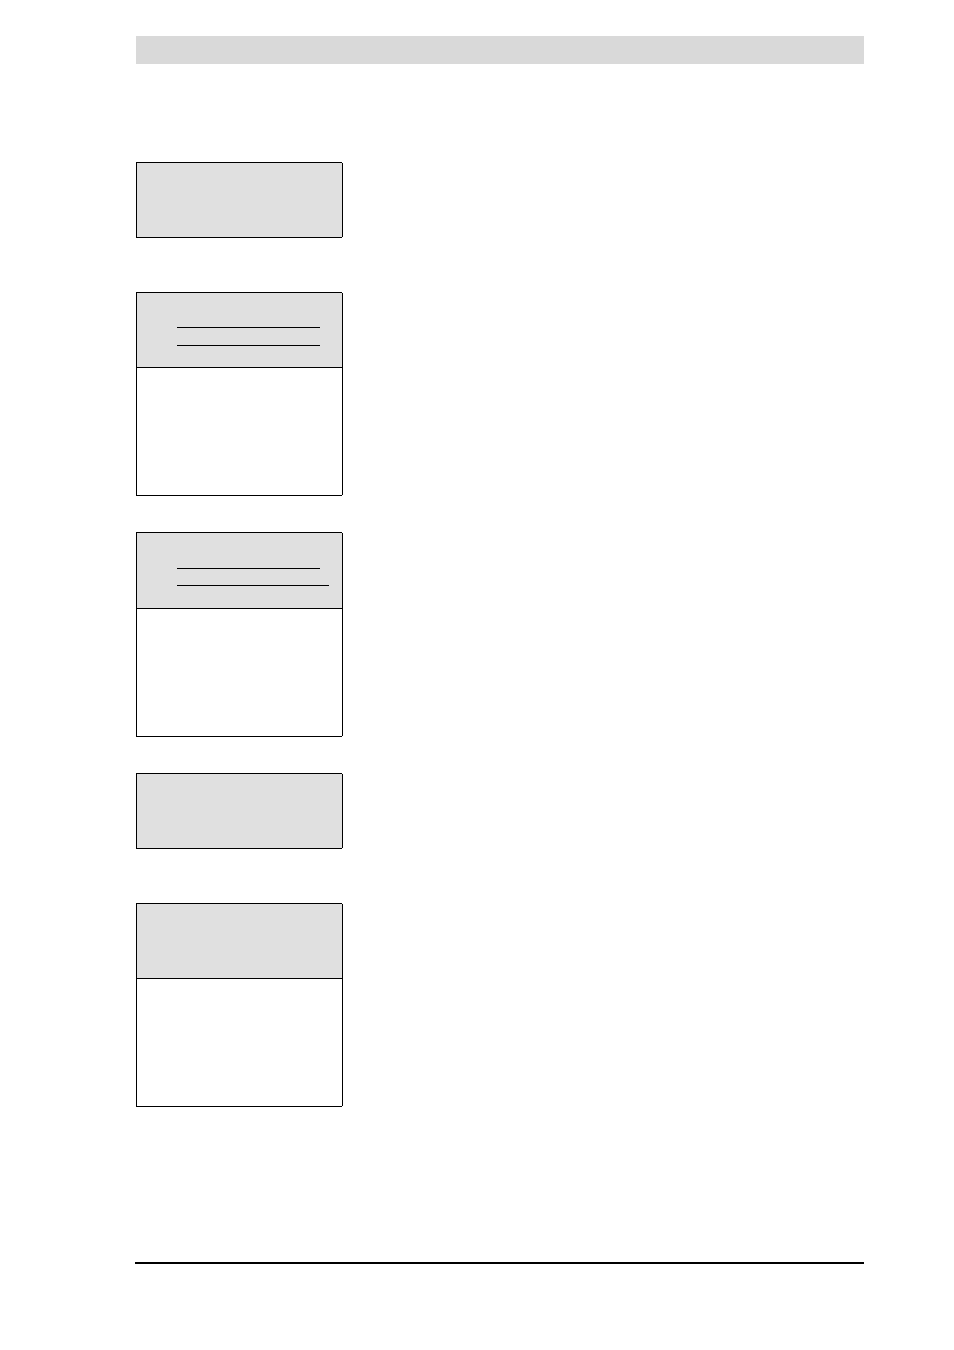
4. The display will change as shown in
Figure 8.24
. To warn you that you are
now working in the delete sub-menu, the cursor is replaced with an
exclamation mark (
!
) and the period settings will blink (illustrated in the
figure by underlining).
5. Scroll with L to the day to be deleted. For example, the second period of
SU
(Sunday). See
.
Confirm with E.
6. The lines showing switch-on/off times are replaced by the text
DELETE BLOCK?
. See
Figure 8.26
.
Confirm with E
(or use R to cancel deletion)
The switching period has been deleted. You will return now to the week
program menu. The cursor is beside the first programmed period. See
Figure 8.27
.
7. Scroll with L to
START OPERATION
.
Confirm with E.
The week program is active.
WEEK PROGRAM
START OPERATION
^»PROGRAM OVERVIEW
È
Figure 8.23 week program
options
DAY TIME Tset
ON !SU 08:15 75ÉC P
OFF SU 12:45
ON SU 18:00 75ÉC P
OFF SU 22:00
....................
....................
OFF SA 23:59
INSERT
DELETE
START OPERATION
Figure 8.24 A program
DAY TIME Tset
ON !SU 18:00 75ÉC P
OFF SU 22:00
ON MO 00:00 65ÉC P
OFF MO 23:59
....................
....................
OFF SA 23:59
INSERT
DELETE
START OPERATION
Figure 8.25 Select
DAY TIME Tset
ON !
DELETE
OFF
BLOCK?
ON MO 00:00 65ÉC P
Figure 8.26 Confirm deletion of
block from week program
DAY TIME Tset
ON SU 08:15 75ÉC P
OFF SU 12:45
ON MO 00:00 65ÉC P
OFF MO 23:59
....................
....................
OFF SA 23:59
INSERT
DELETE
START OPERATION
Figure 8.27 Period deleted