Ultrasound inspection, Time-of-flight diffraction testing, Tofd and pulse-echo testing – Atec Panametrics-Olympus-Omniscan-MX User Manual
Page 4: Degree testing (corrosion and composite), Ultrasound transducers

www.olympus-ims.com
Ultrasound Inspection
4
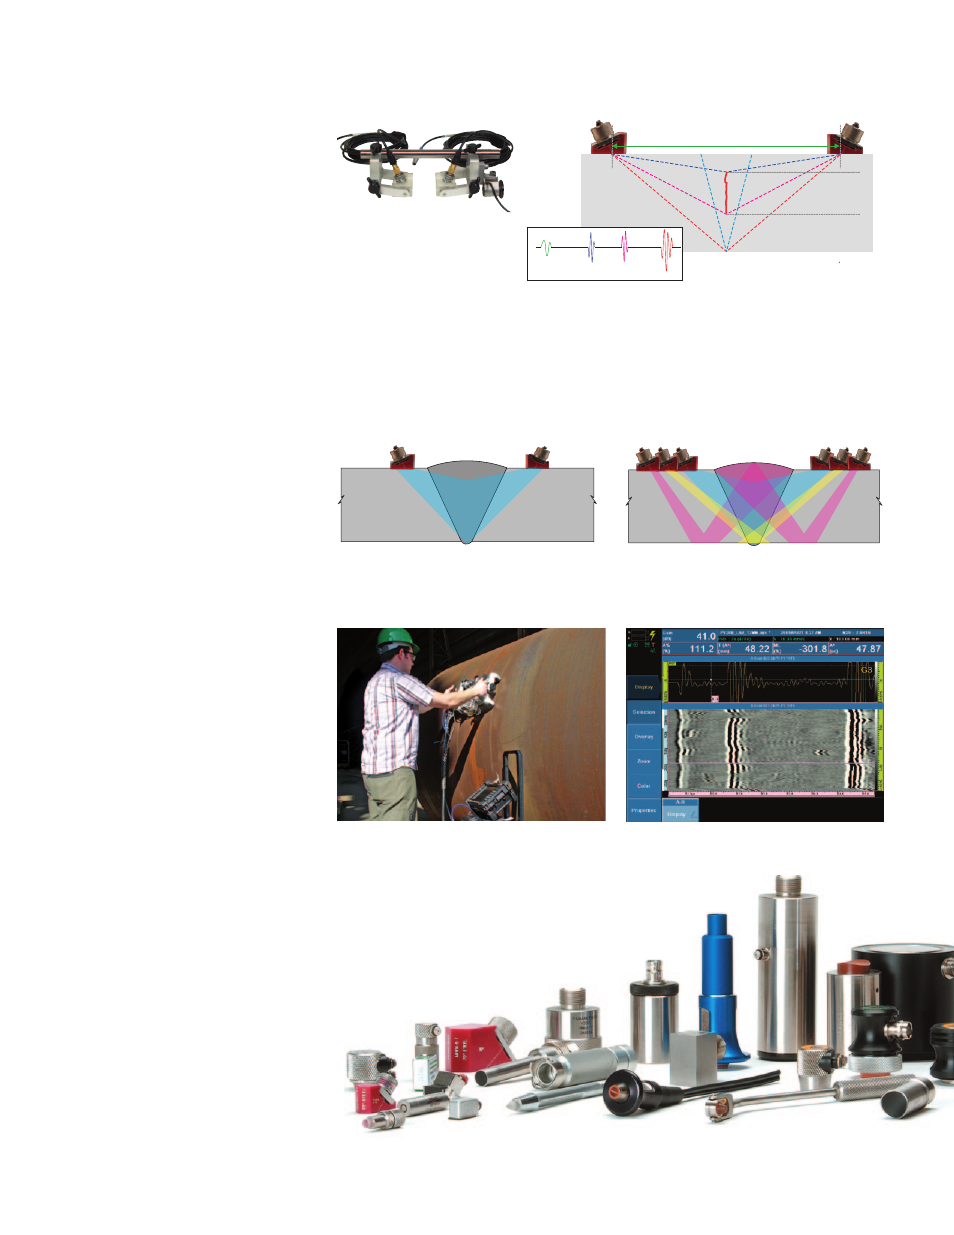
General view of TOFD setup for linear weld inspection showing
lateral wave, backwall echo, and diffracted signals on the A-scan.
Transmitter
Receiver
Lower tip
Upper tip
Backwall (+)
Lower tip (+)
Upper tip (+)
Lateral waves (+)
Lateral waves
Backwall reflection
Transmitter
Receiver
Lower tip
Upper tip
Backwall (+)
Lower tip (+)
Upper tip (+)
Lateral waves (+)
Lateral waves
Backwall reflection
The TOFD hand scanner is a small, light-
weight, efficient, low-cost, and versatile
weld inspection solution.
It can accommodate a full range of probes
and wedges, including the CentraScan
™
composite product line.
TOFD
Transmit
60º SW
PE
45º SW
PE
45º SW
PE
60º SW
PE
TOFD
Receive
Weld inspection using TOFD.
Weld inspection using combined TOFD and pulse echo
(PV-100).
HSMT-Flex scanner used for TOFD applications (PV-100).
Weld inspection with TOFD.
Time-of-Flight Diffraction Testing
Time-of-flight diffraction (TOFD) is a
technique that uses two probes in pitch-
catch mode. TOFD detects and records
signals diffracted from defect tips allowing
both detection and sizing. The TOFD data
is displayed in a grayscale B-scan view.
TOFD offers wide coverage and amplitude-
independent sizing complying with the
ASME-2235 code.
•
One-line scan for full-volume inspection
•
Setup independent of weld configuration
•
Very sensitive to all kinds of defects and
unaffected by defect orientation
TOFD and Pulse-Echo Testing
While TOFD is a very powerful and ef-
ficient technique, its coverage is limited as
a result of two inspection dead zones: one
dead zone is near the surface, the other is
at the backwall.
The OmniScan
®
UT allows inspections that
simultaneously combine TOFD with con-
ventional pulse echo. Pulse echo comple-
ments TOFD, covering the dead zones.
•
TOFD inspection
•
45º pulse echo for weld cap inspection
on either side of the weld
•
60º pulse echo for weld root inspection
on either side of the weld
0-Degree Testing
(Corrosion and Composite)
0-degree testing measures the time-of-flight
and amplitude of ultrasonic echoes reflect-
ing from the part into gates in order to
detect and measure defects.
•
C-scan imaging
•
Full A-scan recording with C-scan
postprocessing
Ultrasound Transducers
Olympus NDT offers a selection of thou-
sands of transducers in standard frequen-
cies, element diameters, and connector
styles.
•
Contact and immersion transducers
•
Dual transducers
•
Angle-beam transducers and wedges
•
Replaceable delay line transducers
•
Protected face transducers
•
Normal incidence shear-wave
transducers
