Alpha Technologies VMX Series User Manual
Page 29
29
017-940-B0-001, Rev. A
SETTING
LOW (-5%)
HIGH (+5%)
87Vac
82.65Vac
91.35Vac
63Vac
59.85Vac
66.15Vac
48Vac
45.60Vac
51.40Vac
Self-test Operation
1. The VMX Power Supply should be operating correctly with no alarms present. Use the
Smart Display to verify Normal and Additional Information. Verify test duration in the
Setup Menu as needed.
2. Press and hold DOWN and ENTER simultaneously to start Self-test. The test runs for a
preset time (5 to 180 minutes, set in the Setup Menu). Self-test can also be entered by
setting Self-test to ON in the Setup Menu.
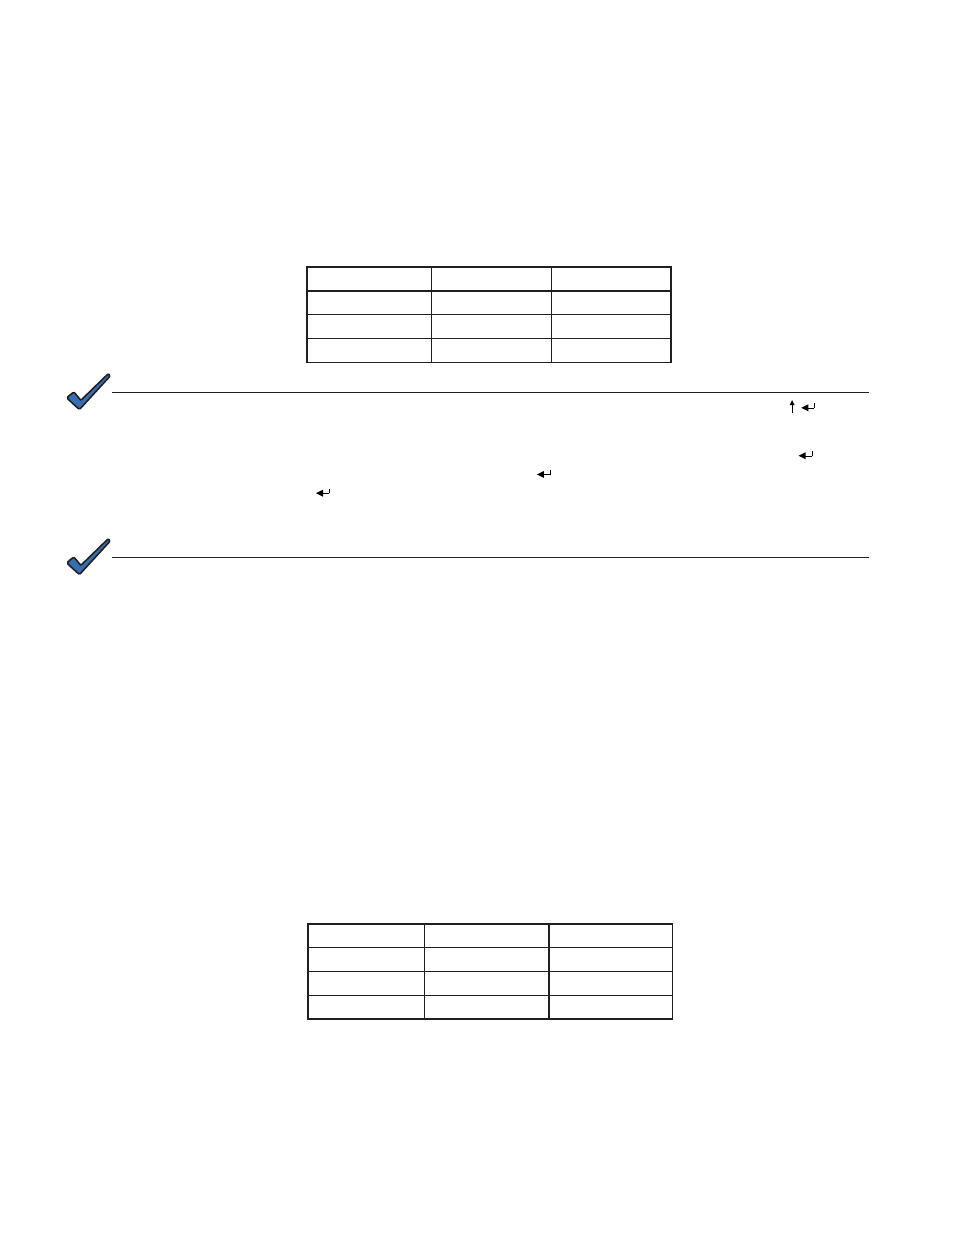
3. While in Self-test mode, use the Smart Display or a true RMS voltmeter to verify output
at the terminal block OUTPUT 1-4 terminals. Output voltages should appear within ±5%
of 87Vac (for 90V units), 63Vac (for 60V units), and 48Vac (for 48V units) at nominal line
input voltage.
5.0 Operation,
continued
5.1
Start-up and Test, continued
AC Line Operation, continued
6. Use the Smart Display or a true RMS voltmeter to verify AC output (±5%) at the module’s
AC Output test point. If a non-RMS voltmeter is used, the output reading can vary by as
much as 10% due to the “quasi” square wave output of the ferroresonant transformer.
4. To cancel a Self-test in progress, push and hold DOWN and ENTER a second time, or
change Self-test to OFF in the Setup Menu.
SETTING
LOW (-5%)
HIGH (+5%)
87Vac
82.65Vac
91.35Vac
63Vac
59.85Vac
66.15Vac
48Vac
45.60Vac
50.40Vac
7. Use the Smart Display to verify VMX Power Supply operations. Press ENTER (
) to
view Normal Information. Press ENTER (
) again to view Additional Information. Press
ENTER (
) a third time to view the Setup Menu. If desired, the No Battery alarm can be
disabled by changing Battery Capacity to “0”.
The Confi guration Screen can be accessed any time by simultaneously pressing UP and ENTER (
).
NOTE:
Disabling the No Battery alarm is only recommended for applications not using batteries.
NOTE: