0 installation, 1 enclosure installation, wall-mount – Alpha Technologies LPE Enclosure User Manual
Page 11
031-302-B0-001 Rev A
11
2.0 Installation
2.1 Enclosure Installation, Wall-mount
Before installing an enclosure, the location and method of mounting must be approved by the utility.
Recommended Tools and Materials:
• Ratchet with 1/2" and 9/16" socket (or metric equivalent)
• Level
• Two user supplied 3/8" x 4 1/2" (or larger) lag bolts (or metric equivalent)
• Two 3/8" stainless steel flat washers, 1.00" max diameter x .08" min thickness
• Stud finder (optional)
• Drill with 1/4" drill bit or metric equivalent
• Tape measure
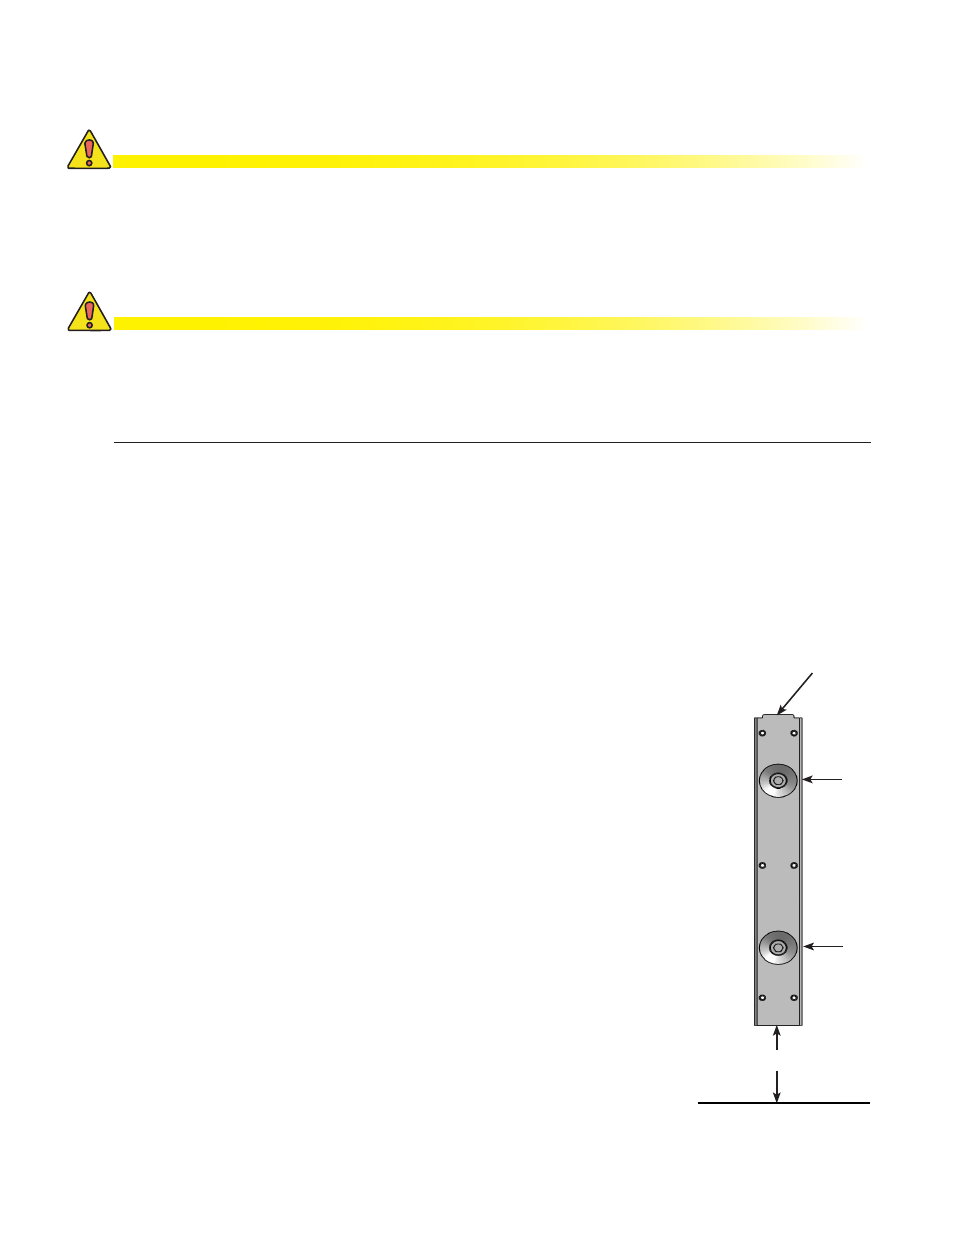
Lag Bolt
Lag Bolt
Tab
ATTENTION:
Never transport the unit with installed batteries. Doing so can cause injury to the installer or damage
the enclosure and equipment. Install the batteries after you transport the unit to the site and secure
it to the pad.
CAUTION!
Installation Procedure:
1. Position the bracket on a wall capable of supporting 150 lbs
(68.0kg). Use a 3/4" plywood backing plate.
2. Maintain a minimum distance of 6" (153mm) from the bottom of the
bracket to the ground for proper enclosure ventilation.
3. Level the bracket vertically with the tab facing up. Center the
bracket on a wall stud.
4. Secure the bracket to the wall using two user-supplied 3/8" x 4 1/2"
(or larger) lag bolts and flat washers specified above. The hardware
must sit flush inside the bracket dimples for proper installation.
Verify there is at least a 6" spacing between the bracket and the
ground.
5. Hang the enclosure on the bracket.
6. Securely fasten the enclosure to the bracket using the six 5/16"
bolts, lock washers and fender washers (supplied).
Fig. 2-1, Mounting Bracket
6" min from ground
The populated cabinet weighs approximately 150 lbs [68kg]. Installer needs to ensure the wall
is capable of supporting the loaded enclosure. Direct mounting to wall studs and 3/4" plywood
backing is required.
CAUTION!