Auto switching, Switching on and off, Preliminar y – Extron Electronics PVS 204SA User Guide User Manual
Page 30: Operation and setup, cont’d
Operation and Setup, cont’d
PVS 204SA Switcher • Operation and Setup
3-4
PRELIMINAR
Y
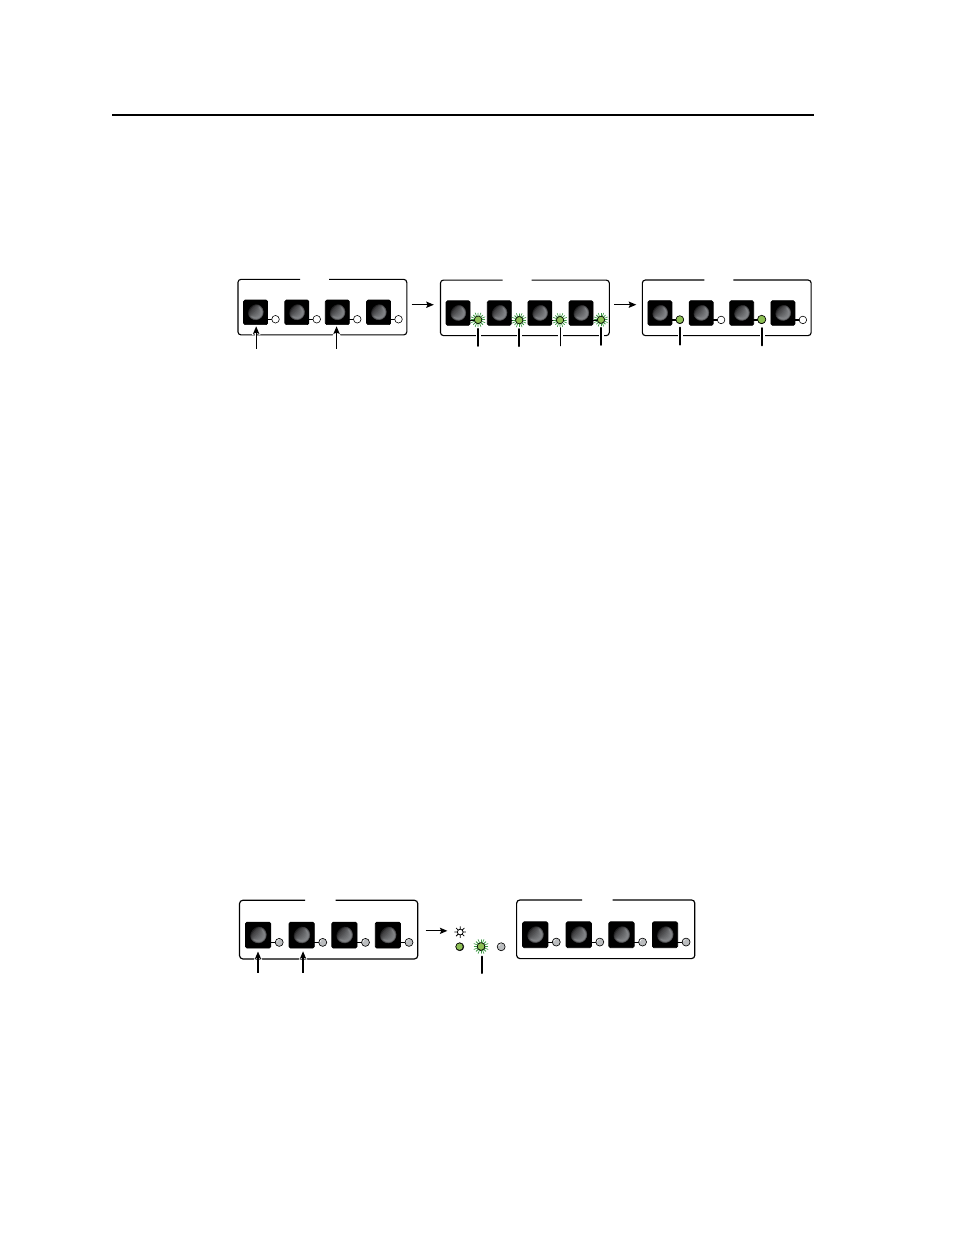
Setting the separate switcher mode via the front panel
1
.
Press and hold input selection buttons 1 and 3 simultaneously for 4 seconds
(see figure 3-4). All the input selection LEDs blink once.
2
.
Release the buttons. The switcher has enabled separate switcher mode and
two LEDs remain lit (one for RGB format, one for composite video format).
INPUTS
1
2
RGB
3
4
VIDEO
Press and hold buttons 1 and 3
simultaneously for 4 seconds.
All input selection LEDs blink
once
to indicate that
separate switcher mode
has been enabled. Release the buttons.
INPUTS
1
2
RGB
3
4
VIDEO
Two LEDs remain lit, one
for RGB, one for composite video.
INPUTS
1
2
RGB
3
4
VIDEO
Figure 3-4 — Setting separate switcher mode via the front panel
Auto Switching
The PVS 204SA has an auto switching feature in single switcher mode only, that
detects which input has an active sync signal and automatically switches to that
signal.
In single switcher mode, the auto input switching follows the highest numbered
active input, regardless of the signal format (RGB or composite video). For
example, if input #2 (RGB) is currently active, and then #4 (composite video)
becomes active, the input automatically switches to #4, regardless of format. In this
example, the output signal changes from RGB to composite video.
The PVS 204SA auto switching can be switched on or off from the front panel
or via RS-232.
N
Auto switching is available only in single switcher mode. If separate switching
mode is selected, auto switching is automatically disabled.
N
Whenever an input changes, the switcher sends an unsolicited response via
RS-232 to the controller, alerting the controller of a possible need to change the
projector input command.
Setting the input auto switching mode via the front panel
1
.
Press and release input selection buttons 1 and 2 simultaneously
(see figure 3-5). The input auto switching LED (labeled “Auto SW”) indicates
the switching mode status (lit when enabled).
A
UT
O SW
LOCK
OUT
INPUTS
1
2
RGB
3
4
VIDEO
Press and release buttons 1 and 2
simultaneously.
The auto switching LED lights to indicate that
input auto
switching mode has been enabled.
INPUTS
1
2
RGB
3
4
VIDEO
Figure 3-5 — Setting input auto switching mode via the front panel