Installation, cont’d, Cabling and installing the aaps, Co mpu ter inp ut sel ect au dio – Extron Electronics HSA 802 User Guide User Manual
Page 9
Surface Access Products • Installation
Surface Access Products • Installation
Installation, cont’d
2-6
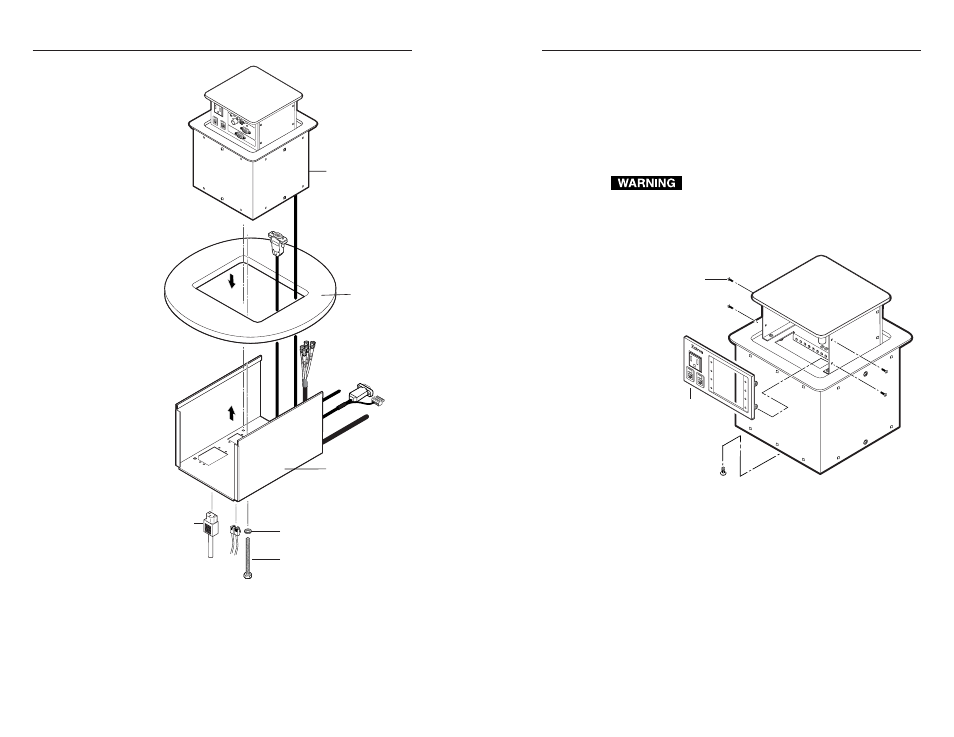
Mounting
Surface
Clamshell
Full Thread
Mounting Bolts
AAP Cables
Flat Washer
IEC Power Cord
RJ-45 Connectors
HSA 802
CO
MPU
TER
INP
UT
SEL
ECT
AU
DIO
Figure 2-3 — Mounting the HSA 800 enclosure
Cabling and Installing the AAPs
Extron’s various single- and double-space AAP devices,
including the various RGB 580xi AAPs, can be mounted to the
HSA 800 or HSA 802. See appendix A, Specifications, Part
Numbers, and Accessories, for RGB 580xi AAP part numbers.
The screws needed for installing an AAP are built into its front
panel, so no additional screws are needed.
Ensure that AC power is disconnected before
servicing the HSA unit.
1
.
Remove the four screws on the right and left sides of the
front panel (figure 2-4). Retain the screws. Lift the panel
away from the enclosure.
HSA
800
Remove Panel
from Enclosure
Replacement Face Plate
Screws (4) under Enclosure
Remove two
Screws ea. side
125 - 50/60 Hz 0.5A
Figure 2-4 — Removing the front panel from an
HSA 800
2
.
Cable the rear of the AAPs before attaching the AAPs to
the enclosure. Route the cables through the hole in the
underside of the surface mount enclosure and connect
them to the rear of the AAPs. If applicable, refer to the
cabling information in the documentation for the AAP.
3
.
Insert each of the AAP’s screws through the holes in the
AAP opening of the HSA front panel. Secure each AAP to
the panel with the provided captive washers and #4-40
nuts (figure 2-5).
4
.
Replace the front panel in the surface mount enclosure and
secure it in place with the screws removed in step 1. If
2-7