Installation and operation, Installation overview, Connections – Extron Electronics FOXBOX Tx_Rx HDMI User Guide User Manual
Page 11: Transmitter connections, controls, and indicators, Installation overview connections, Transmitter connections, controls, and, Indicators
Installation and
Operation
This sections details the installation of the FOXBOX Tx/Rx HDMI, including:
•
Installation Overview
•
Connections
•
Operation
Installation Overview
Follow these steps to install and set up an Extron FOXBOX HDMI transmitter and receiver
system for operation:
1.
Turn off all of the equipment. Ensure that the video sources and the output display are
all turned off and disconnected from the power source.
2.
Mount the transmitter and one or more receiver (see “
page 41).
3.
Connect the cables and configure the receivers (see “
,” below).
4.
Plug in the power supplies, then turn on the display devices and the input devices.
Connections
Transmitter Connections, Controls, and Indicators
FOXBOX Tx HDMI Rear Panel
Front Panel
12V
1.0A MAX
POWER
FOXBOX Tx HDMI
AUDIO INPUT
RS-232
OVER FIBER ALARM
Tx Rx
1 2
HDMI INPUT
LINK
OPTICAL
Rx
Tx
LINK
FOXBOX Tx HDMI
AUDIO
HDCP
HDMI
CONFIG
HDMI LOOP THRU
EDID MINDER
50Hz
AUDIO
DIGITAL
ANALOG
60Hz
1
2
6
11
1
3
9
4
5
10
7
8
2
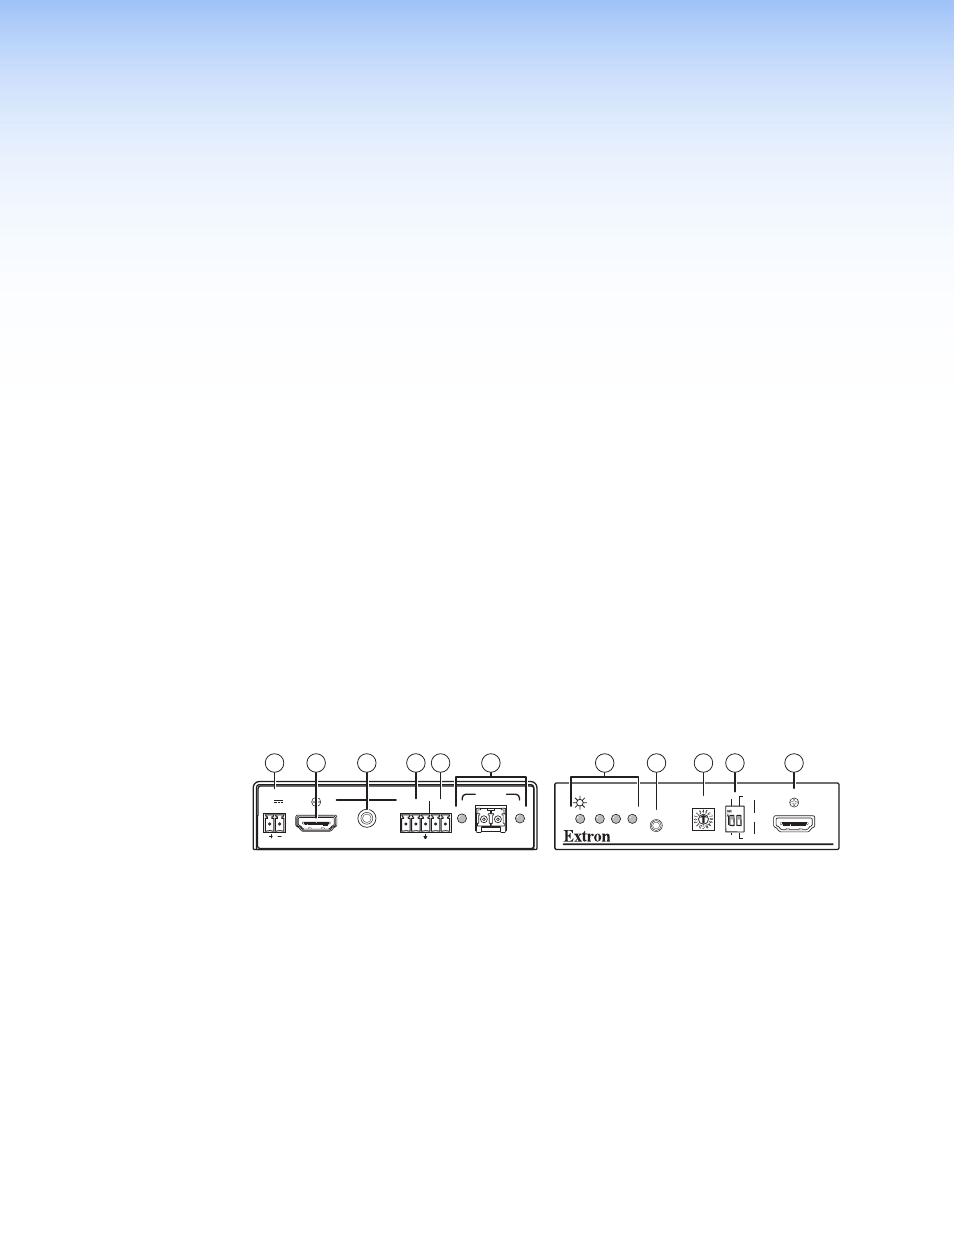
Figure 2.
FOXBOX Tx transmitter connectors
a
HDMI Input connector (FOXBOX HDMI only) — Connect a single link of HDMI or
DVI-D (with the appropriate adapter) to this HDMI connector (see “
on page 12 for pin assignments).
The FOXBOX Tx HDMI also accepts embedded digital audio on this connector.
b
HDMI Loop-through connector — If desired, connect a local monitor to this HDMI
connector.
FOXBOX Tx/Rx HDMI • Installation and Operation
5