Horizontal bracket mounting, Product category – Extron Electronics Cable Retraction System Setup Guide User Manual
Page 7
7
Product Category
Horizontal Bracket Mounting
Trace around
bracket perimeter.
Mounted in
Horizontal Position
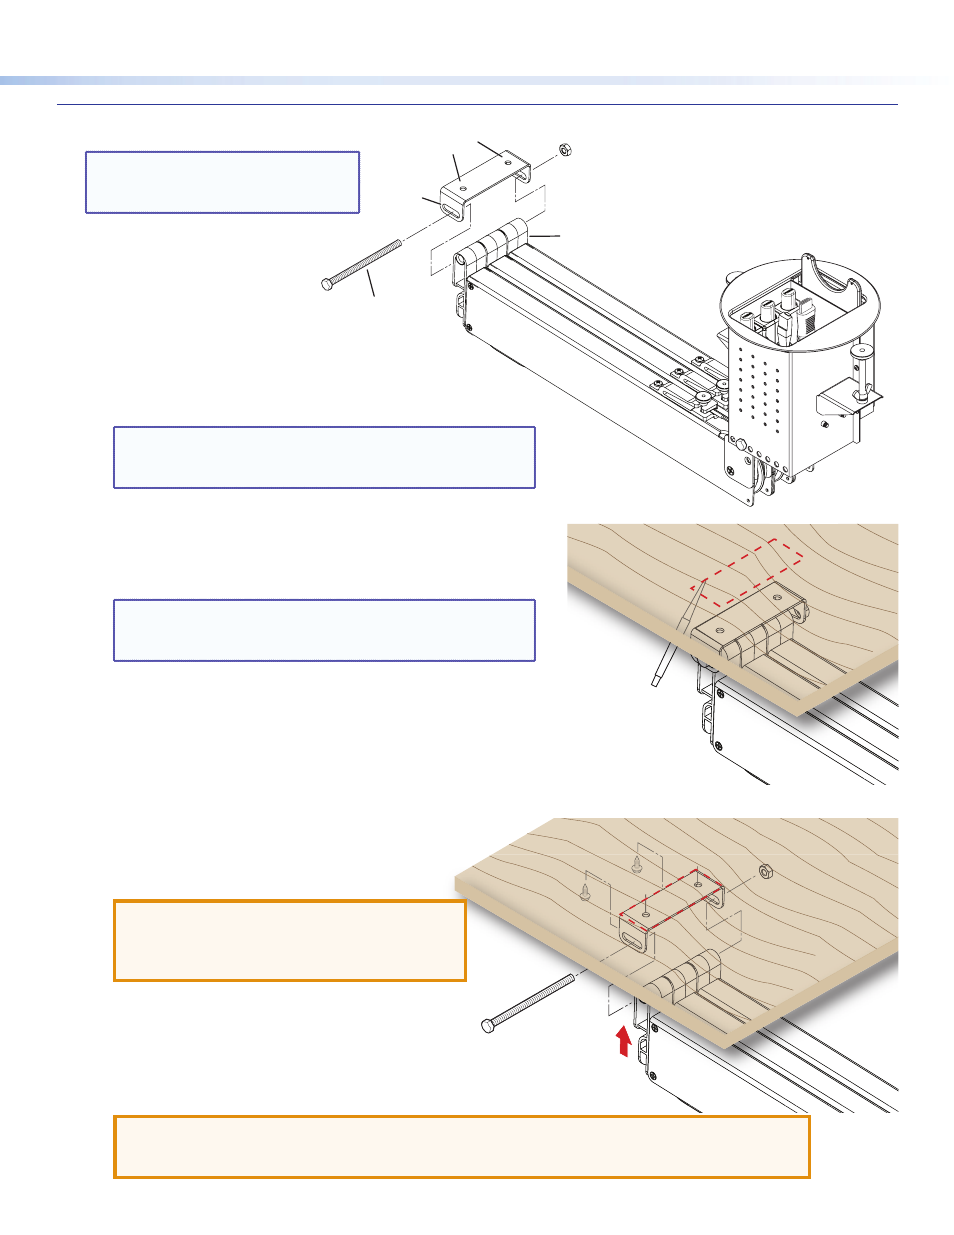
4.
Lower the assembly and remove the horizontal
bracket from the retractors.
5.
Position the bracket inside the lines drawn in step
3
and fasten with the supplied screws.
ATTENTION: Ensure the supplied screws
do not pierce through the top of the table. If
necessary, use appropriate screws based on
the table material and thickness.
6.
Raise the retraction system up into the installed
bracket, run the bolt through the bracket and end
caps, and secure with the supplied nut.
2.
Raise the retractors with attached bracket to the desired mounting
location.
NOTE: Be certain the system is perpendicular to the
enclosure (see the “
Top View
” diagram on page
2) to
prevent binding of the pulley system.
3.
Ensure the bracket is flush with surface and trace a line around the
bracket perimeter.
Horizontal Bracket
Mounting Holes
Horizontal Mounting
Bolt
End Caps
Slotted Hole
NOTE: For vertical mounting, see
“
Locking Screw (Optional)
” on
page
8.
For horizontal mounting, the horizontal
mounting bracket (part number
70-678-00) must be used. The slotted
bolt holes allow for tolerance in
placing the bracket.
To ensure accuracy follow these
procedures:
1.
Attach the horizontal mounting bracket to the retractor
end caps using the provided bolt and nut.
TIP: Hand tighten the nut enough to keep the bracket
from easily moving. The bolt and nut will be removed
later.
Cable Retraction System • Horizontal Bracket Mounting
ATTENTION: Do not overtighten the horizontal mounting nut. It only needs to be snug.
Overtightening could deform the end caps and cause misalignment of the system resulting in
poor cable extension and retraction.