Auto shutoff, Backlight, Sw version (software version) – YSI ProODO User Manual
Page 12: Serial, Unit id, Optical dissolved oxygen (odo™), Odo probe setup
14
15
auto shutoff
Auto Shutoff powers the instrument off after a user specified time period.
Highlight Auto Shutoff and press enter. Using the numeric entry screen, enter
a value between 0 and 360 minutes. To disable auto shutoff, set the value to 0
(zero).
BacKlIGht
Backlight can be set to Automatic or Manual.
Automatic turns the backlight on when you
turn the instrument on and when you press any
key. Manual allows you to turn the backlight
on or off with the backlight key
. When in
Automatic mode, the instrument will turn the
backlight off after 60 seconds without any keys
being pressed. If a key is pressed during that
time, the instrument will “reset” the 60 second
time period. The lighted keypad will turn off
after approximately 20 seconds.
sW VersIon (softWare VersIon)
SW Version shows the instrument’s software version.
serIal #
Serial # shows the instrument’s serial number and allows you to match it with
the number engraved on the back of the instrument’s case. The Serial # is also
the default Unit ID.
unIt Id
Unit ID is used to identify instruments in the Data Manager software included
with your instrument. It is also used to identify GLP files, Site Lists, Configuration
Files, and Data files transferred from the instrument to the PC. The default Unit
ID is the Instrument’s serial number. To modify the Unit ID, highlight Unit ID,
press enter and use the alpha/numeric entry screen. The character limit is 16
characters.
O P T I C A L D I S S O LV E D O X Y G E N
( O D O ™ )
Each ProODO cable/probe assembly and replacement ODO
sensor cap includes an instruction sheet with important
information unique and specific to each individual sensing
cap. This instruction sheet is important because it includes
the calibration coefficients for the sensor cap. After using this
sheet for general probe setup, be sure to store it in a safe place
in case you need to reload these calibration coefficients in the
unlikely event that they are ever deleted from the probe.
See Initial Setup | Unpacking the ODO Probe for initial setup instructions.
It is important to always keep your sensor in a moist
environment so the sensor cap does not dry out. (See
Maintenance and Storage for more information.)
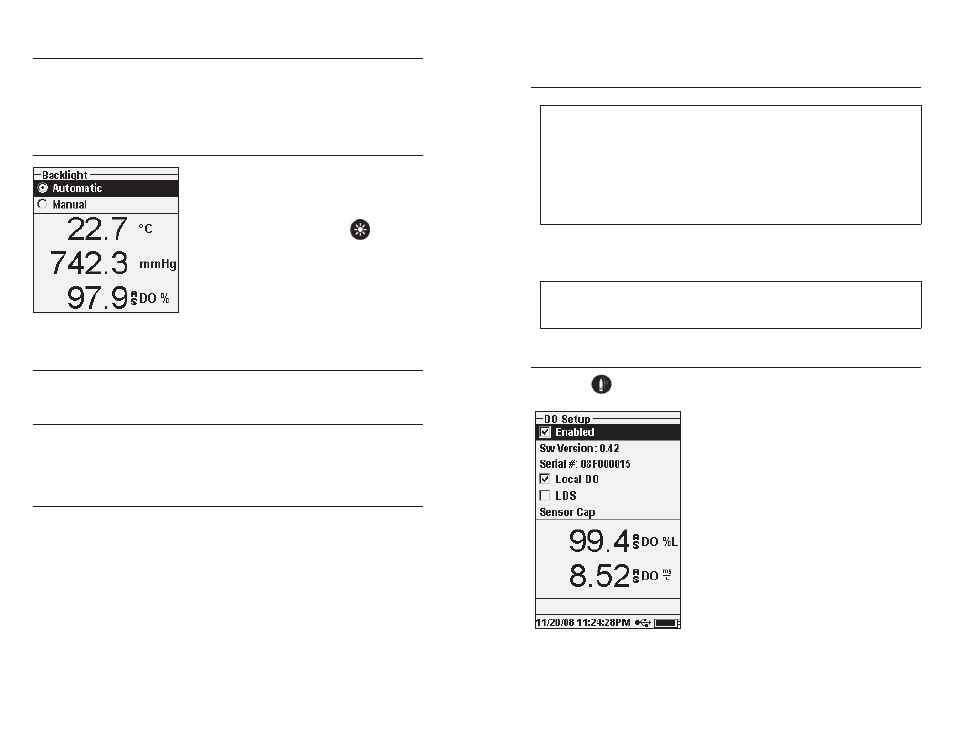
odo proBe setup
Press Probe
, Highlight DO, press enter.
Enabled allows you to enable or disable the DO
sensor. Highlight Enabled and press enter to
activate or deactivate dissolved oxygen.
The DO Setup menu also displays the ODO
probe’s SW Version and Serial #. This
information is programmed into the probe at
the factory and digitally sent to the instrument
when the cable is connected.
Local DO allows for localized DO%
measurements. This sets the calibration value
to 100% regardless of the altitude or barometric
pressure. Highlight Local DO and press enter
to enable or disable this function. Local DO
is a method for the ProODO to factor in the
barometric pressure on each DO measurement.
In essence, even if the barometric pressure changes you wouldn’t notice the
difference with the DO% readings in air-saturated water or water-saturated air.
i
i