Keypad – YSI Professional Plus User Manual
Page 9
8
9
CoNNECtING tHE CABLE to AN INStRUMENt
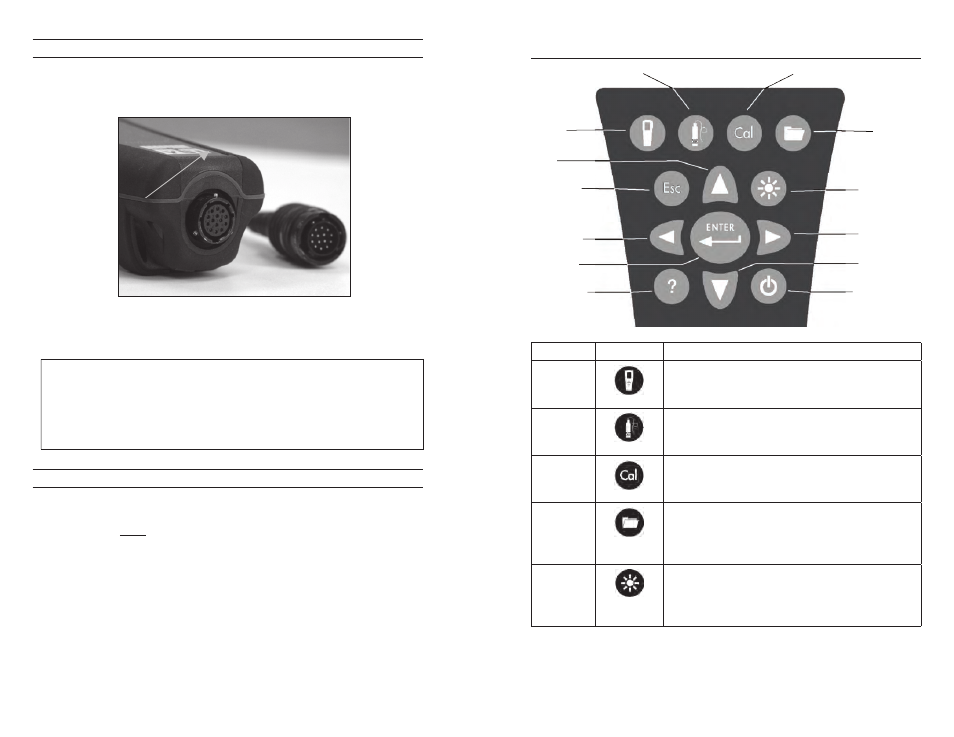
to connect a cable, align the keys on the cable connector to the slots on the
instrument connector. Push together firmly, then twist the outer ring until it
locks into place (figure 5). this connection is water-proof.
Figure 5. Note the keyed connector. The cable and instrument
connectors can only be mated once the keys are properly aligned.
When a sensor is not installed, the sensor and cable sensor
connectors are NOT water-proof. Do not submerge the cable
without a sensor or port plug installed in all available ports.
When the cable is disconnected, the cable’s instrument connector
and the connector on the instrument maintain an IP-67 rating.
SENSoR StoRAGE
the cable assembly is supplied with a storage container, or sleeve, that installs
on to the cable. the container is used for short-term storage (less than 30 days).
Be sure to keep a small amount of moisture (tap water) in the container during
storage. this is done to maintain a 100% saturated air environment which is
ideal for short-term sensor storage (see Care, Maintenance, and Storage for more
detailed information). Do not submerge the sensors in an aqueous solution.
the intent is to create a humid air storage environment.
Keypad
Number
Key
Description
1
System
opens System Menu from any screen.
Use to adjust system settings.
2
Sensor
opens Sensor Menu from any screen.
Use to enable sensors and display units.
3
Calibrate
opens Calibrate Menu from any screen.
Use to calibrate all parameters except temperature.
4
File
opens File Menu from any screen.
Use to view data and GLP files, set up
site and folder lists, and delete data.
5
Backlight
Press to turn the instrument backlight on and
off and to adjust the display contrast when
pressed with the left or right arrow key.
i
1
2
3
4
5
6
7
8
9
10
11
12
13