YSI Professional Plus User Manual
Page 25
40
41
Sensitivity selected by User
% Data Variance Threshold
100 - Most Sensitive, Sensitivity
bar is set to the far right
0.025%
75
0.39375%
50
1.5%
25
1.13125%
0 - Least Sensitive, Sensitivity
bar is set to the far left
0.15%
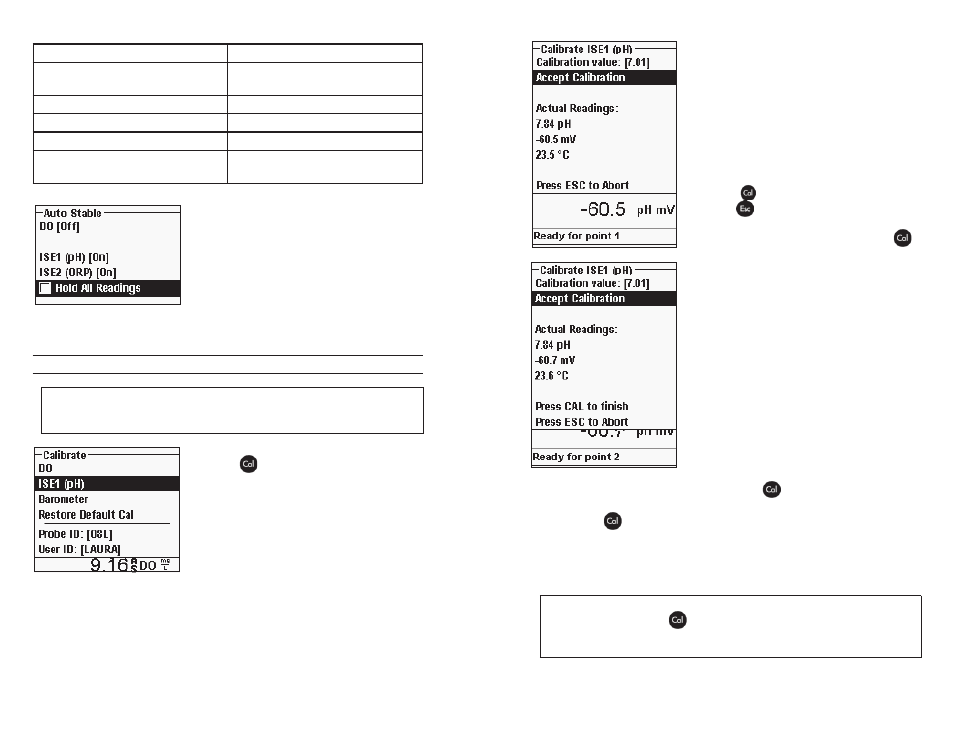
Within the Auto Stable menu, you can also
choose to Hold All Readings for as many
parameters as you set for Auto Stable. For
instance, if oRP and pH have Auto Stable
enabled and Hold All Readings is enabled, then
the display will hold the readings once oRP and
pH have both reached their Auto Stable settings.
You must press the Esc key to “release” the held
display in order to take subsequent readings.
Hold All Readings must be reactivated after each use!
CALIBRAtIoN - pH
Calibration can be accomplished in any buffer order. pH
7 buffer should be used regardless of how many calibration
points you use but it does not have to be used first.
Press Cal
. Highlight Probe ID or User ID
if you wish to add, select, edit, or delete an ID.
Probe ID must be enabled in the System GLP
menu to appear in the Calibrate menu. User
ID will appear automatically. Select ‘None’
if you do not want a User ID stored with the
calibration. When enabled, these IDs are stored
with each calibration record in the GLP file.
After selecting your User ID and/or Probe ID if appropriate, highlight ISE (pH)
and press enter. the message line will show the instrument is “Ready for point
1”. the pH calibration allows up to six calibration points.
Place the sensor in a traceable pH buffer solution. the instrument should
automatically recognize the buffer value and display it at the top of the calibration
screen. If the calibration value is incorrect, the auto buffer recognition setting
in the Sensor Setup menu may be incorrect. If
necessary, highlight the Calibration Value and
press enter to input the correct buffer value.
once the pH and temperature readings stabilize,
highlight Accept Calibration and press enter to
accept the first calibration point. the message
line will then display “Ready for point 2”.
If you do not wish to perform a second point,
press Cal
to finalize the calibration. or,
press Esc
to cancel the calibration. If User
Field 1 or 2 are enabled, you will be prompted
to select these fields and then press Cal
to
finalize the calibration.
to continue with the 2nd point, place the sensor
in the second buffer solution. the instrument
should automatically recognize the second
buffer value and display it at the top of the
screen. If necessary, highlight the Calibration
Value and press enter to input the correct buffer
value. once the pH and temperature readings
stabilize, highlight Accept Calibration and
press enter to confirm the second calibration
point. the message line will then display ‘Ready
for point 3” and you can continue with the 3rd
calibration point if desired.
If you do not wish to perform a 3rd calibration
point, press Cal
to complete the calibration.
If User Field 1 or 2 are enabled, you will be prompted to select these fields and
then press Cal
to finalize the calibration.
Continue in this fashion until the desired number of calibration points is
achieved (up to six).
Once you’ve achieved the desired number of cal points you
must press Cal
to finalize the calibration and to allow the
instrument to update the pH offset and slope. The instrument will
not take these cal values into account until Cal has been pressed.
i
u