YSI Professional Plus User Manual
Page 28
46
47
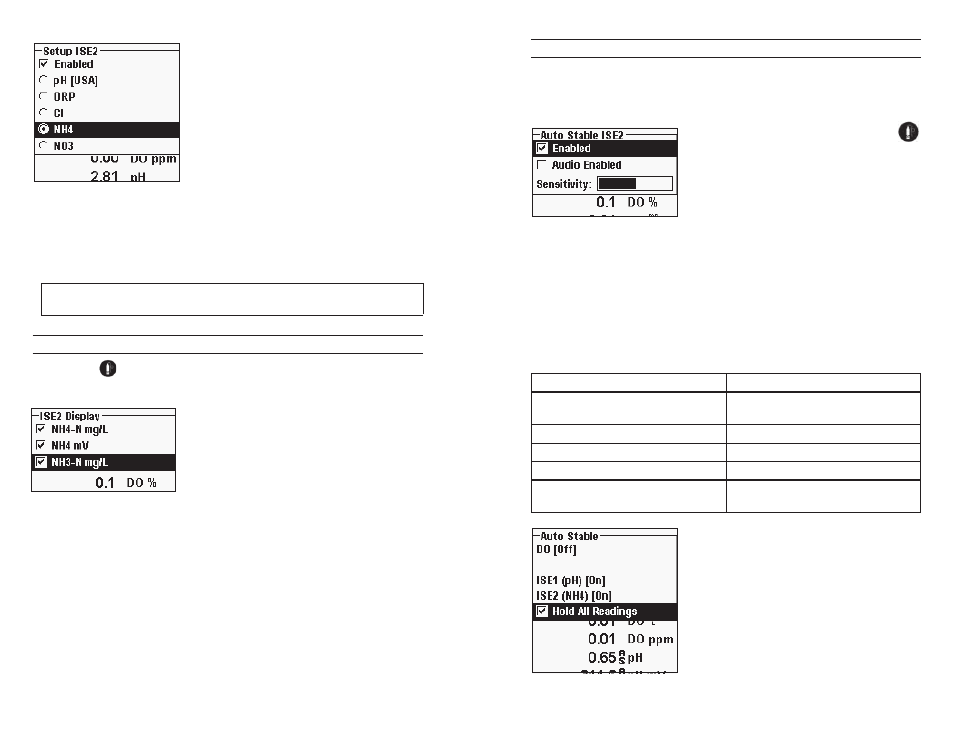
Enabled allows you to enable or disable the ISE
function and select which ISE sensor is installed
on the cable.
Highlight Enabled and press enter to enable (
Q
)
or disable (
P
) the ISE you selected previously
(either ISE1 or ISE2).
After enabling the ISE function, choose the
parameter you want enabled for that ISE. In
this example, NH4 is selected.
Cl - Chloride
NH4 - Ammonium
No3 - Nitrate
If a sensor is Enabled that isn’t connected to the instrument, the
display will show an unstable, false reading next to the units.
DISPLAY - AMMoNIUM, NItRAtE, CHLoRIDE
Press Sensor
, highlight Display, press enter. Highlight ISE2(NH4), press
enter. You will not be able to Display the sensor unless it is Enabled.
Highlight the value you wish to display and
press enter to enable (
Q
) . Ammonium can
be displayed as NH4-N mg/L (Ammonium),
NH3-N (Ammonia) and/or NH4 mV (sensor
signal).
the same steps would be followed to display
nitrate or chloride.
Ammonia is calculated from the pH, salinity, and temperature readings. If a
pH sensor is not in use, the instrument will assume the sample is neutral (pH
7) for the calculation. If a conductivity sensor (Salinity) is not in use, the
instrument will use the salinity correction value entered in the Sensor Menu
for the calculation (see Salinity Correction within the Dissolved oxygen Setup
section of this manual for more information).
AUto StABLE - AMMoNIUM, NItRAtE, CHLoRIDE
Auto Stable indicates when a reading is stable. When Auto Stable is enabled, AS
will blink next to the parameter until it is stable. once the parameter is stable,
AS will stop blinking.
to enable Auto Stable, press Sensor
,
highlight Auto Stable and press enter. Highlight
ISE1 or ISE2 and press enter.
Highlight Enabled and/or Audio Enabled
(instrument will beep when the stability is
achieved) and press enter to confirm. the Auto
Stable Sensitivity can be decreased or increased.
Highlight Sensitivity and use the left and right arrow keys to slide the bar. the
more sensitive you make it (larger black bar) the harder it is to achieve stability
in a changing environment.
the Auto Stable system works by examining the previous 5 readings, computing
the percent change in the data and comparing that change against a % threshold
value. the % threshold value is determined by the Sensitivity bar setting. the
following chart can be used as a guide when setting the Sensitivity bar.
Sensitivity selected by User
% Data Variance Threshold
100 - Most Sensitive, Sensitivity
bar is set to the far right
0.05%
75
0.62525%
50
1.275%
25
1.8875%
0 - Least Sensitive, Sensitivity
bar is set to the far left
2.5%
Within the Auto Stable menu, you can also
choose to Hold All Readings for as many
parameters as you set for Auto Stable. For
instance, if pH and Ammonium have Auto
Stable enabled and Hold All Readings is also
enabled, then the display will hold the readings
once pH and Ammonium have both reached
their Auto Stable settings. You must press the
Esc key to “release” the held display in order to
take subsequent readings. Hold All Readings
must be reactivated after each use!
i