Asus q-connector (system panel) – Asus M4N78 Pro User Manual
Page 35
ASUS Q-Connector (system panel)
Use the ASUS Q-Connector to connect/disconnect the chassis front panel cables. Refer to
the following instructions to install the ASUS Q-Connector.
1.
Connect the front panel cables to the ASUS Q-Connector.
Refer to the labels on the Q-Connector to know the detailed
pin definitions, and then match them to their respective front
panel cable labels.
The labels on the front panel cables may vary depending on
the chassis model.
2.
Install the ASUS Q-Connector to the
system panel connector, making sure
the orientation matches the labels on the
motherboard.
3.
The front panel functions are now
enabled. The figure shows the
Q-Connector is properly installed on
the motherboard.
IDE_LED
POWER SW
RESET SW
IDE_LED-
IDE_LED+
PWR
Reset
Ground
Ground
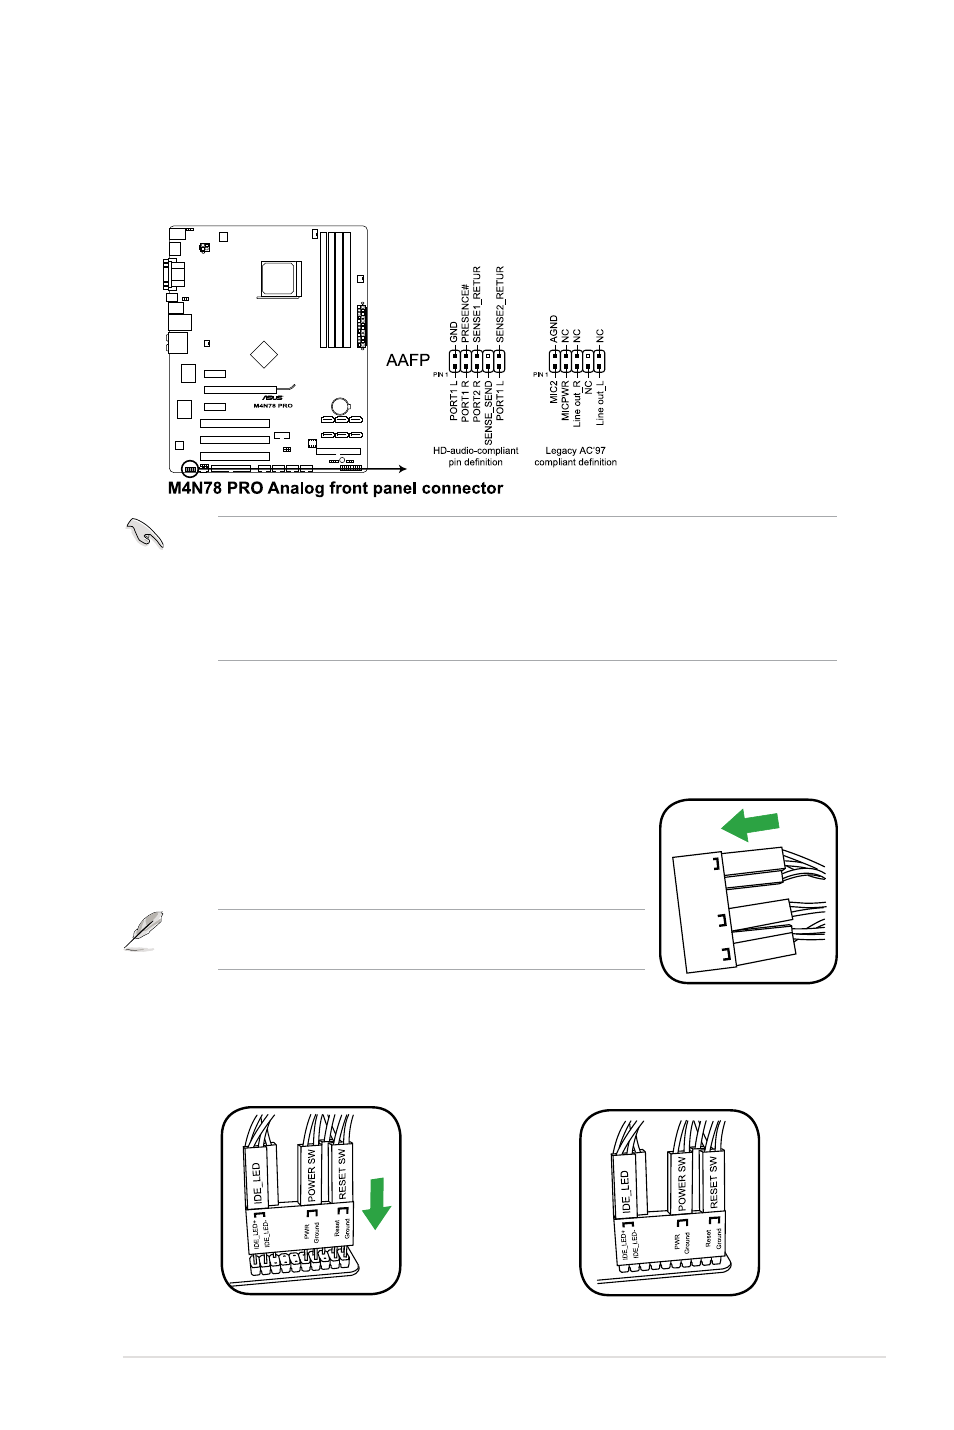
12. Front panel audio connector (10-1 pin AAFP)
This connector is for a chassis-mounted front panel audio I/O module that supports
either High Definition Audio or AC`97 audio standard. Connect one end of the front
panel audio I/O module cable to this connector.
• We recommend that you connect a high-definition front panel audio module to this
connector to avail of the motherboard high-definition audio capability.
• If you want to connect a high-definition front panel audio module to this connector,
ensure that the Front Panel Select item in the BIOS is set to [HD Audio]. If you want
to connect an AC’97 front panel audio module to this connector, set the item to [AC97].
See page 2-20 for details.
Chapter 1: Product introduction
1-25