Warning – Peerless-AV ACC845 - Installation User Manual
Page 3
ISSUED:12-18-01 SHEET#: 055-9070-3 11-10-04
Visit the Peerless Web Site at www.peerlessindustries.com
For customer service call 1-800-729-0307 or 708-865-8870.
3 of 4
D
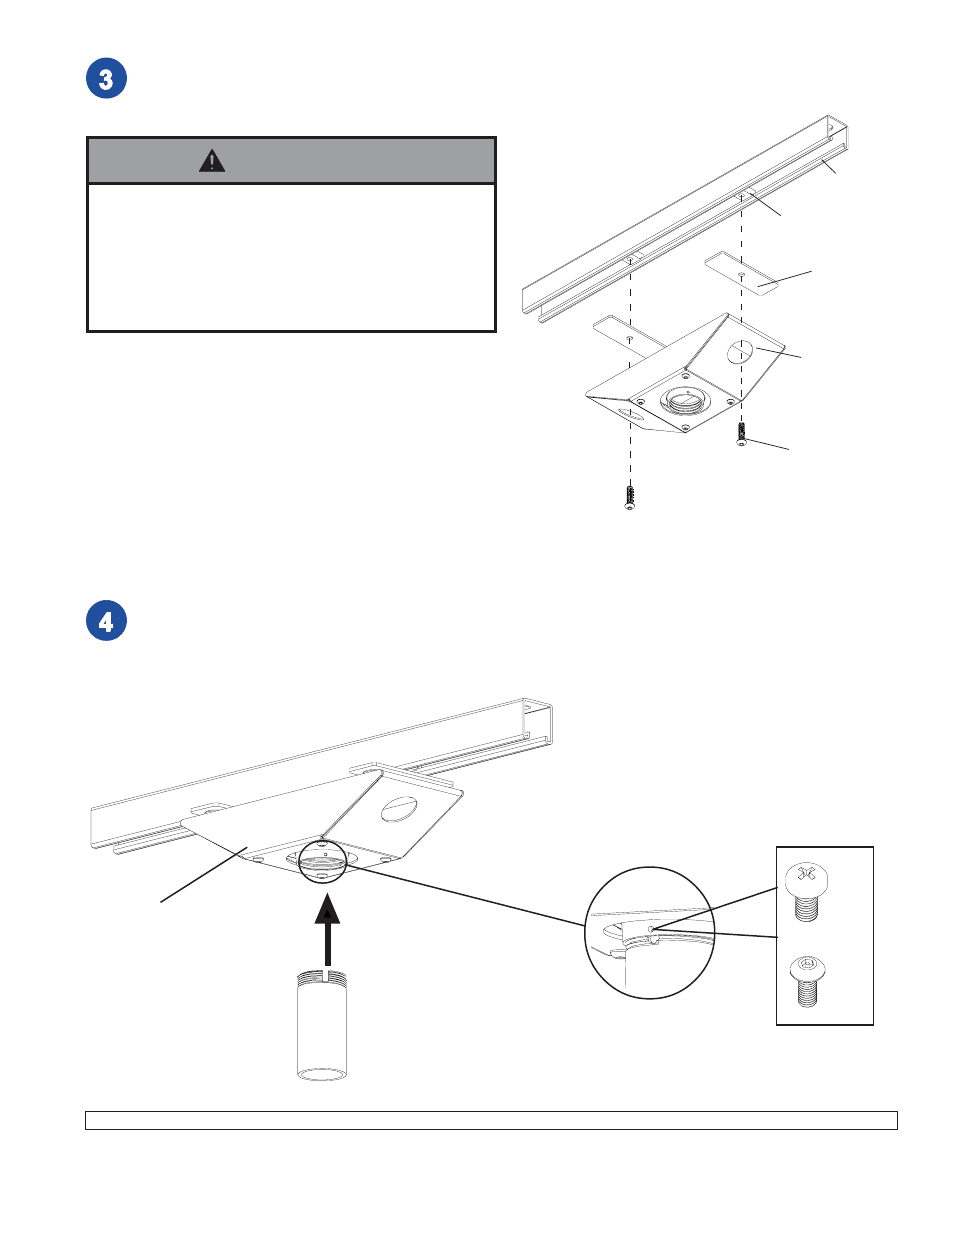
A
E
I
Unistrut
®
Track
Place adapter brackets (D) on top of rubber bumper (B) then fasten to spring nuts (I) inside Unistrut
®
track using
two 5/16-18 socket bolts (E). Note: Make sure rubber bumpers (B) are firmly in place before attaching to ceiling.
When attaching anti-vibration mount (A) to flush mount tube or extension column (both tube and column are sold
separately ), tighten at least four complete turns ending with one of the small threaded holes aligned with slot in
the end of flush mount tube or extension column. Insert and tighten one M5 screw (H) to lock tube position
(shown below on right side). Note: For security the M5 philips screw (H) can be replaced with M5 socket-
pin screws (G).
or
H
G
flush mount tube or
extension column
(sold sparately)
A
• Tighten socket bolts so that anti-vibration mount is
firmly attached, but do not overtighten. Overtightening
can damage the bolts, greatly reducing their holding
power and decrease the anti-vibrational effectiveness!
• Tighten to 30-40 in • lb (3.4 - 4.5 N.M.) maximum
torque.
WARNING