Installing a rear i/o module, Installing a rear i/o module (p. 2-3), Installation and setup – Cobalt Digital COMPASS 9305 Embedded Audio Delay Processor User Manual
Page 23
9305-OM (V4.1)
9305 PRODUCT MANUAL
2-3
Installation and Setup
Installing a Rear I/O Module
10.
If network remote control is to be used for the frame and the frame has
not yet been set up for remote control, perform setup in accordance with
Setting Up 9305 Network Remote Control (p. 2-5).
Note:
If installing a card in a frame already equipped for, and connected to
DashBoard™, no network setup is required for the card. The card will be dis-
covered by DashBoard™ and be ready for use.
Installing a Rear I/O Module
Note:
This procedure is applicable only if a Rear I/O Module is not currently
installed in the slot where the 9305 is to be installed.
If installing the 9305 in a slot already equipped with a suitable I/O module,
omit this procedure.
Install a Rear I/O Module as follows:
1.
On the frame, determine the slot in which the 9305 is to be installed.
2.
In the mounting area corresponding to the slot location, install
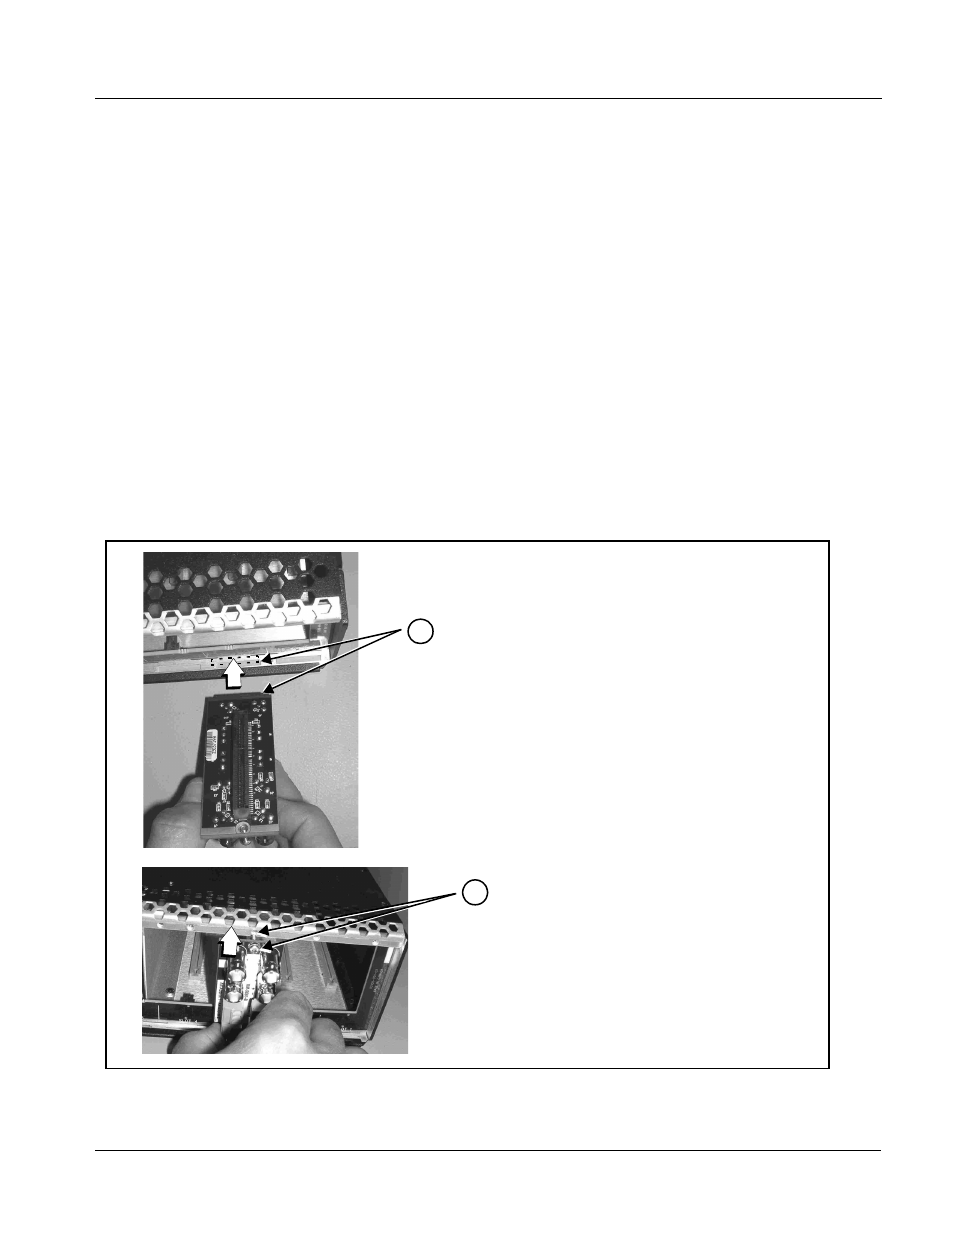
Rear I/O Module as shown in Figure 2-1.
Figure 2-1 Rear I/O Module Installation
DSCN3483A.JPG
Align and engage mounting tab on Rear
I/O Module with the module seating slot
on rear of frame chassis.
Hold top of Rear I/O Module flush against
frame chassis and start the captive screw.
Lightly tighten captive screw.
DSCN3487A.JPG
1
2