Rough Country 376.20 User Manual
Page 2
FRONT INSTALLTION INSTRUCTIONS
1. The tools needed , and parts for this installation are on the front cover. Make sure you have all of the proper tools
and understanding of these instructions before you proceed.
2. Place the truck on a clean level surface and set the parking brake. Chock the rear wheels and using a floor jack
raise the front of the truck and support the frame rails with approved jack stands. NEVER WORK UNDER AN UN-
SUPPORTED VEHICLE, Using a 7/8 deep well socket remove the front wheels.
3. Remove the brake calipers from the spindle bracket using a 13 mm wrench. Using a pry bar to pry up the caliper, zip
tie the caliper to the frame rail. Do not let the caliper hang from the hose. Remove the two bolts securing caliper
bracket to the spindle.
4. Remove Rotor
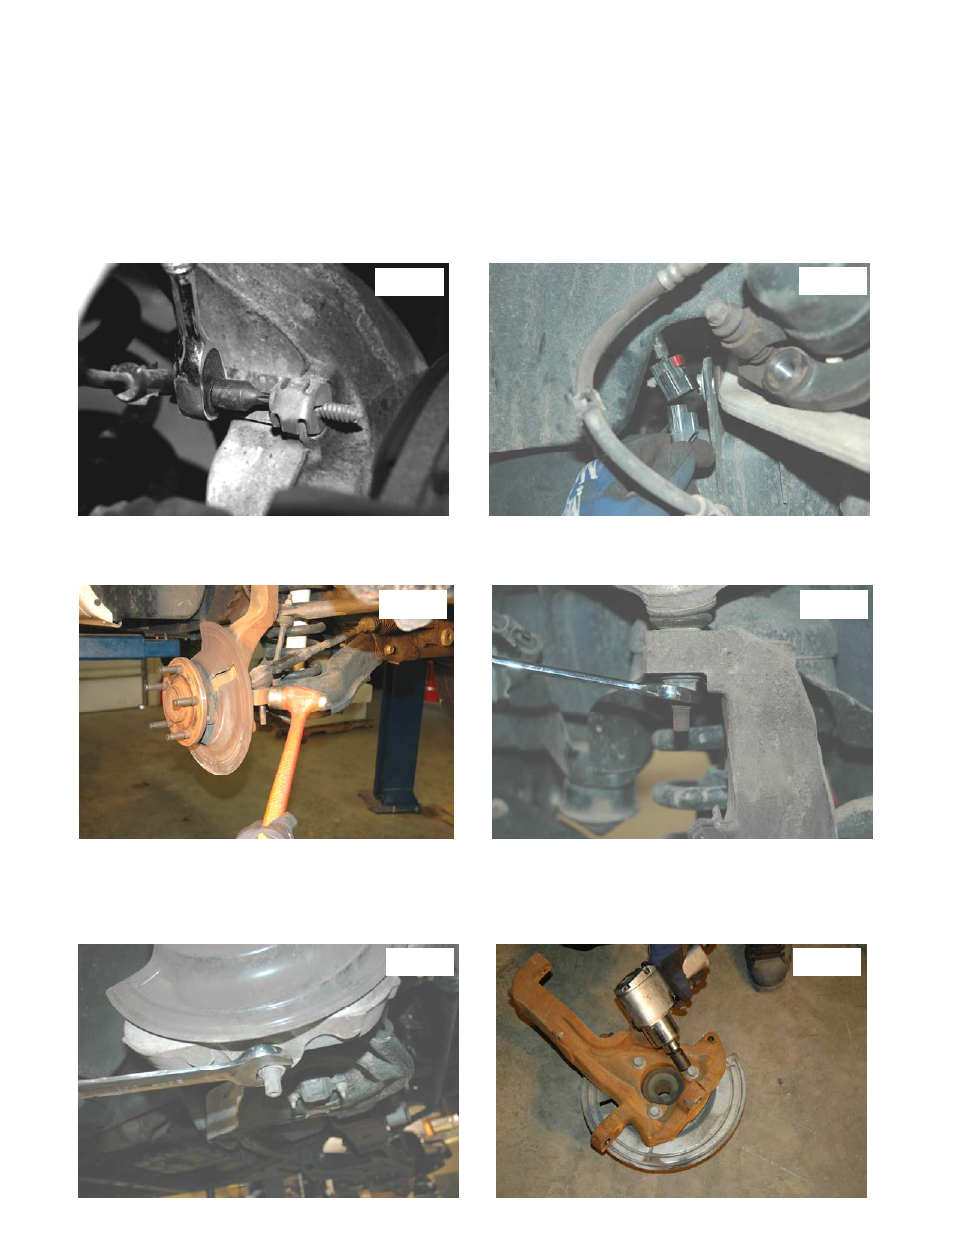
5. Using a T30 Torx socket remove the ABS wire from the spindle as shown in Photo 1
6. Unplug the ABS wire as shown in Photo 2.
7. Using a 21 mm socket remove tie rod end from the spindle. Using a hammer lightly wrap on the spindle around the
ball joint to loosen. Remove from spindle See Photo 3.
8. Using a 21 mm wrench loosen the nut on the upper control arm ball joint, but do not remove. See Photo 4.
9. Using a 24 mm wrench loosen the nut on the lower control arm ball joint. Using a hammer lightly rap on the spindle
around the ball joint until it breaks free from the joint. See Photo 5
10. Take nuts off of the upper and lower control arm ball joints and remove spindle.
11. Turn spindle on its back side. Using a 18mm socket remove the 3 bolts holding the hub assembly and dust cover on
the spindle. See Photo 6.
Photo 1
Photo 2
Photo 3
Photo 4
Photo 5
Photo 6