Rough Country PERF619 User Manual
Page 7
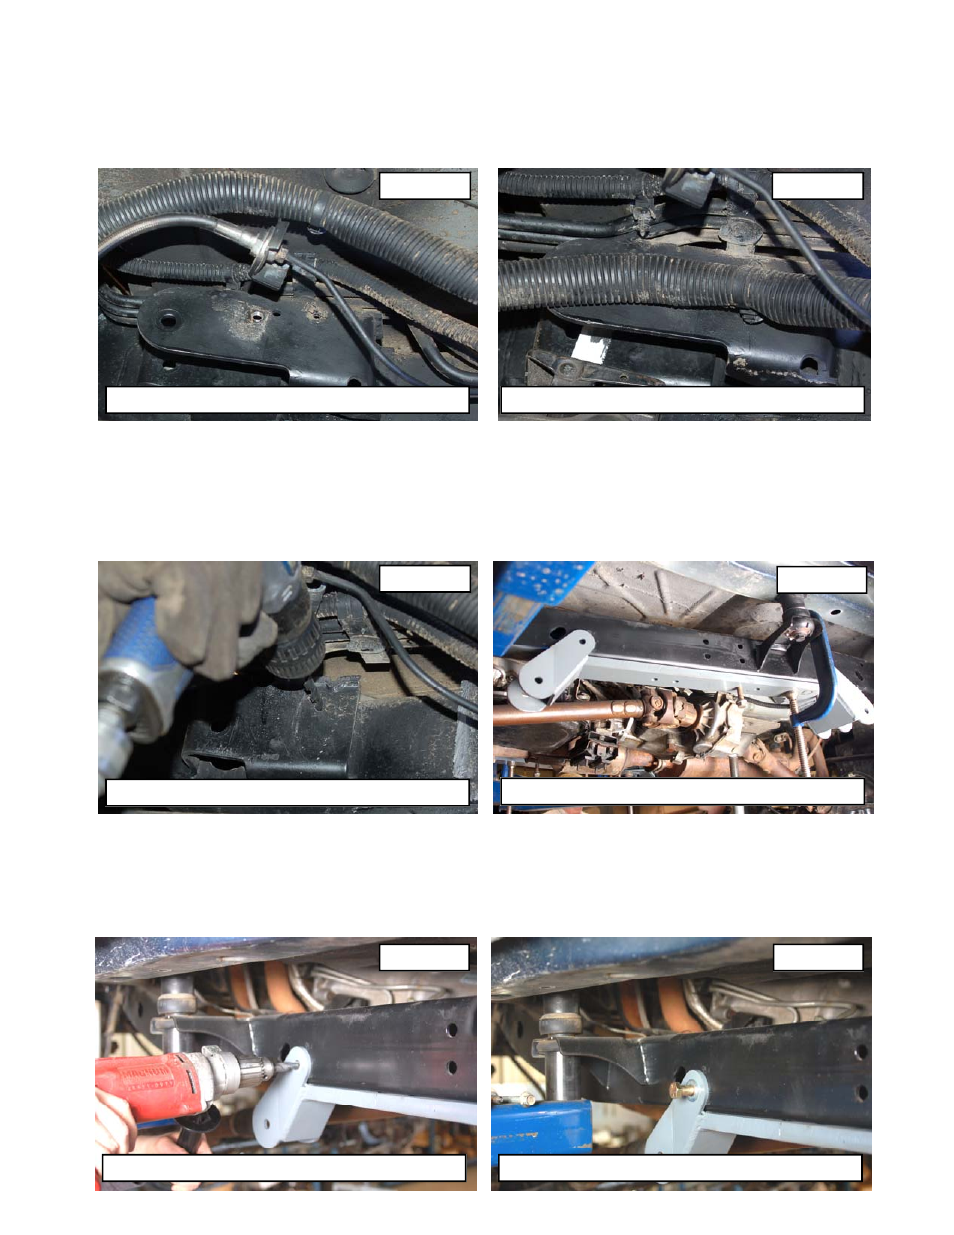
25. The rear stock upper control arm mounts will have to be removed to allow clearance for the rear long arms. Using
a T30 Torx head bit remove the brake line bracket and wiring hardness from the stock mount on the drivers side.
See Photo 10. Retain hardware for reuse. Driver side shown.
26. Using a reciprocating saw remove the upper mount as shown taking care to not damage the brake lines and gas
lines. See Photo 11.
27. Remove the passenger side mount using a reciprocating saw.
28. After mount has been removed grind the area smooth and paint to prevent rust.
29. Using a 19/64” drill bit, drill hole as shown to reinstall the brake line bracket. See Photo 12. The brake line will
be installed later.
30. Proceed to frame bracket install.
31. Align the holes in the frame with the new control arm bracket and install the factory skid plate bolts. Clamp in
place using a large c-clamp. See Photo 13.
32. Using the new bracket as a guide, drill using a 17/32” drill bit through the inner and outer frame rail. See Photo
14. NOTE: The drill must be kept level for the frame holes to align with the new bracket. Note: Use caution
when drilling the frame rail to avoid any lines on the inside of the frame rail, including fuel lines and
brake lines.
33. Install the supplied 1/2” x 4” bolts, washers and nuts as shown in Photo 15 through the frame rail and tighten
using a 3/4”wrench. Repeat steps 29-31 for the opposite side
PHOTO 10
PHOTO 11
PHOTO 12
PHOTO 13
Clamp control arm bracket in place
PHOTO 14
Drill the frame using a 17/32” drill bit
PHOTO 15
Install 1/2” x 4” bolts, washer and nut
Remove the brake line and harness from the frame
Cut and remove the stock upper arm mount
Drill hole and remount brake line bracket