Rough Country PERF619 User Manual
Page 13
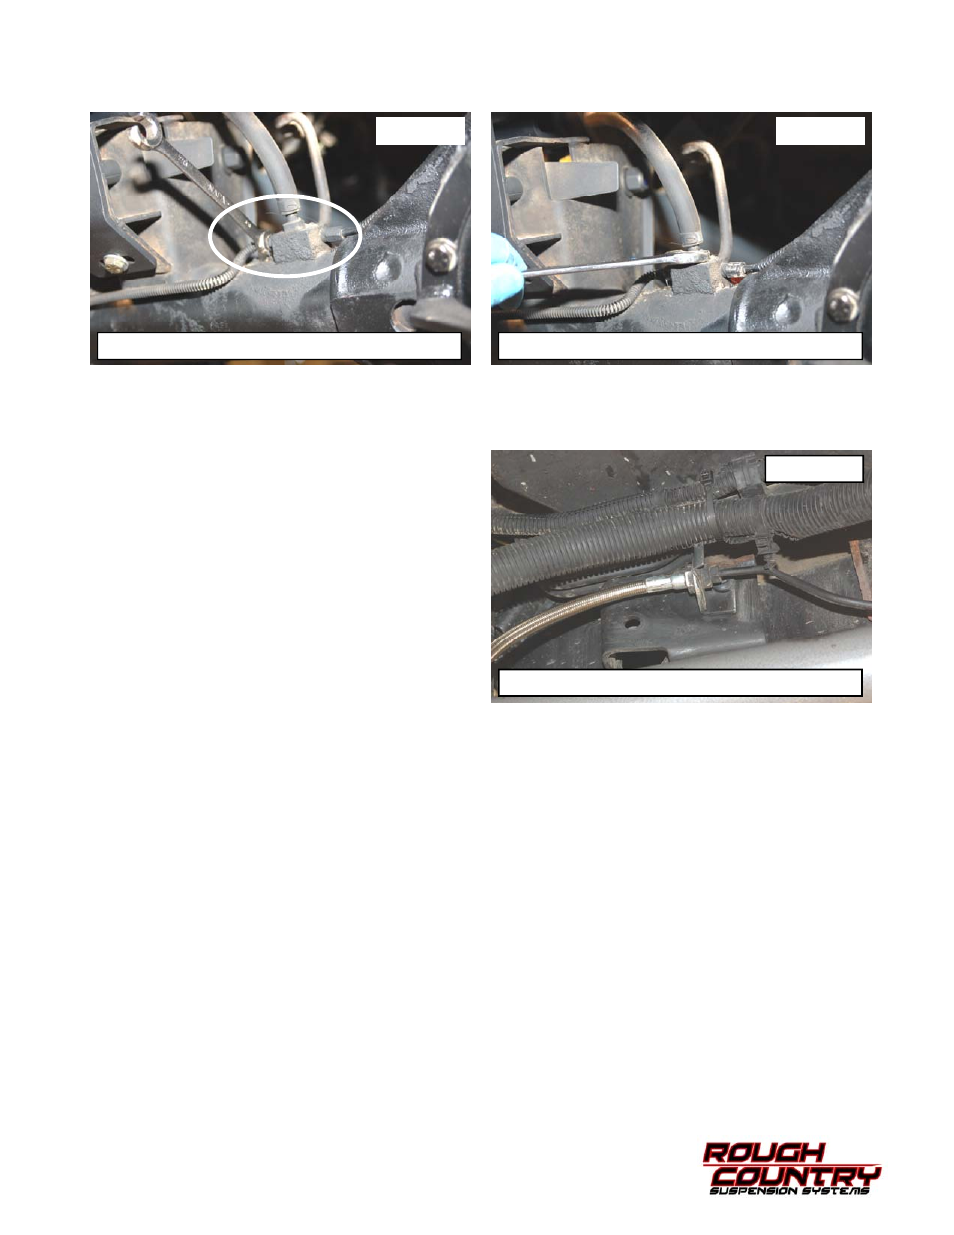
71. Separate the stock rubber line from the steel line at the axle using a 3/8” brake line wrench and remove the stock
brake line from the axle using a 9/16” wrench. See Photo 44 & 45.
72. Separate the steel line from the rubber line on the driver side frame rail.
73. Install the supplied brake line bracket with the factory hardware on the frame in the hole drilled earlier in the in-
stall. Tighten using a T30 torx head bit. Install the brake line to the bracket on the frame and secure with the sup-
plied clip. See Photo 47.
74. Install the brake line on the axle to the hard lines using
a 3/8” brake line wench. Secure the new brake line to
the axle with the stock hardware using a 9/16” wrench.
75. Install the new Rough Country coil springs making sure
the rubber damper in positioned in the upper mount. It
will be necessary to use a coil spring or strut compres-
sor to install the new coil springs.
76. Install the rear Rough Country Shock absorber on the
upper mount with the factory hardware. Tighten bolts
using a 15mm & 18mm wrench. (Stock shocks shown
in picture). RCX 2.2 Series shock absorbers are de-
signed to be installed with the piston down and
body up. N2.0 shocks are installed rod up and body
down.
77. Install the wheels / tires and tighten the lug nuts to the
factory specifications using crossing pattern.
78. Remove the jack stands and lower the vehicle to the ground.
79. On the front lower control arms; align the reference marks on the adjustment cams and lower arm axle brackets
and tighten to 85 ft. lbs using a 21 socket & wrench. Tighten the upper using a 15mm socket & wrench. Repeat
for the rear of the vehicle. Tighten front track rod in mounts using a 15mm socket / wrench.
PHOTO 44
Remove steel line from line on axle
PHOTO 45
Remove the stock brake line from axle
PHOTO 47
Install new line in supplied bracket and install clip