Rough Country PERF619 User Manual
Page 10
50.Assemble the sway bar link with the link body, the jam nut and rod end Adjust the sway bar to a length of 11 1/4”
from top to bottom. Tighten the jam nut against the rod end using a 19mm & 5/8” wrench.
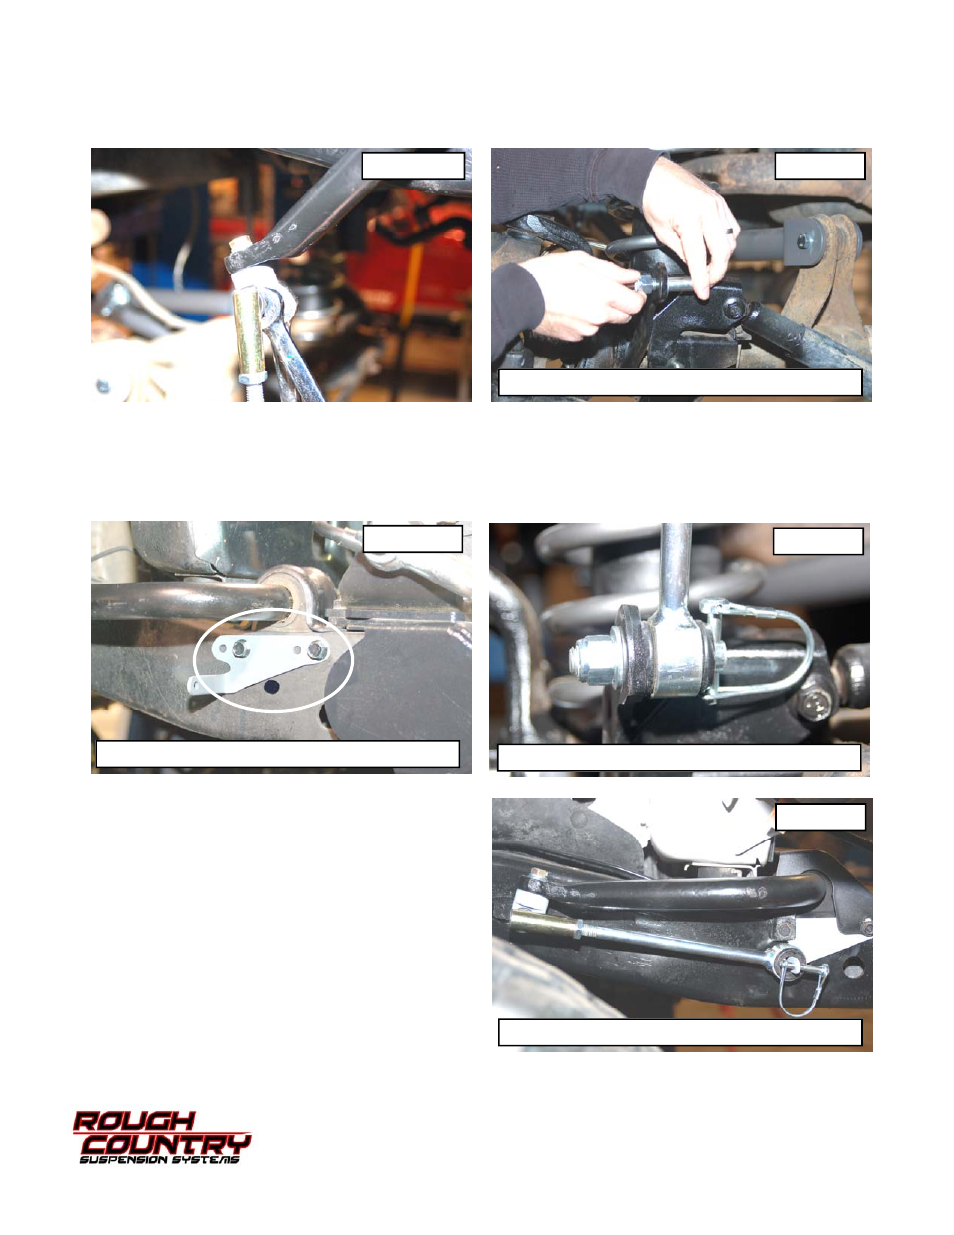
51.Install the link on the upper sway bar mount as shown in Photo 28. Tighten using a 5/8” & 18mm wrench.
52.Install the supplied pin on the axle as shown in Photo 29. Tighten using a 3/4” wrench.
53.Remove the bolts securing the plastic shroud to the frame and install the driver and passenger side frame mount
brackets in the holes shown for the disconnect kit using the factory holes and the supplied 1/4” x 3/4” bolts &
washers. See Photo 30. Tighten using a 7/16” wrench, be careful to not over tighten. Please note there is a pas-
senger and driver side bracket.
54.Swing the sway bar link down and install on the lower axle mounting pin. Install the hitch pin. See Photo 31. It
may be necessary to install the link on the axle after the vehicle is on the ground.
55.When disconnecting the sway bar, remove the sway bar
link and place it on the frame mount as shown in Photo
32 to keep the sway bar link from interfering with front
end components.
PHOTO 28
PHOTO 31
Install the sway bar link on the axle with hitch pin
PHOTO 29
Install mounting pin on axle
PHOTO 30
Install sway bar link frame bracket
PHOTO 32
Sway bar link shown in up position