Rough Country PERF663 User Manual
Page 13
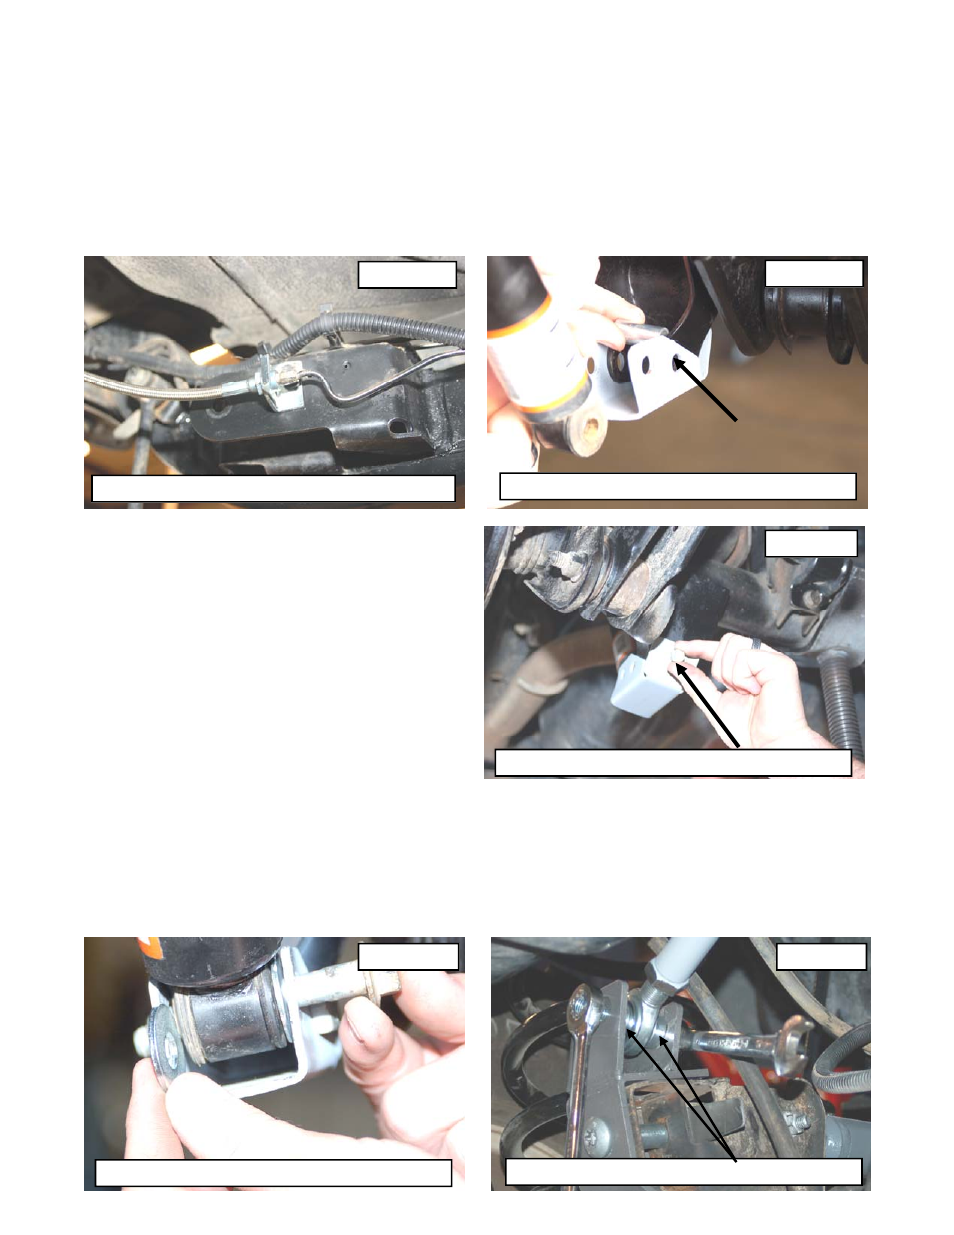
69. Install the supplied brake line bracket with the factory hardware on the frame. Install the brake line to the bracket
on the frame and secure with the supplied clip. See Photo 46.
70. Install the brake line on the axle to the hard lines using a 3/8” brake line wench. Secure the new brake line to the
axle with the stock hardware using a 9/16” wrench.
71. Install the new Rough Country coil springs making sure the rubber damper in positioned in the upper mount.
Please note that there is a driver and passenger side coil. The passenger coil has the larger rod diameter. It will
be necessary to use a coil spring or strut compressor to install the new coil springs. If installing a 6” lift, refer to
instructions included in the coil kit for installation of the coil angle correction brackets.
72. Install the lower shock bracket as shown in Photo 47 with the supplied 12mm x 65mm bolts, flange locknuts with
supplied crush sleeves. Do not tighten at this time.
73. Install the supplied 5/16” x 3/4” bolts, washers & nuts
as shown in Photo 48 in the shock bracket. Tighten
the 5/16” bolts using a 13mm socket and wrench.
74. Install the rear Rough Country 2.2 Shock absorber
Part #660576 on the upper mount and install the sup-
plied flat washers as shown in Photo 49 on the lower
shock mounts with the factory hardware. Tighten bolts
using a 15mm & 18mm wrench. (Stock shocks shown
in picture). RCX 2.2 Series shock absorbers are de-
signed to be installed with the piston down and
body up.
75. Install the wheels / tires and tighten the lug nuts to the
factory specifications using crossing pattern.
76. Remove the jack stands and lower the vehicle to the
ground.
77.On the front lower control arms; align the reference marks on the adjustment cams and lower arm axle brackets
and tighten to 85 ft. lbs using a 21 socket & wrench. Tighten the upper using a 15mm socket & wrench. Repeat for
the rear of the vehicle. Tighten front track rod in mounts using a 15mm socket / wrench.
78. On the rear, make sure the body is centered over the axle and adjust the track rod to 33 1/4” or adjust as neces-
sary to center the vehicle over the axle and install in the new track rod bracket with the supplied 12mm x 65mm
bolt, washer, flange nut and spacers. Tighten to 55 ft/lbs using a 18mm & 19mm wrench and snug the jam nut
using a 1 1/2” wrench. See Photo 50. It is important to center the vehicle over the axle to ensure proper
tracking and alignment.
PHOTO 46
Install new line in supplied bracket and install clip
Install 12mm x 65mm hardware & crush sleeve
PHOTO 47
PHOTO 49
PHOTO 50
PHOTO 48
Install 5/16” x 3/4” Hardware
Install flat washers and Stock bolt
Install 12mm x 65mm hardware & spacers