Installing the new t, Step one, Step three – Rough Country 51124-15 User Manual
Page 4: Step two
51124 pg 4
Rev. B 0204
Installing the New T
op
Work pockets over
corners of header
Drape fabric over
tailgate
Detail of Header
Install screw to
secure fabric
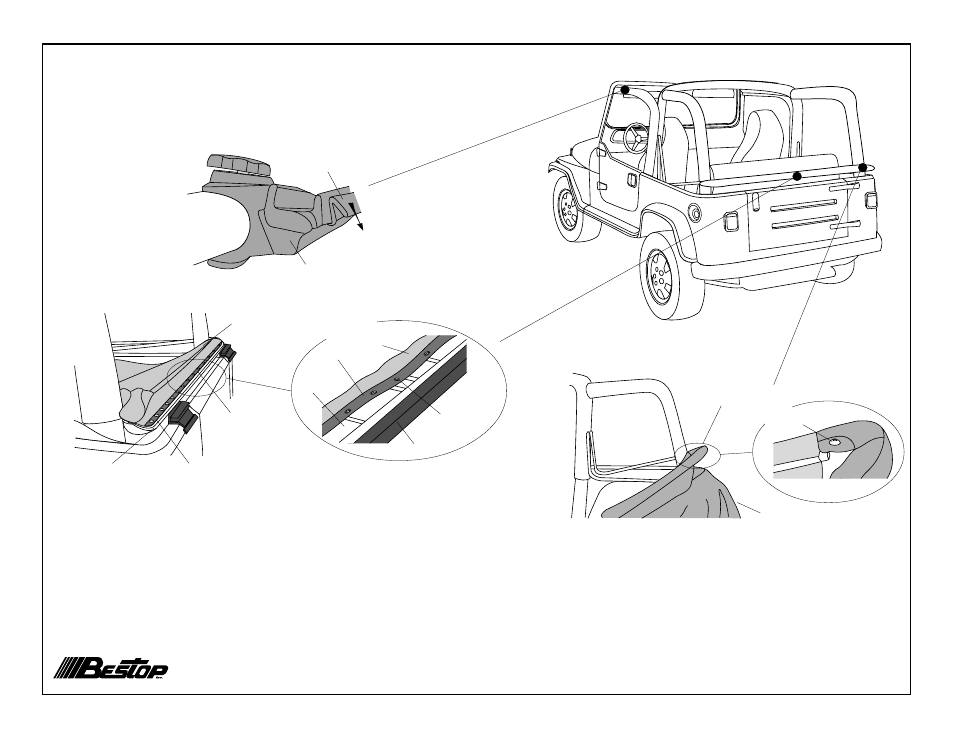
Step Three
Flip the fabric over so that it wraps around the header and
drape the top fabric over the tailgate. Raise the header
slightly and work the pockets in the fabric over the corners
of the header. Install an oval head screw in each corner to
secure the fabric to the header.
Detail of Center
Screw Hole
Lay fabric, backing up
in rear of vehicle
Plastic Strip along front
edge of fabric
Start with center
ROUND hole
Align fabric with
header
Fabric
Plastic
Strip
Header
Start with center
ROUND hole
Door Surround
Pull down on extrusion
to remove
Slip-On Plastic
Extrusion
Step One
If you have a 1997 vehicle with a slip-on plastic
extrusion on the door surround, it must be removed.
Pull down on the extrusion to work it loose.
Step Two
In order to install the top fabric, make sure that the Center and Rear
Bows are in the folded down position on the rear of the vehicle.
Lay the top fabric, backing side up in the rear of the vehicle with
the plastic strip facing up and aligned with the front edge of the
header. Locate the round hole that marks the center of the plastic
strip (all other holes are slotted). Install a screw in the round hole to
secure the fabric to the header as well as to center the top. Then
proceed to install screws in the remaining seven or thirteen holes
along the front of the header.
Tailgate