Rough Country 775S User Manual
Page 8
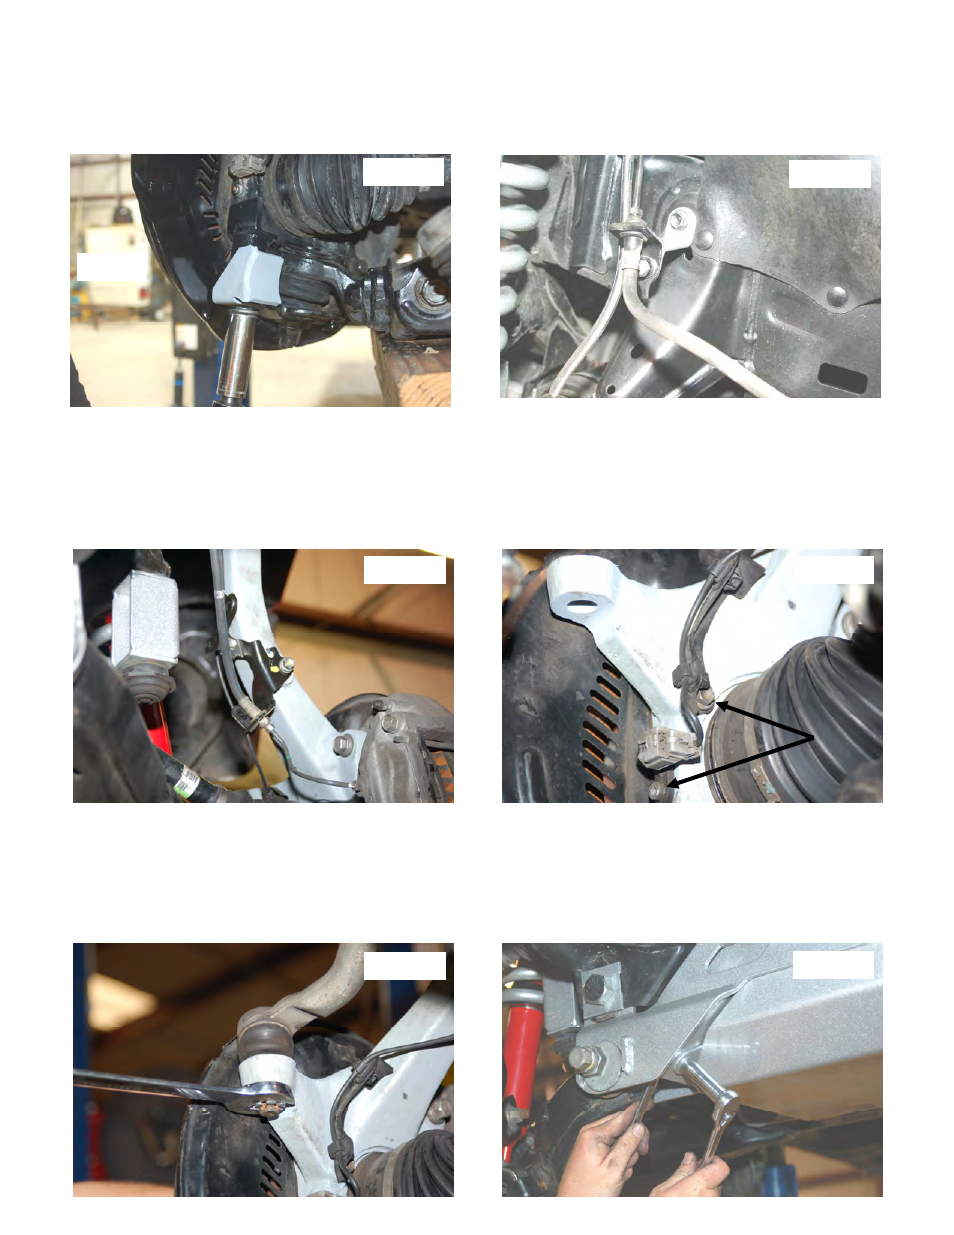
39. Install knuckle onto vehicle with factory hardware. Tighten upper ball joint using 19mm
40. Install the supplied steering stop on the lower ball joint front bolt hole and tighten with a 22mm wrench.
See Photo
31. Tighten the axle nut with 39mm socket or equilavent. Make sure the cotter key is installed on the axle nut.
41. Install new brake line drop brackets on the frame as shown in
Photo 32 using stock bolts. Secure the brake line to
the new bracket using the supplied 5/16 x 3/4
” bolts, washers & nuts. Tighten using a 12mm and a 13mm wrench.
42. Install rotor and brake caliper using a 17mm wrench.
43. Install the stock brake line bracket onto the knuckle as shown in
Photo 33 using the stock hardware. Tighten using
12mm wrench.
44. Install the ABS sensor into the knuckle using a 5mm allen wrench and install the factory bracket back onto the upper
a-arm using a 10mm wrench and stock bolt .
It may be necessary to slightly pull the ABS wire to create slack .
WD-40 can be used to lub the line to allowit to slide in the upper control arm mount. Reinstall the ABS bracket
on the knuckle as shown using the stock hardware. Tighten using a 12mm wrench.
See Photo 34.
45. Install the tie-rod end into the knuckle using a 24mm wrench to tighten in
Photo 35. Make sure the cotter key is
installed. Tighten the jam nut on the tie-rod end using a 1 1/16
” and a 1 3/16” wrench.
46. Install skid plate as shown in
Photo 36 using the previously installed 9/16” rear diff. bracket bolts and supplied 3/8” x
1
” bolts and nuts and 2 washers. Use a 9/16” wrench for the front bolts and a 21mm for the rear diff bolts that
secure the skid plate.
47. Install the wheels and tires. Jack up the front of the vehicle and remove the jack stands. Lower the vehicle to the
ground and tighten lower control arm bolts using a 21mm wrench.
Photo 32
Photo 33
Photo 34
Photo 35
Photo 36
Photo 31
FRONT