Rough Country 775S User Manual
Page 5
16. Remove sway-bar using a 17mm wrench.
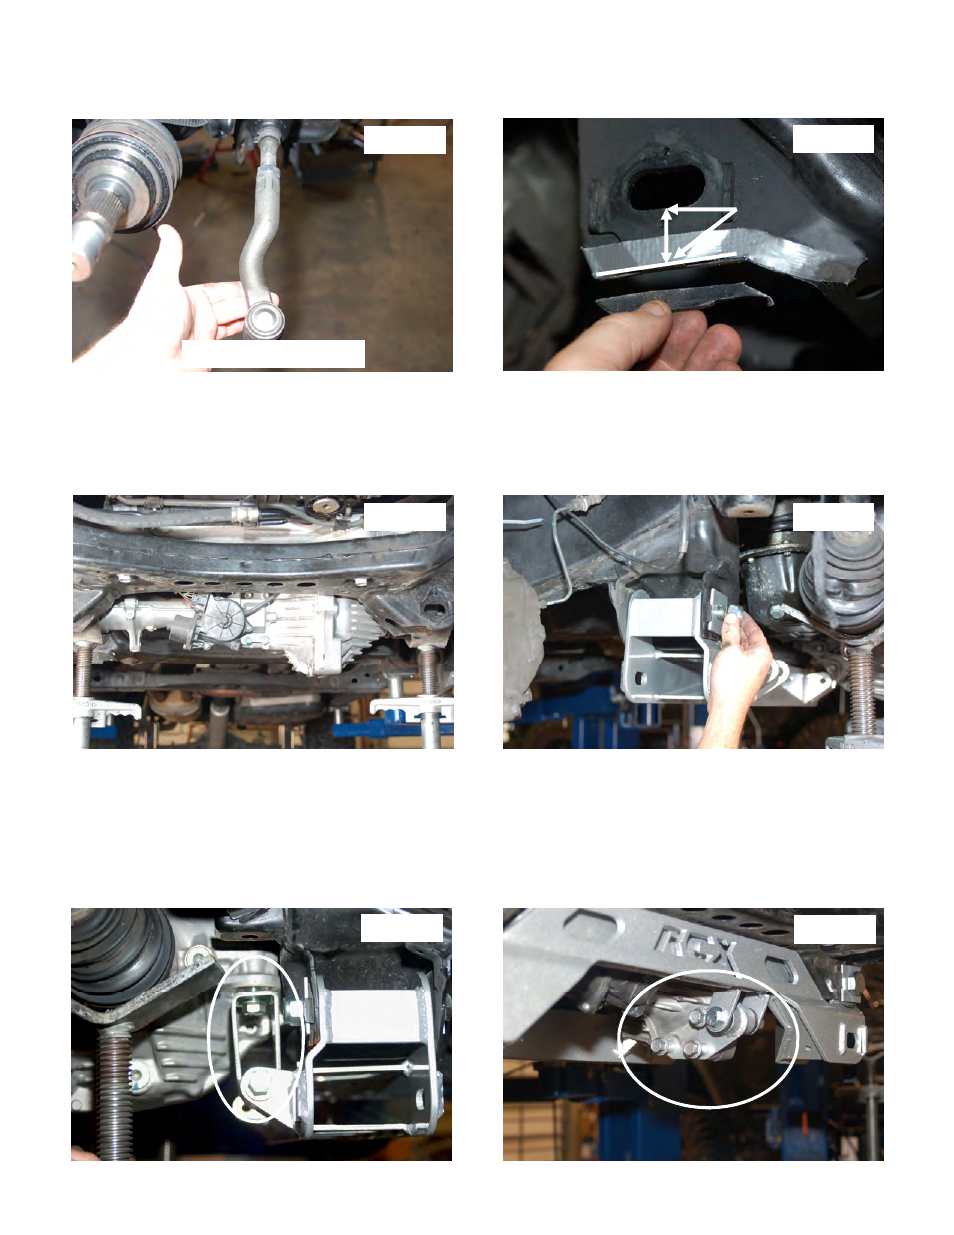
17. Swap left and right outer tie-rod ends as shown in
Photo 13. This is done for wheel clearance.
18. Trim the front and rear lower control arm pocket front side only
1 inch from hole as shown in Photo 14.
19. Support differential with jack stand and remove the 3 differential mounts using a 19mm wrench. There should be 10
bolts to remove. Remember too remove the nuts on top of frame from front diff mounts.(4WD Model)
20. Lower differential down being careful with vent hose and wiring. Let the diff rotate down slightly. (4WD Model)
See
Photo 15.
21. Install rear cross-member using supplied 18mm x 150mm bolts square washers (4) and nuts as shown in
Photo 16.
Do not tighten at this time. Please note, there is a front and rear cross-member square washer.
22. Install supplied bushings & sleeve into rear diff mount and using 22mm and 21mm wrench install on vehicle with
9/16 x 4
” bolt Install the 14mm x 25mm bolt in the differential as shown in
Photo 17. (4WD Model) Do not install
nuts on the 9/16” bolts, the nuts for this bolt are located on the skid plate.
23. Install front cross-member using 7/8 x 5
” bolts and square washers (4) in
Photo 18. Please note, there is a front and
rear cross-member square washer. Do not tighten at this time.
24. Install supplied bushings & sleeve into driver side diff mount and install on vehicle using 9/16 x 4
” bolts & nut on the
cross-member and three 14mm x 60mm long bolts on the differential drop bracket as shown in
Photo 18. Tighten
using a 19mm, 21mm and 22mm wrench. (4WD Model)
Photo 13
Photo 14
Photo 15
Photo 16
Photo 17
Photo 18
Passenger Side Shown
1”