Rough Country 775S User Manual
Page 6
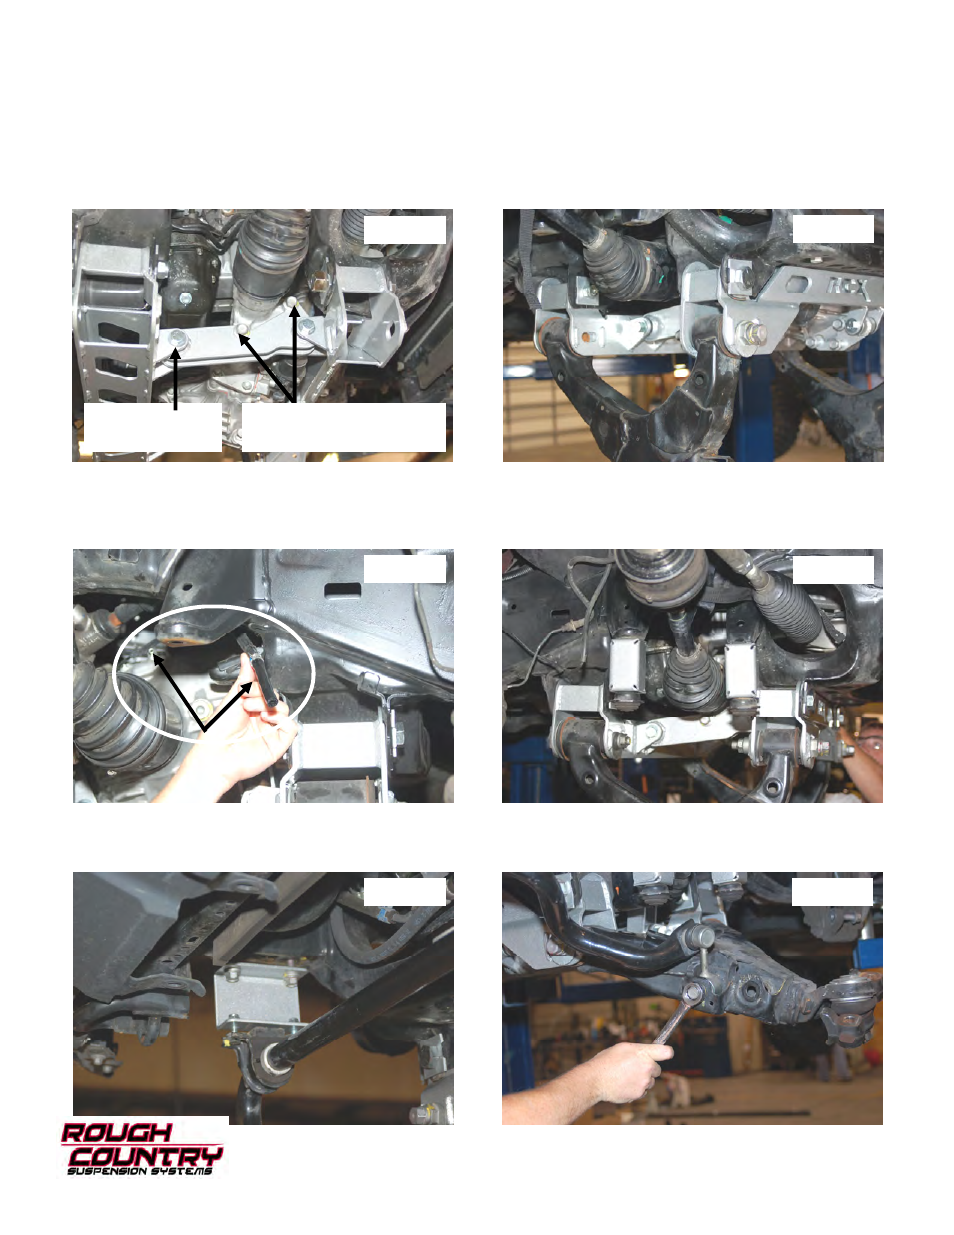
25. Install bushing into passenger side diff bracket. Using 2- 9/16 x 4
” long bolts and 21 and 22mm wrench on vehicle.
Use stock bolts for bracket to diff with supplied 14mm nuts.
See Photo 19. Tighten using a 19mm wrench. Do not
install nuts on the 9/16” bolts on the rear cross member ,the nuts for this bolt are located on the skid plate.
(4WD Model)
26. Install lower control arms with stock hardware as shown in
Photo 20.Do not tighten.
27. At this time tighten all cross-member bolts using 1- 5/16
” wrench on front cross-member and 1 -1/16” on rear.
Tighten all differential mounting bolts. (4WD Model) Rear diff bracket bolt are not tighten because the nuts are
welded to the skid plate. Do not tighten lower control arm bolts at this time.
28. Assemble supplied 1/4
” coupler and hose and install new vent tube ext to differential as shown in
Photo 21. (4WD
Model)
29. Install bump-stop to bump-stop ext. using 10mm x 1.25 nuts & washers and thread into factory location with 10mm
x1.25 bolts & washers.
See Photo 22. Tighten hardware using a 17mm wrench.
30. Install sway-bar drop brackets using factory hardware at top with a 17 mm wrench. Install sway bar to drop brackets
using supplied 7/16 X 1.25 bolts nuts and washers using a 5/8 wrench as shown in
Photo 23. Attach sway bar links
to lower control arms with factory hardware using a 19mm wrench as shown in
Photo 24.
Photo 19
Photo 20
Photo 21
Photo 22
Photo 23
Photo 24
Stock bolts install here
with supplied 14mm nuts
9/16” Flat washer
installs here