Rough Country 775S User Manual
Page 7
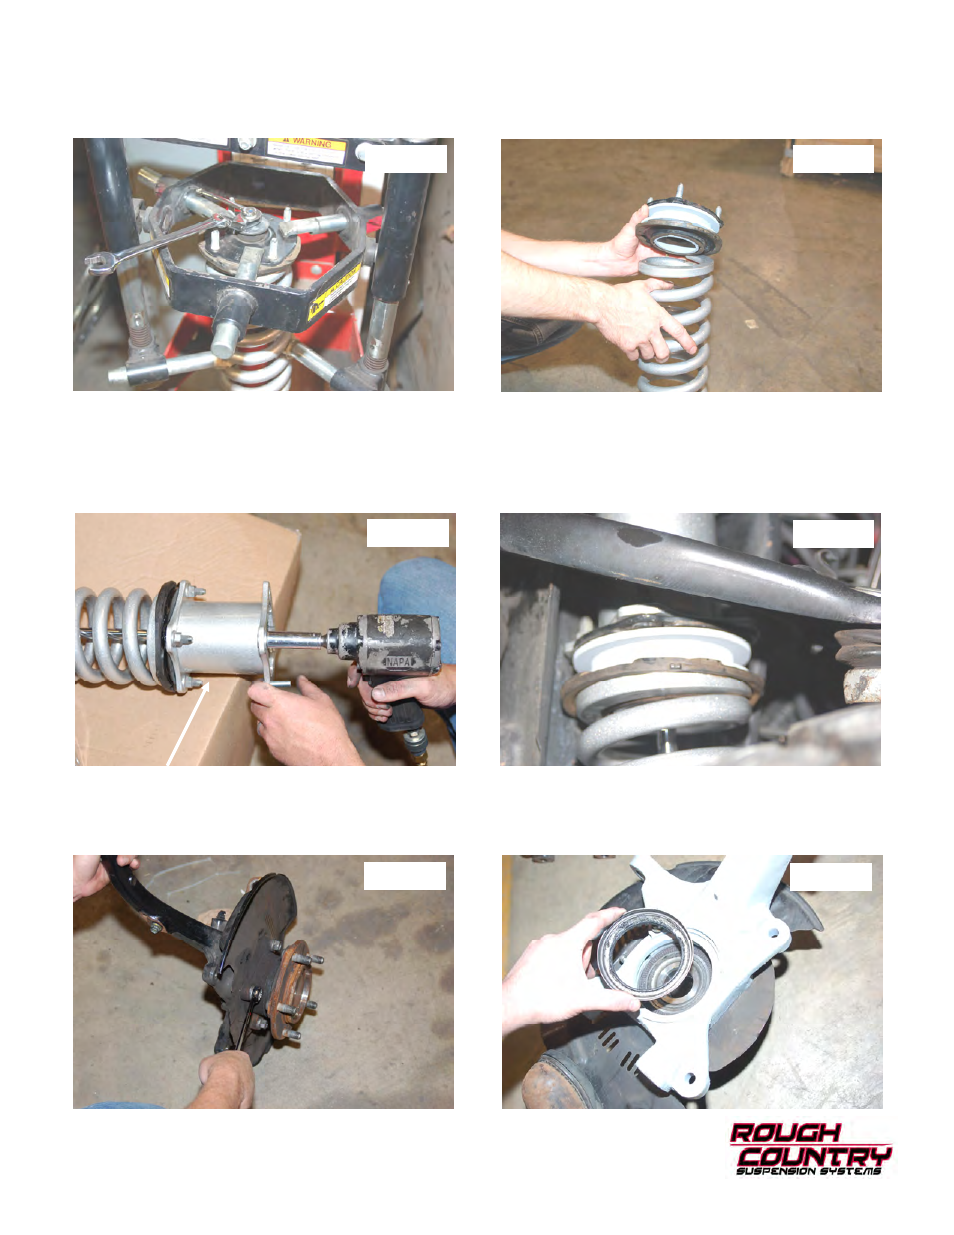
31. Disassemble the factory strut assembly with a strut compressor using a 17mm wrench and remove the strut cylinder
as shown in
Photo 25.
32. Install the strut preload spacer on the strut as shown with the stock hat on top, spacer and stock isolator as shown in
Photo 26.
33. Re-assmble the strut with the factory hardware. Tighten hardware using a 17mm wrench.
34. Install the strut spacer on the strut with the factory hardware. Tighten using a 14mm wrench.
See Photo 27.
35. Install the 3/8 studs into strut ext. using a 3/8 nut and a 9/16 socket torque the stud to 35-45 ft/lbs as shown in
Photo
27, this will cause the stud to clinch.
36. Install strut onto vehicle using factory hardware for bottom and supplied 3/8
” lock washers, flat washers & 3/8” nuts
for top. Tighten using a 22mm wrench & 14 mm wrench to tighten.
Photo 28 shows the top of the strut.
37. Remove hub bearing from stock knuckle using a 17mm wrench as shown in
Photo 29. Remove seal and install seal
into knuckle.
38. Install bearing assemble into new knuckle Take care not to damage seals.
See Photo 30. Tighten using a 17mm
wrench.
Photo 25
Photo 26
Photo 27
Photo 29
Photo 30
Photo 28