4 ptz control (all ch mode), 5 ip device search – Velleman NVR2 User Manual
Page 24
QUICK OPERATION
18
5.4 PTZ Control (All CH mode)
Note: This function is available only for “SUPERVISOR” and “POWER USER”. To know more details,
please refer to “4.4 User Level Creation” at page 12.
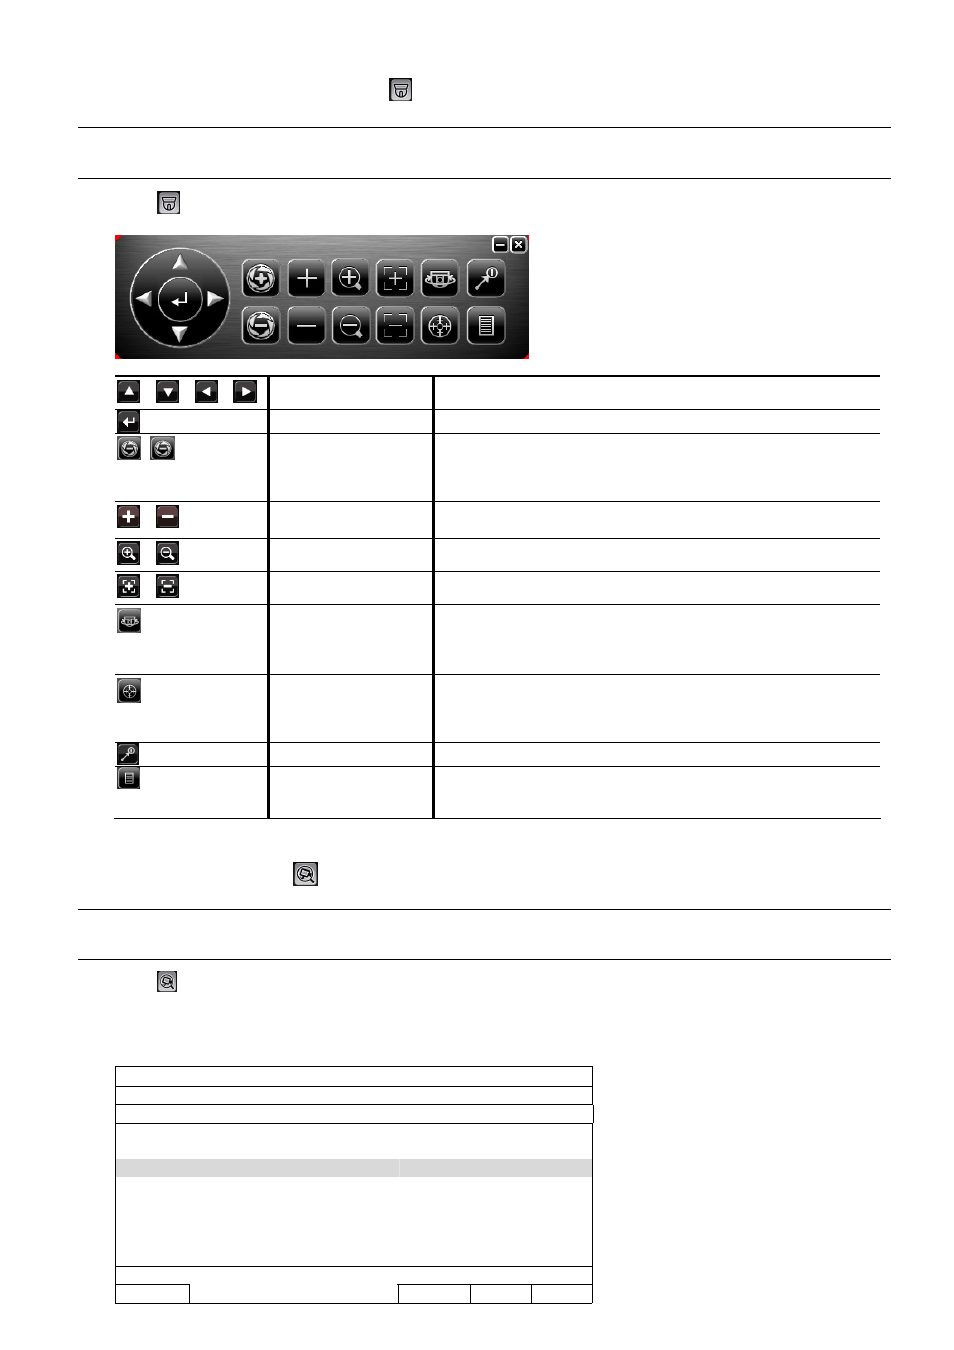
Click
on the quick menu bar to display the panel as follows:
/
/
/
Up / Down / Left / Right
Click to move your selection up / down / left / right, or change settings.
Enter
Click to confirm your selection / enter the menu.
/
Iris + / Iris -
This two buttons are designed for PTZ camera. To know the action after
clicking Iris + and Iris -, please refer to the camera’s user manual. If you
using an analogue camera, paired with Video Server*, make sure the
camera and Video Server support P-D / P-P protocol for PTZ control.
/
Zoom in / out max
Click to zoom in on the image to the largest / zoom out on the image to its
original size.
/
Zoom in / out
Click to zoom in / out the image.
/
Focus near / far
Click to adjust the focus of the image.
Auto pan
Click to activate the auto pan.
Before using it, you need to assign a specific function that will be enabled
when “AUTO” is clicked. For details, please refer to the user manual of
the PTZ camera.
Auto tracking
Click to activate the auto tracking.
Before using it, you need to assign a specific function that will be enabled
when “AUTO” is clicked. For details, please refer to the user manual of
the PTZ camera.
Preset point
Click to enter the PTZ preset point you want to see.
Camera Menu
Click to enter the camera main menu.
For details about each camera menu, please refer to the user manual of
the PTZ camera.
*To know how to configure NVR with video server, please refer to the user manual of video server.
5.5 IP Device Search
Note: This function is available only for “SUPERVISOR”. To know more details, please refer to “4.4 User
Level Creation” at page 12.
Click
(IP Search) to start search IP camera(s) connected in the same network segment as the NVR (i.e.
10.1.1.xx by default).
You’ll see the list of every connected IP camera with its connection status to this NVR and MAC address.
IP SEARCH
IP PORT
MAC STATUS
10.1.1.12
88
00:0e:53:e5:9a:f1
CONNECTED TO CH1
10.1.1.13
88
00:0e:53:a6:91:18
CONNECTED TO CH2
10.1.1.14
88
00:0e:53:a5:9f:a2
UNUSED
10.1.1.15
88
00:0e:53:e1:4e:k5
CONNECTED TO CH3
10.1.1.16
88
00:0e:53:s5:3e:h6
CONNECTED TO CH4
10.1.1.17
88
00:0e:53:e6:4b:26
CONNECTED TO CH5
10.1.1.18
88
00:0e:53:g2:3b:e7 CONNECTED TO CH6
CONNECT SETUP EXIT