Atdec Spacedec SD-SA-DW Installation manual User Manual
Spacedec acrobat, Installation instructions, Swing arm wall
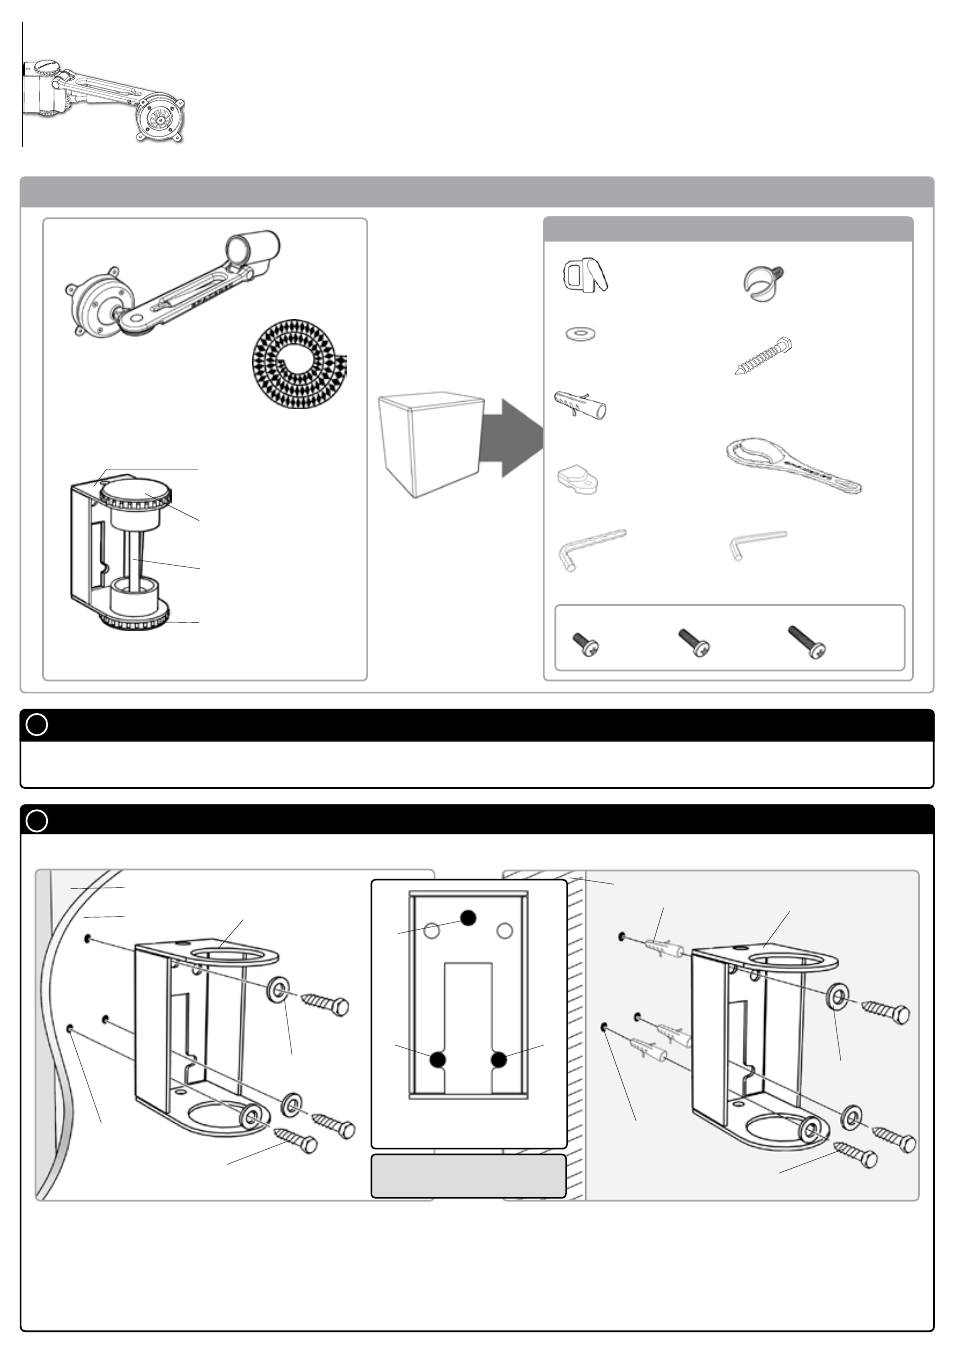
Component Checklist
Installation Instructions
spaCedeC aCROBaT
swing arm wall
swing arm
assembly (x1)
Cable wrap
applicator (x1)
Top Cap Tool (x1)
2.5mm allen
Key (x1)
Cable Clip
(x2)
Extension
Clip (x4)
Component Checklist
a
Check you have received all parts against the Component Checklist above.
Bits Box
Mounting Fasteners
m4x10mm
screw (x4)
m4x12mm
screw (x4)
m4x16mm
screw (x4)
16mm Cable
wrap (x1)
m6 washer (x3)
Direct wall mount
Bracket assembly (x1)
Top Cap
Threaded rod
Bottom Cap
Direct wall mount
Bracket
5mm allen
Key (x1)
nylon anchor
Plugs (x3)
m6x40mm
Coach screw (x3)
direct Wall Mount
B
Timber stud
wall
Direct wall mount
Bracket
4mm Hole
m6 washer
m6 Coach screw
Direct wall mount
Bracket
8mm Hole
m6 washer
m6 Coach screw
B.2.1.
B.1.2.
B.1. For Timber stud Mounting - Use the Direct wall
mount Bracket to mark out the location of the required
three holes (see diagram B.1.1.). Drill 3x4mm holes deep
enough to receive the m6 Coach screws, insert the screws
and secure the bracket to the wall (see diagram B.1.2.)
B.2. For Masonry Mounting - Use the Direct wall mount
Bracket to mark the location of the required three holes (see
diagram B.1.1.). Using an 8mm masonry drill bit, drill 3 holes
41mm deep. insert the nylon anchors and then secure the Bracket
to the wall using the m6 Coach screws (see diagram B.2.1.).
s8 nylon anchor
refer to Ergonomic guidelines overleaf to determine best position to mount wall bracket.
Front View of the Direct wall
mount Bracket
1
2
3
B.1.1.
Note: Ensure Bracket is
mounted Vertically
Brick or Concrete wall