Pinion assembly – Spicer Drive Axles Service Manual G & M User Manual
Page 15
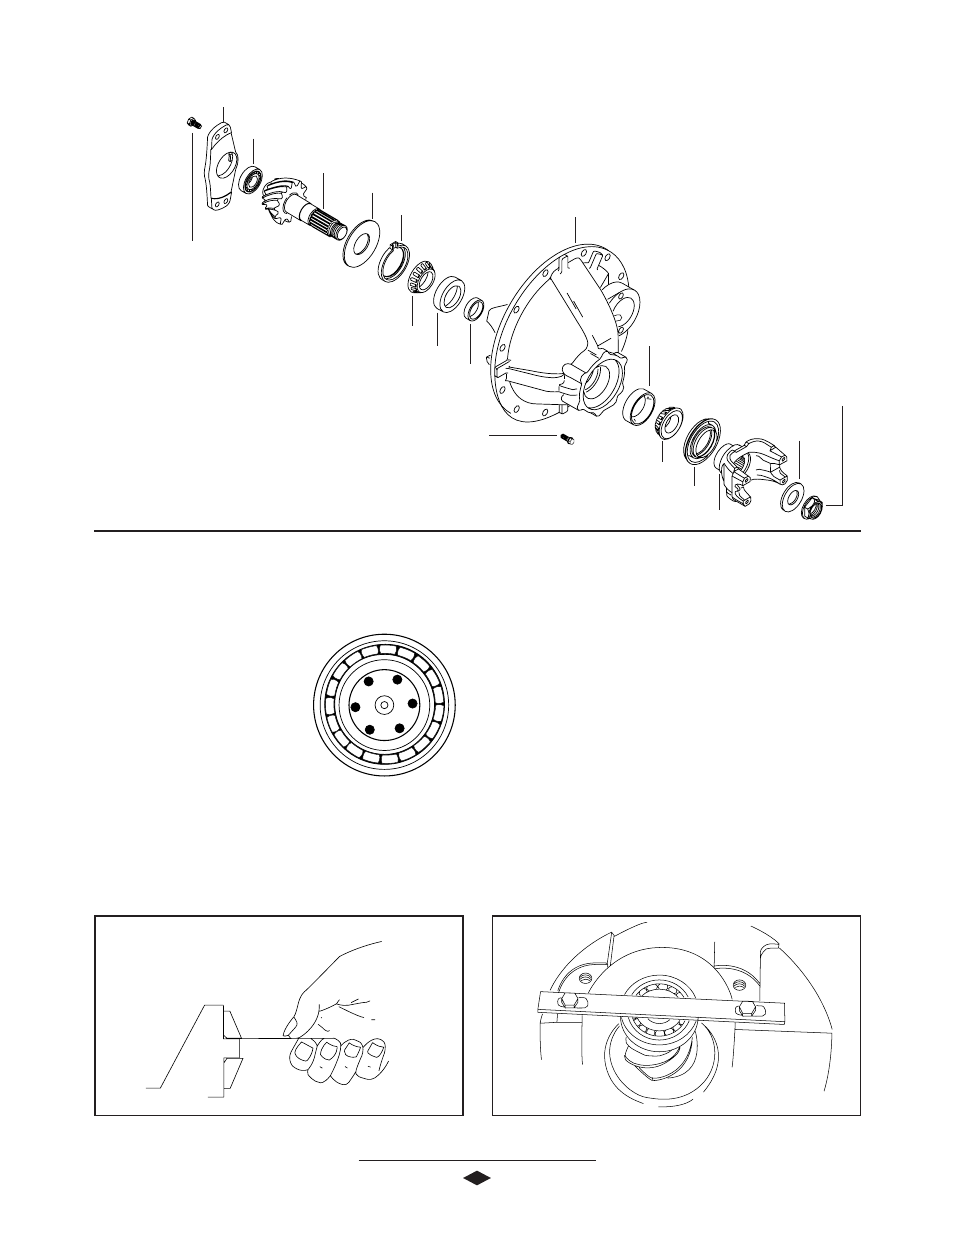
PINION ASSEMBLY
Pinion Bearing Spacer (Selective)
Pinion
Pinion Pilot Bearing Cap
Pinion Pilot Bearing
Retainer Plate Bolt
(See Torque Specifications)
Carrier Housing
Inner Pinion Bearing Cup
Inner Pinion Bearing Cone
Oil Slinger Seal
Pinion Oil Slinger (Selective)
End Yoke Assembly
Pinion Oil Seal
Outer Pinion Bearing Cone
Carrier Mounting Bolt
(See Torque Specifications)
Washer
Flanged Hex Nut
(700-900 Lb-Ft)
(949-1,220 N-m)
Outer Pinion Bearing Cup
13
5. Use a feeler gauge or shim stock to ensure bearing
cups are completly seated in bearing bores (.0015"
approx.). This is necessary for proper pinion
position.
See Figure 8.
6. Install inner pinion oil slinger seal into the carrier
with the tabs locking into the oil channel. Make
sure the flat side of the seal is seated against the
bottom of the bearing cup bore so that the lip side
will be against the pinion oil slinger.
7. Install pinion into carrier using slow steady move-
ment when sliding through inner bearing cup and
seal. The pinion should be restrained from end
movement by using a retaining strap.
See Figure 9.
1. Assemble the proper pinion position spacer, oil
slinger seal and inner bearing cone onto the pinion.
2. Press pinion pilot bearing
on the pinion.
3. Stake pinion pilot bearing
onto pinion in six places,
using a center punch or
equivalent tool.
See
illustration on right.
NOTE: Make sure all carrier bores are free from all nicks,
dirt, or any other contamination.
4. Install the inner and outer bearing cups into the
carrier.
FFFFFigur
igur
igur
igur
igure 8
e 8
e 8
e 8
e 8
FFFFFigur
igur
igur
igur
igure 9
e 9
e 9
e 9
e 9