Installing the exasan a12s2-ps, 1 installing the system, 1 installing disk drives – Accusys ExaSAN A12S2-PS User Manual
Page 31: Installing the system, Installing disk drives
3. Installation
User Guide
Page 3-1
3. Installing the ExaSAN A12S2-PS
Follow the steps in this chapter to prepare your ExaSAN A12S2-PS system for installation.
3.1 Installing the System
Follow the instructions in this section to hook up all your hardware components of the
ExaSAN A12S2-PS system. Do not turn the power of any individual component on until
instructed. When all components are properly connected, follow the instructions in
section 3.3.1 “Powering On” to turn the components on in the prescribed order.
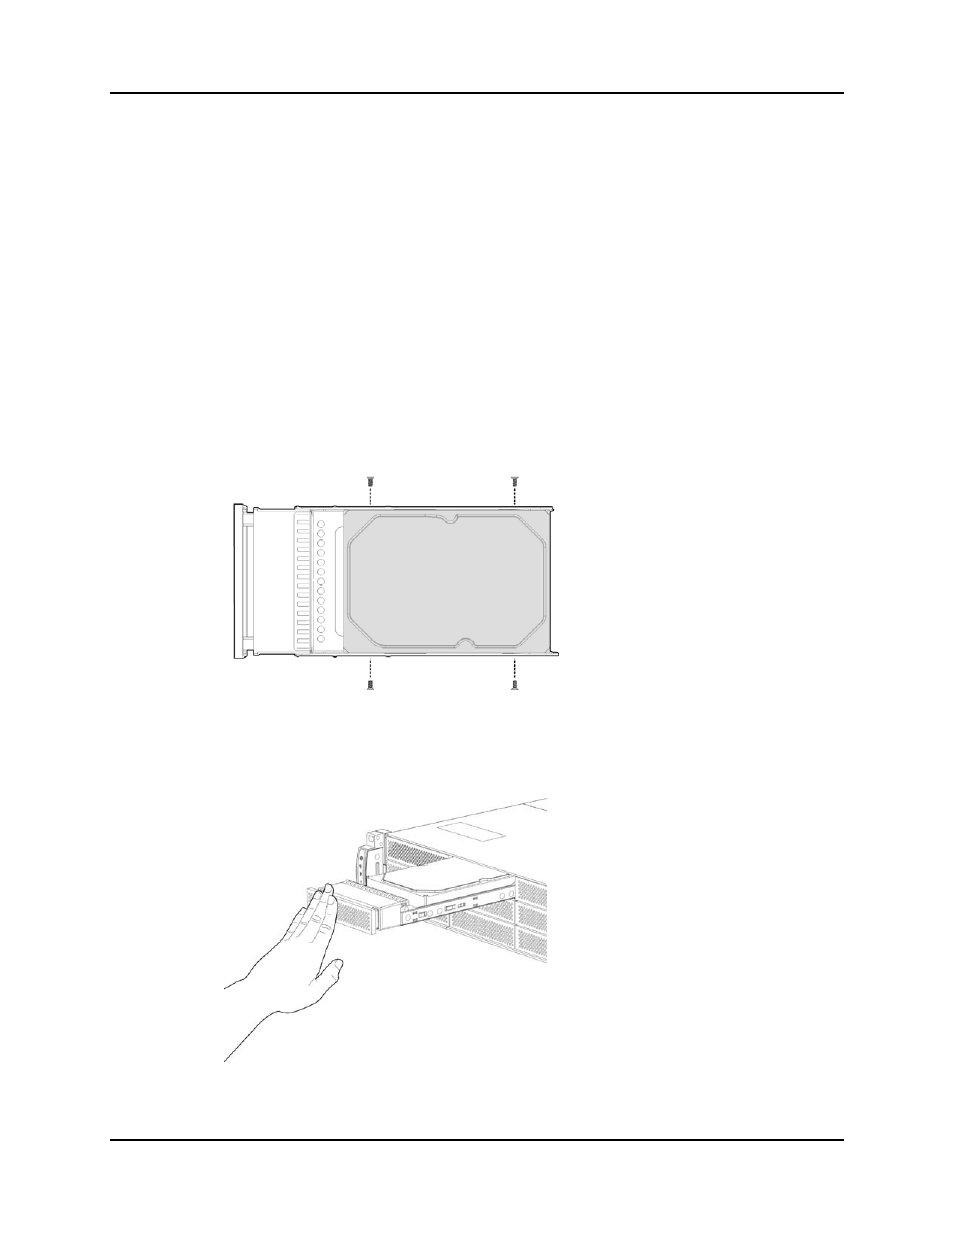
3.1.1 Installing Disk Drives
Follow the steps below to install your HDDs. Refer to the applicable RAID disk system
User’s Guide and Quick Start Guide for additional information.
1. With the connectors facing outward, insert the HDD into the disk tray.
2. Slide the HDD outward until the connectors align with the edge of the disk tray.
3. Secure the HDD to the disk tray with two screws on each side.
4. Slide the disk tray into the disk bays on the front of the chassis.