Xerox DOCUCOLOR 12 User Manual
Page 169
DOCUCOLOR 12 USER GUIDE
7–13
OUTPUT FORMATS
1
2
3
4
5
6
7
1
Touch the Transparency Separators icon on the
Output Formats tab to display the Transparency
Separators screen.
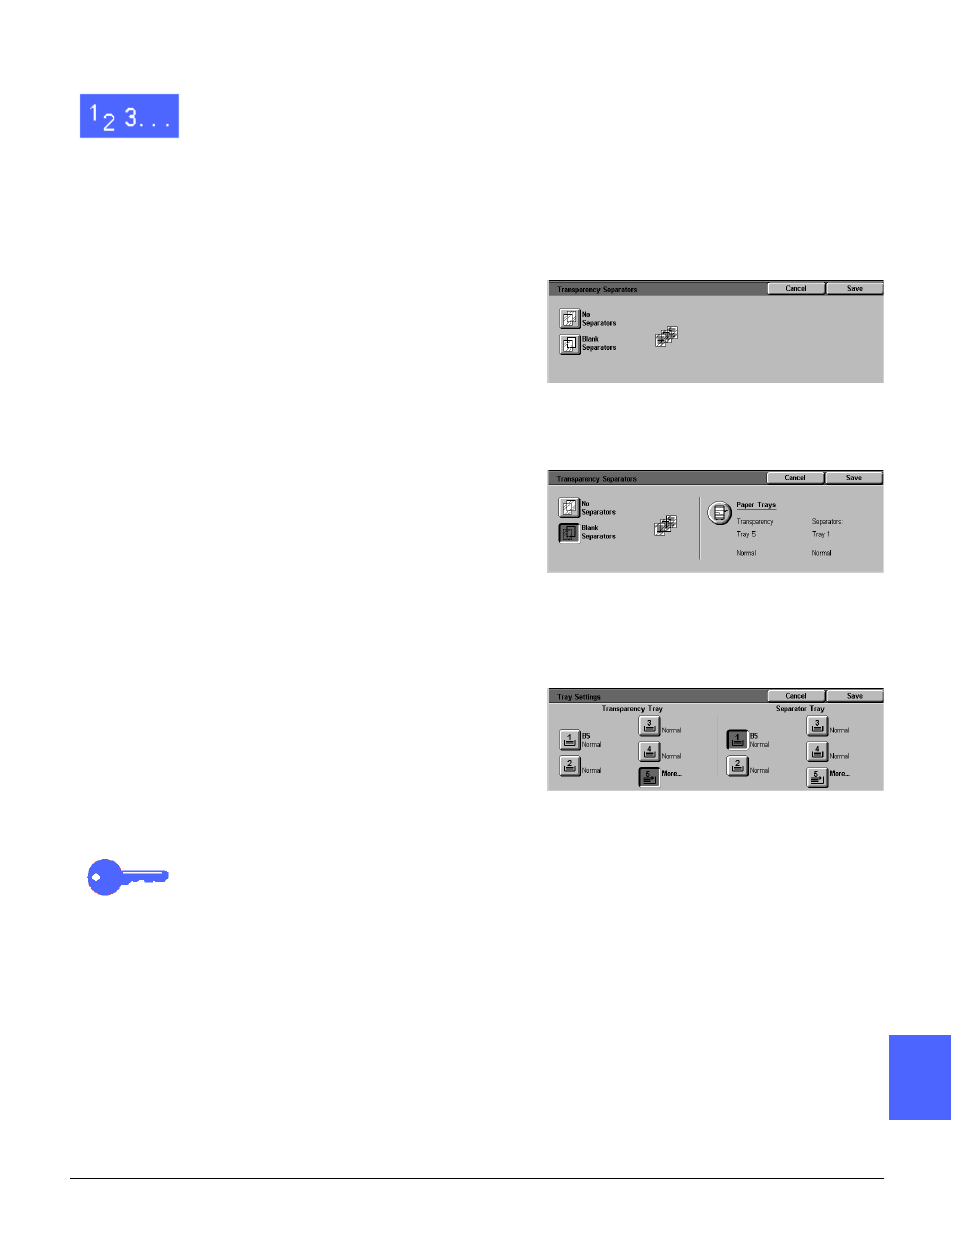
2
Touch one of the following options:
•
No Separators (Figure 16)
•
Blank Separators
–
Ensure that the Paper Tray listed for the
separators is holding the correct size and
type of paper.
–
If you need to make changes to the
separator paper tray, touch the copier/
printer icon in the Paper Trays area
(Figure 17) to display the Tray Settings
screen. Notice that only Paper Tray 5 is
selectable as the transparency tray.
–
You may have to touch the Tray 5 icon
and select a Paper Type (Transparency)
and size before the system allows you to
save these values and select a Separator
Tray.
–
Under Separator Tray (Figure 18), select
the paper tray to use as a source for the
separators.
–
Touch Save to return to the Transparency
Separators screen.
3
Touch Save to display the Output Formats tab.
KEY POINT: If you load transparencies into Tray
5, it is automatically set to transparencies. The
Tray 5 window does not pop up like it does when
separators are selected.
Figure 16: Transparency Separators screen
with No Separators selected
Figure 17: Transparency Separators screen
with Blank Separators selected
Figure 18: Separator Tray screen