Replacing the lamp, 2 prepare a new lamp, 8 gently turn the projector right-side up – VIEWSONIC PJ751 User Manual
Page 33
30
ViewSonic PJ751
Replacing the Lamp
All projector lamps will burn out eventually. If used for long periods of time, the image could
become darkened, and the color and contrast could be impacted as well. We recommend that you
replace your lamps early. If the LAMP indicator turns red, it is a caution signal that the lamp needs to
be replaced.
NOTE:
The LAMP indicator is also red when the lamp unit reaches high temperature. Before replacing the
lamp, switch power OFF, wait approximately 20 minutes, then switch the power ON again. If the
LAMP indicator is still red, replace the lamp.
ATTENTION
• Ensure that the screws are screwed in firmly. Loose screws could result in damage or injury.
• Do not turn on with lamp cover removed.
• Do not reset the lamp timer without replacing the lamp. Always reset the lamp timer when the
lamp is replaced.
1 Switch the projector OFF, remove the power
cord from the power outlet, then wait at least
45 minutes for the unit to cool.
2 Prepare a new lamp.
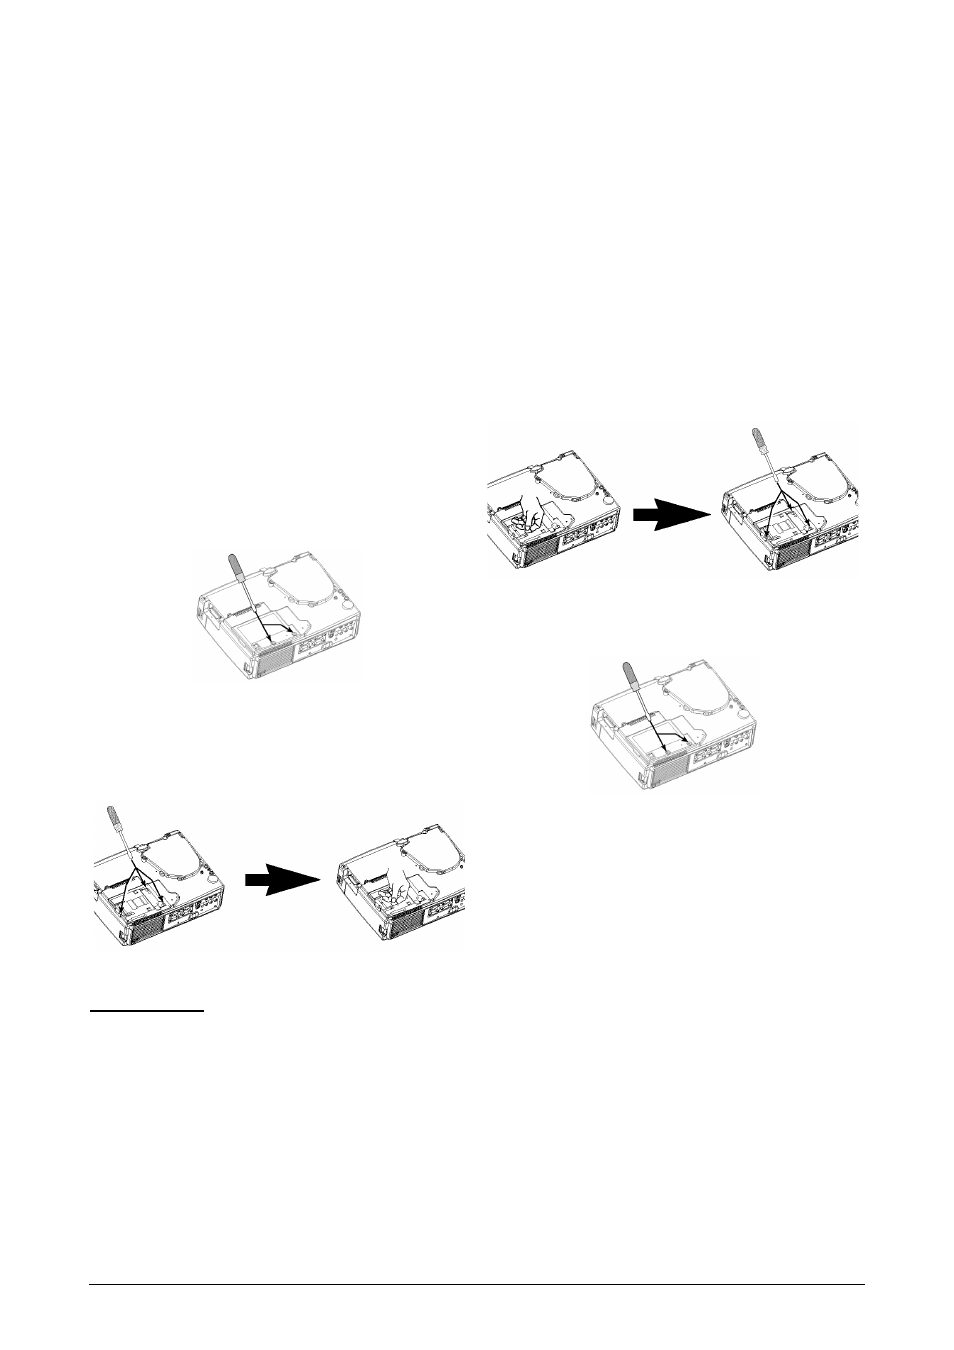
3 Check that the projector has cooled suffi-
ciently, then gently turn it upside down.
4 Loosen the screw as shown in the diagram,
then remove the lamp cover
5 Loosen the two screws, then gently remove
the lamp while holding the grips. Touching
the inside of the lamp case cavity may result
in uneven coloring.
6 Install the new lamp then tighten the two
screws firmly. Also steadily push the oppo-
site side of the screwed lamp assembly into
the cavity.
7 Replace the lamp cover in position then
tighten the screw firmly.
8 Gently turn the projector right-side up.