No signal menu – VIEWSONIC PJ1065 User Manual
Page 18
16
ViewSonic PJ1065
No Signal Menu
The same adjustments and settings are available as with the Image and
Options menus when the MENU button is pressed during display of the
“NO INPUT IS DETECTED ON***”or “SYNC IS OUT OF RANGE
ON***”message while no signal is received.
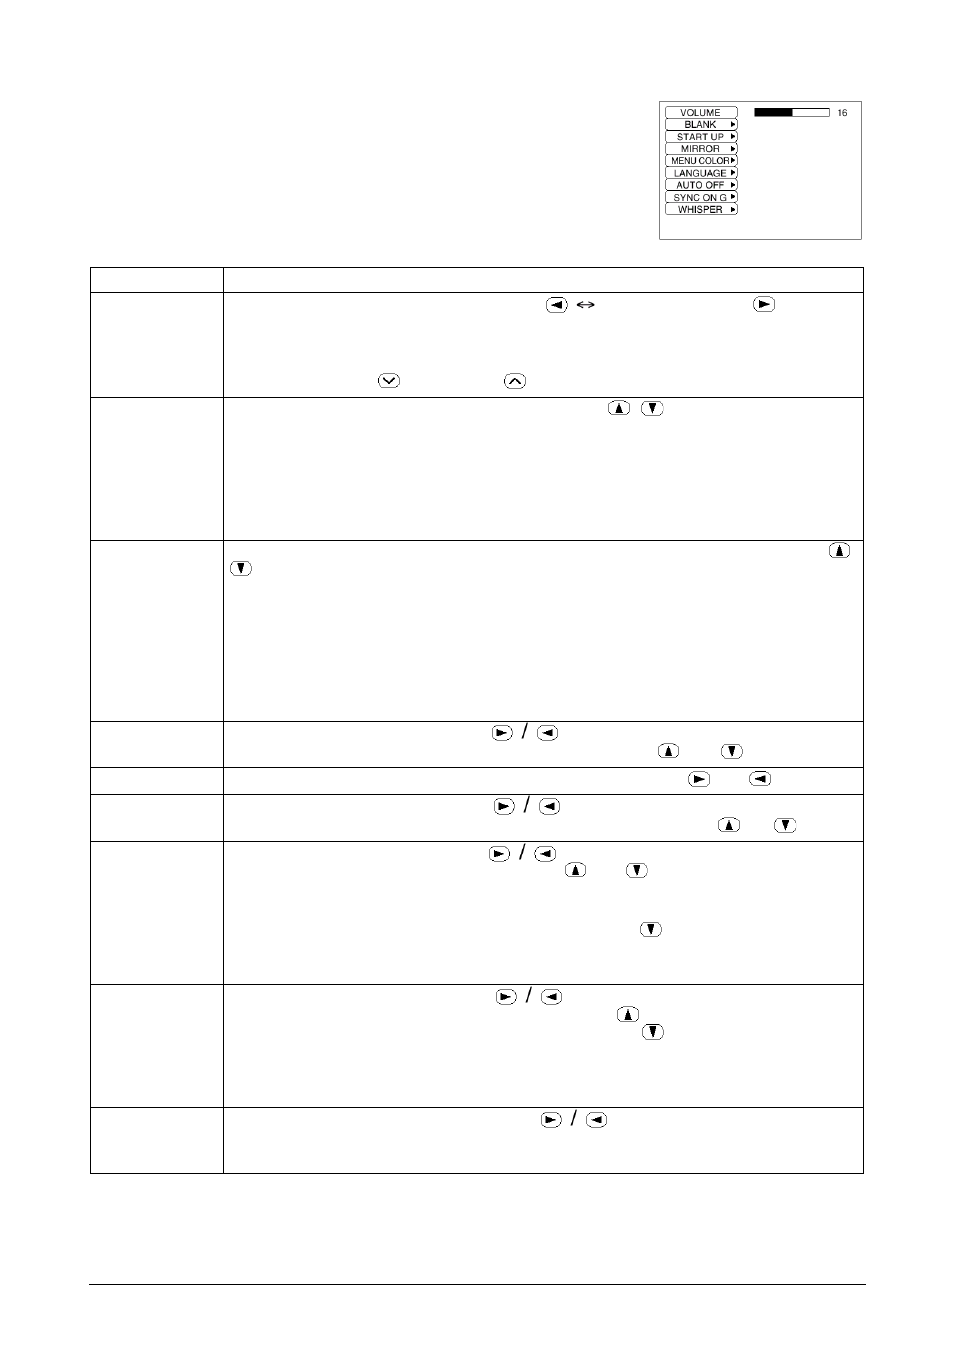
Table 8: No Signal Menu
Item
Description
VOLUME
Volume Adjustment: Reduce VOLUME Increase VOLUME
• When this function is used, audio input is automatically switched to video. The
audio input can be switched by moving the DISK PAD left and right during the
display of the volume adjustment bar. The volume adjustment bar is displayed by
pressing VOLUME or VOLUME button.
BLANK
Select Blank Screen: Select the screen with the / button.The selected one
(MyScreen, ORIGINAL or one colors) is displayed when the BLANK mode is ON.
MyScreen is a mode that the customer-customized screen is displayed. This is
the blue screen at the factory setting. Refer to the description of MyScreen below.
ORIGINAL is a mode that the factory fixed screen is displayed.
• When MyScreen or ORIGINAL is selected, the screen is going blank after
several minutes.
START UP
Select Start Up Screen:Select the screen in case of no signal input with the /
button. The selected one (MyScreen, ORIGINAL or TURN OFF) is displayed
when no signal is input
MyScreen is a mode that the customer-customized screen is displayed. This is
the blue screen at the factory setting. Refer to the description of MyScreen below.
ORIGINAL is a mode that the factory fixed screen is displayed.
TURN OFF displays the blue screen.
• When MyScreen or ORIGINAL is selected, the screen is going blank after
several minutes.
MIRROR
Operation Start/Stop: Press the button.
Select Mirror Status: Select the mirror status with the and buttons.
MENU COLOR Select Menu Background Color: Select the color with the and buttons.
LANGUAGE
Operation Start/Stop: Press the button.
Select Menu Display Language: Select the language with the and buttons.
AUTO OFF
Operation start/stop: Press the button.
Set AUTO OFF: Set 1-99 minutes with the and buttons. The system
automatically enters the standby mode when a signal is not received for the set
time.
Clear AUTO OFF: Select the STOP (0 min.) with the button. When STOP is
selected the system does not enter the standby mode even if no signal is
received.
SYNC ON G
Operation Start/Stop: Press the button.
SYNC ON G Valid: Select the TURN ON with the button.
SYNC ON G Invalid: Select the TURN OFF with the button.
• May not be displayed correctly with some input signals when the SYNC ON G is
valid. In such cases, remove the signal connector so that no signal is received,
set the SYNC ON G to invalid, and reconnect the signal.
WHISPER
Set / Clear WHISPER Mode: Press the button. When WHISPER is
selected, the WHISPER mode is active. In the WHISPER mode, acoustic noise
level from the unit is reduced, and brightness level on screen is a little lower.