Installation, Configuration, 2 rackmounting the netcommander kvm – Tripp Lite NetCommander B072-016-1 User Manual
Page 4: 3 pre-installation guidelines, Continued), 1 rackmount considerations, 2 back panel
4
5. Installation
4
5.2 Rackmounting the NetCommander KVM
Use the L-shaped brackets and screws provided to mount the KVM in a server rack as
illustrated below.
Figure 5.2 Connecting the L-shaped bracket
Insert screws to
connect to rack
Insert screws to
connect to Switch
side panel
Switch off all computers
•
Ensure that the cables are not close to any sources of electrical noise interference such as fluorescent
•
lights, HVAC systems or motors
Ensure that the distance between any computer and the KVM switch does not exceed 33 ft.
•
Shut down all PS/2 computers. If you plug the keyboard and mouse connectors into an active PC, they
•
may not work.
5.3 Pre-Installation Guidelines
4. Configuration
(continued)
The ambient operating temperature in the rack may be an issue and is dependent upon the rack load and
ventilation. When installing in a closed or multi-unit rack assembly, make sure that the temperature will
not exceed the maximum rated ambient temperature. (32º to 104º F)
Ensure that the airflow within the rack is not compromised.
When connecting the equipment to the supply circuit, consider the effect that overloading of circuits
might have on over-current protection and supply wiring.
Reliable grounding of rack-mounted equipment should be maintained.
To protect against circuit overloading you should connect your Console KVM and attached computers/
servers to a Tripp Lite SmartPro® or SmartOnline® UPS System.
5.1 Rackmount Considerations
5.1.1 Ambient Operating Temperature
5.1.2 Airflow
5.1.3 Circuit Overloading
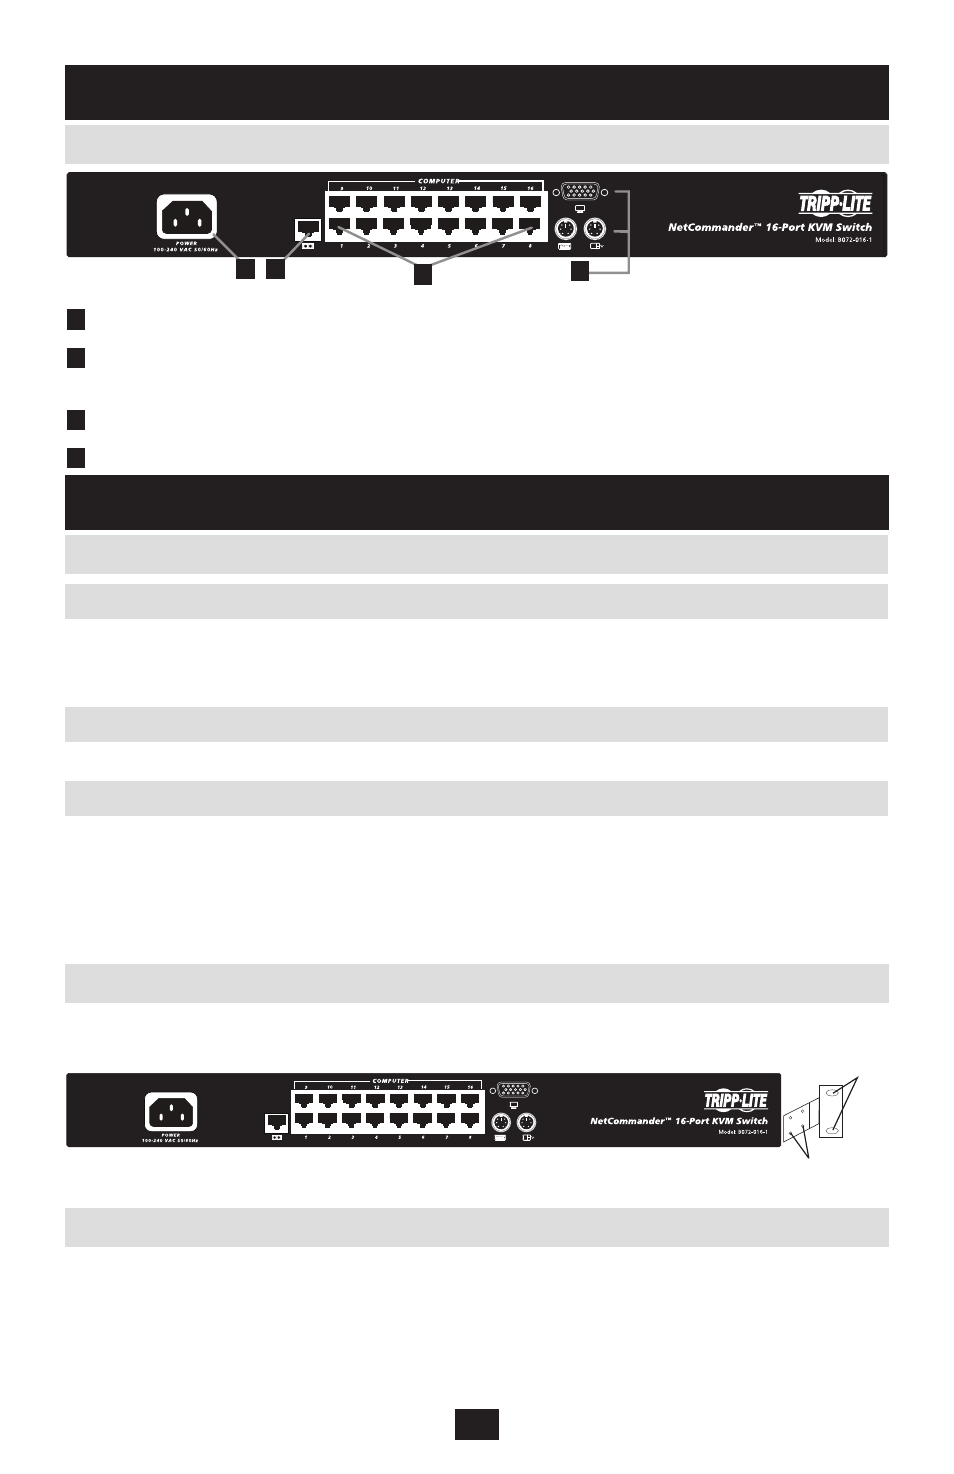
Figure 4.2 B072-016-1 NetCommander KVM rear panel
4.2 Back Panel
1
Power Socket: The power cord plugs in here from the AC power source.
2
Firmware Upgrade Port: Insert the included firmware upgrade cable here to download firmware
upgrade data.
3
CPU Port Section: Insert the Cat5/5e/6 cables from each PC or server.
4
KVM Console Ports: Your keyboard, monitor and mouse plug in here.
1 2
3
4