Recording an external source, Recording, Dvd-ram dvd-rw dvd-r – Toshiba D-R1SU User Manual
Page 36: Input3 (l-3) external equipment
36
VHF / UHF
RF IN
(FROM ANT.)
R
L
VIDEO
S-VIDEO
R
L
VIDEO
S-VIDEO
R
COAXIAL
OPTICAL
L
VIDEO
R
L
VIDEO
S-VIDEO
S-VIDEO
RF OUT
(TO TV)
Y
P
B
P
R
COMPONENT OUTPUT
INPUT1
OUTPUT1
OUTPUT2
INPUT3
DIGITAL AUDIO OUTPUT
BITSTREAM/PCM
DV
DV
S-VIDEO
S-VIDEO VIDEO
VIDEO
L
R
INPUT
INPUT 2
INPUT
INPUT SELECT
SELECT
TIMESLIP
TIMESLIP
ON/ST
ON/STANDBY
ANDBY
CHANNEL
CHANNEL
Recording
DVD-RAM DVD-RW
DVD-R
Recording an external source
You can record programs from connected equipment on a DVD-RAM/R/RW disc.
Preparation
• Load a DVD-RAM/R/RW into the recorder.
– Load a disc which has sufficient remaining space to record the program.
– Make sure the loaded disc is not write-protected.
Notes
• The audio format of the recorder does not support DVD audio discs, etc. If equipment that can play DVD audio or other high
resolution discs is connected to this recorder, this unit records audio that is within the frequency range of regular audio CD’s.
Refer to the instructions of the connected equipment.
• When you record an external source onto a DVD-R/RW disc, set the connected equipment to output sound you want to
record (if selectable such as multiplex broadcasting), as the recorder records sounds of external source in stereo onto a
DVD-R/RW disc, neglecting the setting of “DVD Video Compatibility” (
page 130).
• DVD-R/RW discs cannot record contents with copy restriction signal embedded (copy-protected or copy onde contents),
DVD-RAM discs can record copy once contents.
• Some satellite programs via a connected tuner may contain both 4:3 pictures and 16:9 pictures. DVD-R/RW discs cannot
record such contents, under restriction of DVD-Video standard. To record them, use DVD-RAM discs.
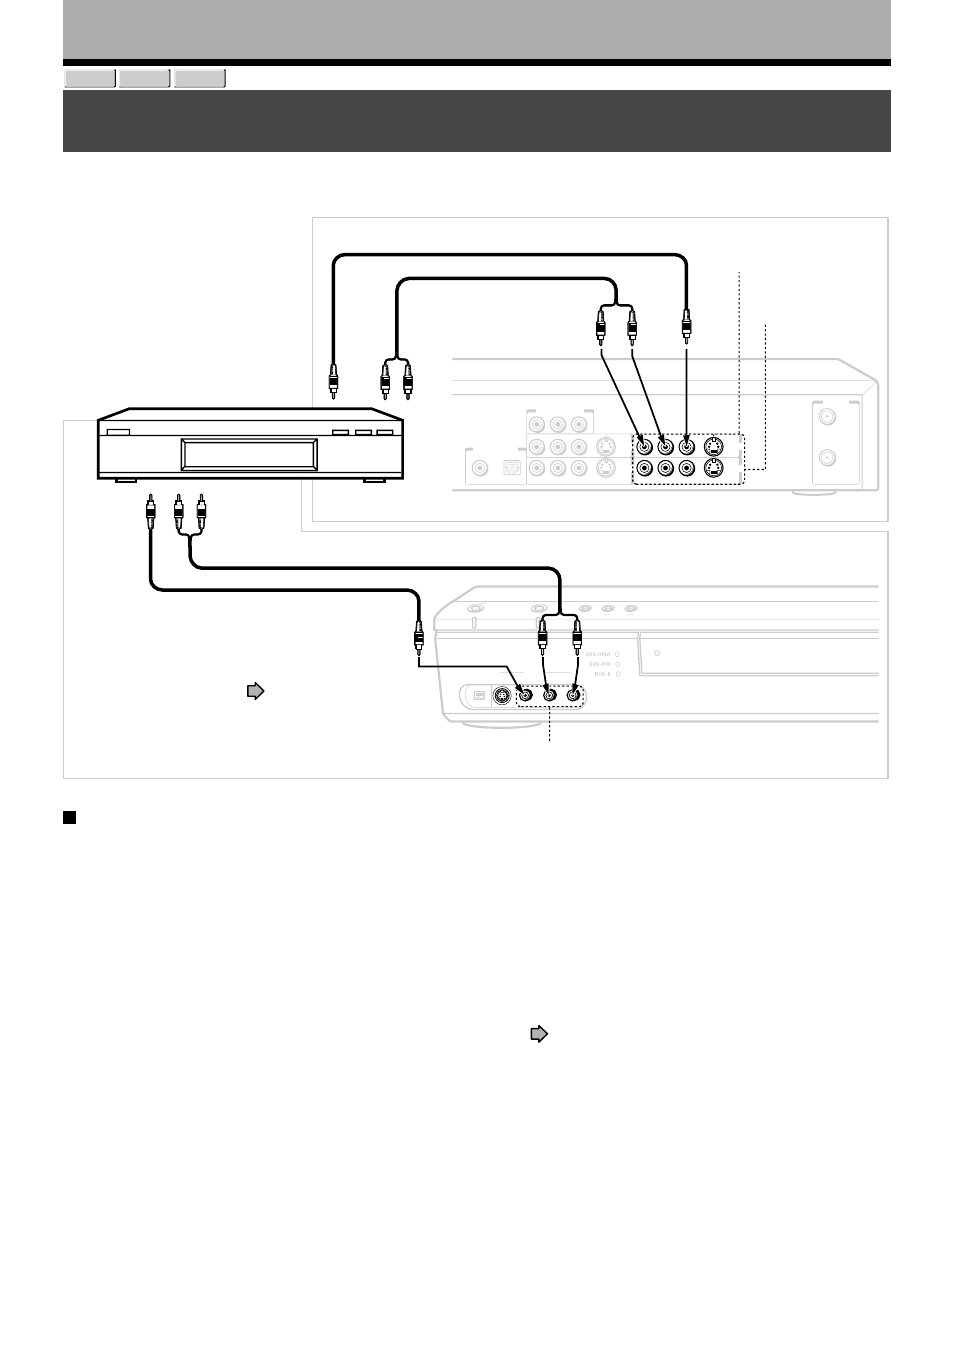
Connect according to A or B.
A: Using the input jacks on the rear of the recorder
B: Using the input jacks on the front of the recorder
• To record a clearer picture,
use the S video jack.
To video
output jack
To audio
output jacks
Audio cable
Video cable
Rear of the
recorder
INPUT1 (L-1)
Yellow
White
Red
INPUT 2 (L-2)
Yellow
White
Red
Video cable
Audio cable
To video
output
jack
To audio
output jack
For recording from a digital video
camera recorder, etc.)
connected to the DV input connector
on the front panel, see
page 108,
“DV Synchro recording.”
INPUT3 (L-3)
External equipment