Start-up steps, Introduction, Step 1: enter the vehicle information – OTC Wireless switch/hub User Manual
Page 23
13
Introduction
ABS / Air Bag 2004 User Guide
Chapter 2: Start-up Steps
2: Start-up Steps
Introduction
All vehicle setups require a specific cable connection
to the vehicle Data Link Connector (DLC). To deter-
mine the specific cable required for a vehicle, you must
first enter the vehicle information. After you have done
this, the screen displays the specific cable information
for the vehicle. You then use this information to connect
the correct cable to the DLC and proceed with the vehi-
cle diagnostics.
This chapter includes the following general steps to get
you started:
1
Enter the vehicle information to determine the correct
cable required.
2
Connect the required cable.
3
Select the diagnostic function you want to perform.
Step 1: Enter the Vehicle
Information
Use the following steps to enter vehicle information and
to determine which cable to use for the communication
connection between the NGIS tool and the vehicle’s
electronic control unit (ECU).
To enter the vehicle information, follow these steps:
Note: Before doing these steps, make sure the NGIS tool’s
battery is charged.
1
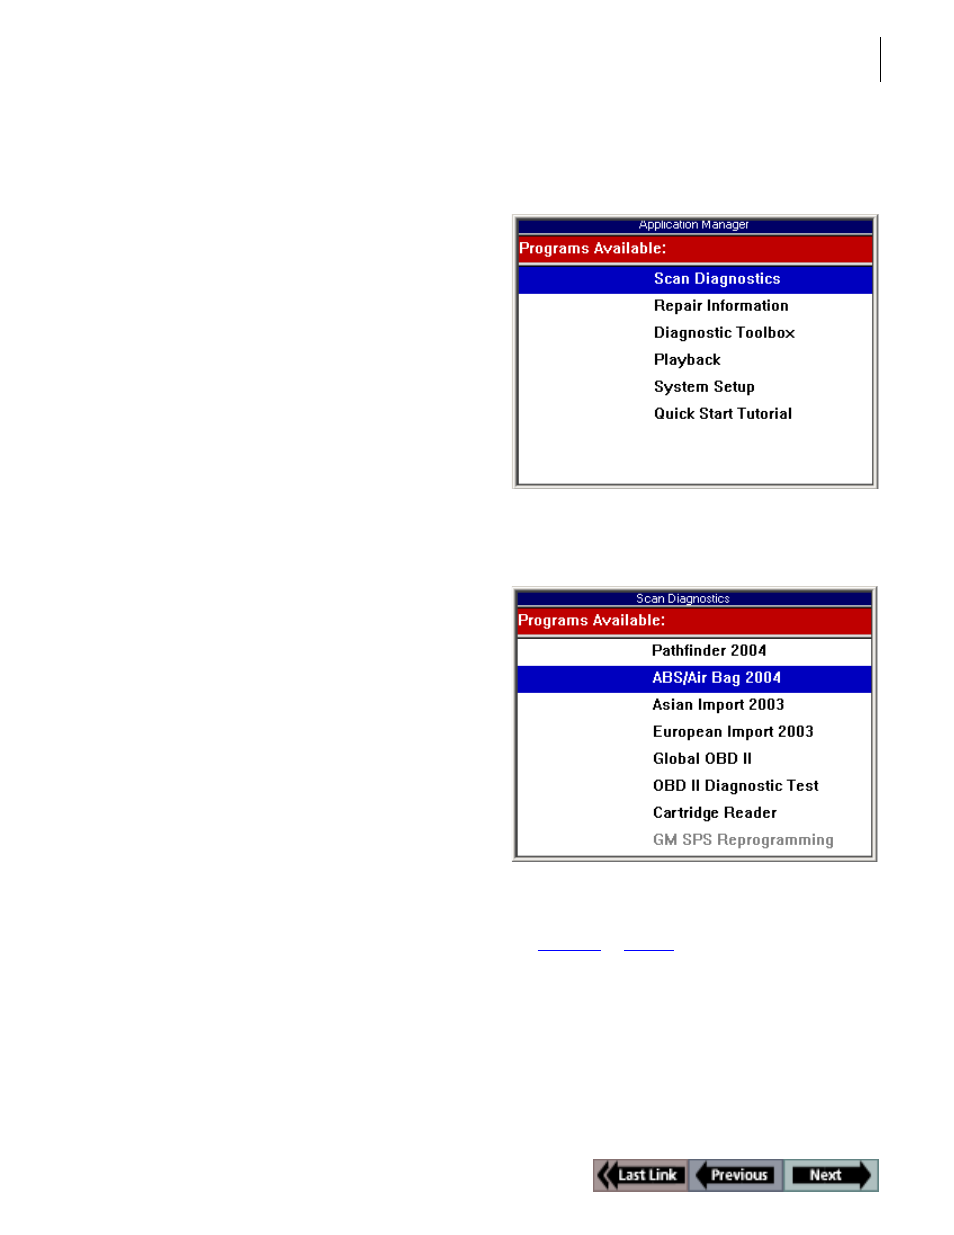
Press the NGIS tool’s power button to turn the tool on.
This displays the Application Manager screen.
Figure 2.1: Application Manager Screen
2
Select Scan Diagnostics and press the ENTER key. This
displays the Scan Diagnostics screen.
Figure 2.2: Scan Diagnostics Screen
3
Select ABS / Air Bag 2004 and press the ENTER key.
This displays the first Vehicle Information screen
(
Figure 2.3
on
page 14
).