36 input setup – Onkyo TX-DS989 User Manual
Page 36
36
Input Setup
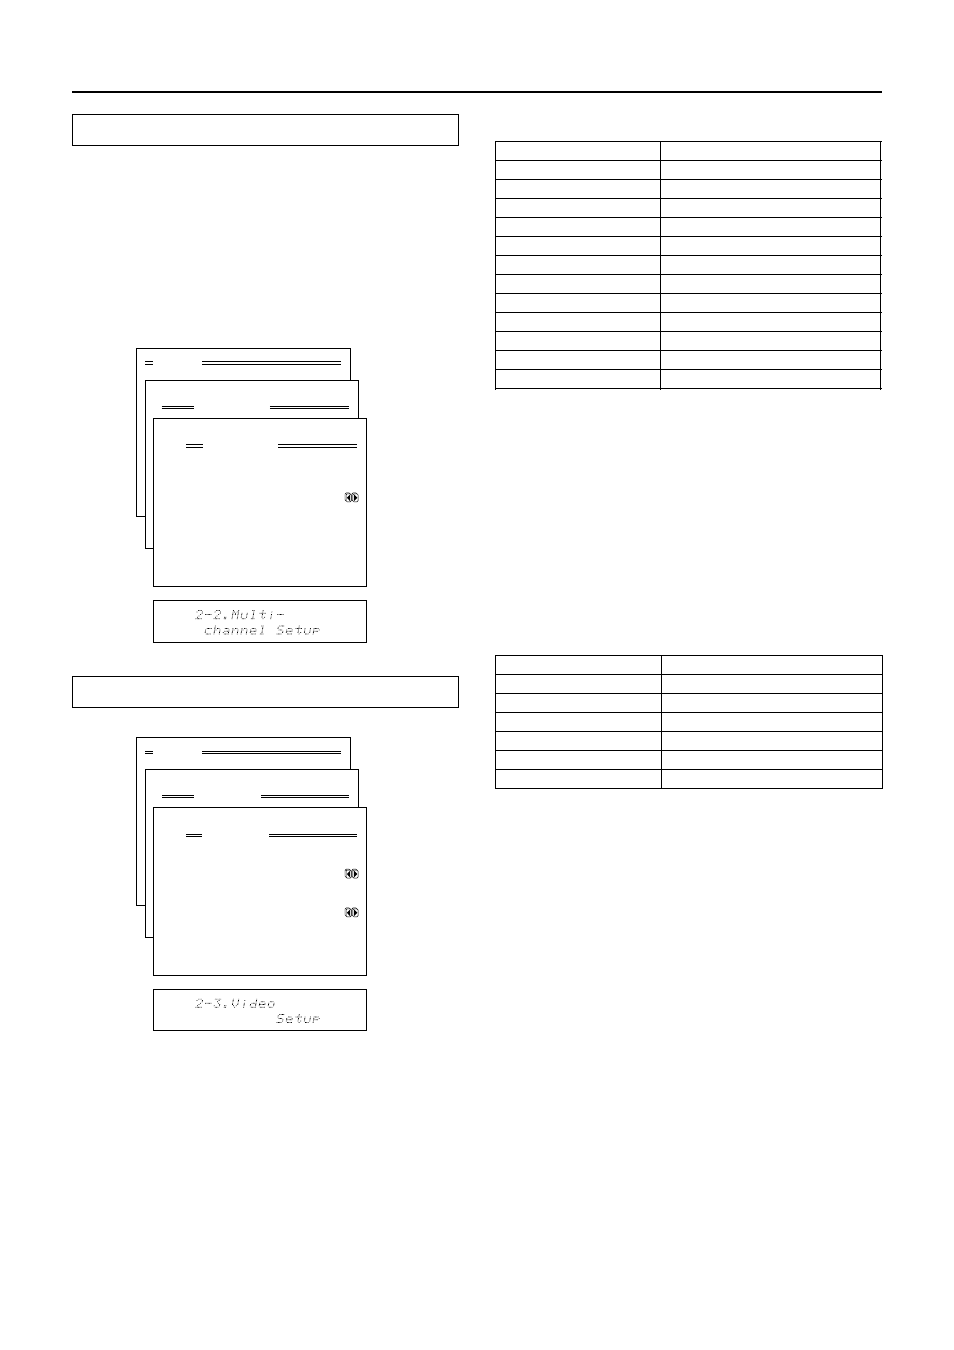
2-2. Multichannel Setup sub-menu
This sub-menu will not appear if AM, FM, or PHONO is selected
at the front panel for the input source. This setting is normally set
to “No,” and only needs to be changed to “Yes” if a DVD player,
MPEG decoder, or other component that has a multi channel port
is connected to the MULTI CHANNEL INPUT port for 5.1-
channel or 7.1-channel audio. For example, if a DVD player is
connected to the MULTI CHANNEL INPUT port, then select
DVD at the front panel as the input source, bring up this sub-menu,
and select “Yes” for the Multichannel setting. When “Yes” is
selected, the audio from the MULTI CHANNEL INPUT is given
preference.
Menu
1.Speaker Setup
2.Input Setup
3.Listening Mode Setup
4.Preference
5.Zone2 OSD Setup
6.About
Select: Exit:|EXIT|
Enter:|ENTER| Quit:|OSD|
1
2
3
4
5
6
7
8
9
0
1
2
123456789012345678901234
2.Input Setup
Input:DVD
1.Digital Setup
2.Multichannel Setup
3.Video Setup
4.Listening Mode Preset
5.Sound Effect
6.Character Input
7.Miscellaneous Setup
Quit:|OSD|
1
2
3
4
5
6
7
8
9
0
1
2
123456789012345678901234
2-2.Multichannel Setup
Input:DVD
a.Multichannel :Yes
Quit:|OSD|
2-3. Video Setup sub-menu
Menu
1.Speaker Setup
2.Input Setup
3.Listening Mode Setup
4.Preference
5.Zone2 OSD Setup
6.About
Select: Exit:|EXIT|
Enter:|ENTER| Quit:|OSD|
1
2
3
4
5
6
7
8
9
0
1
2
123456789012345678901234
2.Input Setup
Input:CD
1.Digital Setup
2.MulSetup
3.Video Setup
4.Listening Mode Preset
5.Sound Effect
6.Character Input
7.Miscellaneous Setup
Quit:|OSD|
1
2
3
4
5
6
7
8
9
0
1
2
123456789012345678901234
2-3.Video Setup
Input:CD
a.Video
:VIDEO1
b.Component Video
:VIDEO1
Quit:|OSD|
a. Video
This setting allows you to match the audio from one component
with the video from another. Therefore, you can set a video source
to be displayed while the audio from another input source is heard.
For example, this allows you to play the music from a compact
disc, while displaying the picture from a video cassette player or
other video source. Since the settings in this sub-menu are also
linked to the input source that is currently selected at the front
panel, a different setting can be made for each digital input source.
The default settings are given below.
Input source selected
Video
CD
Last valid
PHONO
Last valid
FM
Last valid
AM
Last valid
TAPE1
Last valid
TAPE2
Last valid
DVD
DVD
VIDEO1
VIDEO1
VIDEO2
VIDEO2
VIDEO3
VIDEO3
VIDEO4
VIDEO4
VIDEO5
VIDEO5
Last valid: When you change to an input source set to “Last
valid,” the video of the input source that you changed from is
continued. For example, if the selected input source is VIDEO
1, and you then change to CD (set to “Last valid”), then the
audio from the CD input is played while the video from
VIDEO 1 continues.
b. Component
If a component is connected to the one of the COMPONENT
VIDEO inputs (1, 2, or 3), then that input must be set here. This
setting will not appear if AM, FM, PHONO, CD, TAPE1, or
TAPE2 is selected as the input source.
The default settings are given below.
Input source selected
Setting
DVD
COMPONENT VIDEO 1
VIDEO1
----
VIDEO2
COMPONENT VIDEO 2
VIDEO3
COMPONENT VIDEO 3
VIDEO4
----
VIDEO5
----