Figure 3-22 . image alignment controls, 22. image alignment controls, Pre l iminar y – Runco SIGNATURE CINEMA SC-50D User Manual
Page 60
44
Signature Cinema™ SC-50d/SC-60d Installation/Operation Manual
PRE
L
IMINAR
Y
“Keystoning” usually occurs when the projector is tilted relative to the screen. “Pincushion”
distortion can sometimes occur if the throw distance is very short and/or the projector is
equipped with an anamorphic lens.
To correct keystoning or pincushion distortion:
1.
On the DHD Controller remote control or front panel, press MENU.
2.
Select Calibration from the Main Menu and enter the Calibration Menu passcode.
3.
Select Image Alignment from the Calibration Menu.
4.
Select Corner Alignment to correct a “keystoned” image by adjusting the image
corner positions. Select Midpoint Alignment to correct pincushion distortion by
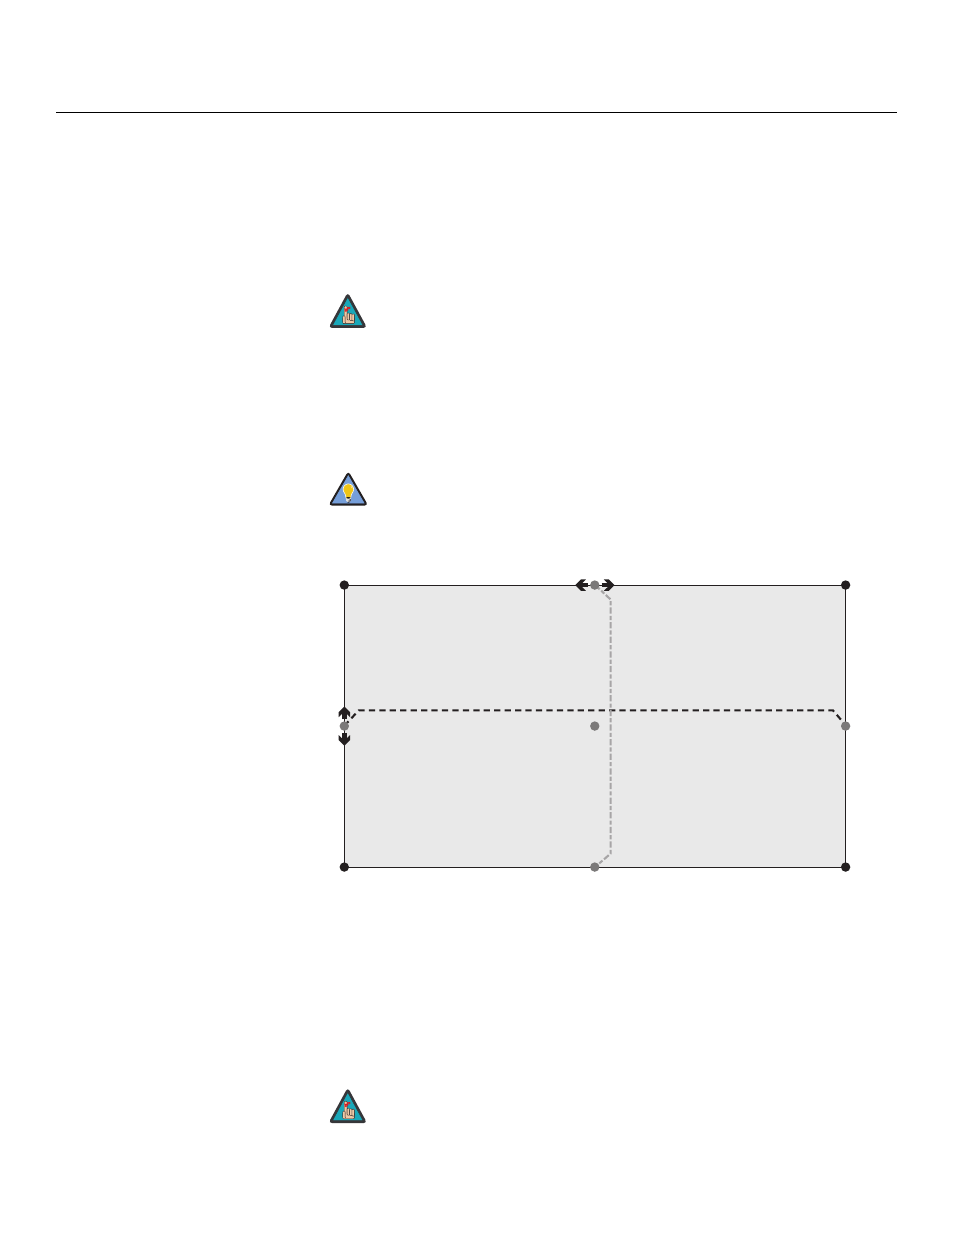
adjusting the image edge mid-points. See Figure 3-22.
Figure 3-22. Image Alignment Controls
You must enter a passcode to access the Calibration menu.
Use the built-in test pattern when adjusting the image corners or
midpoints. To access it, check the Test Pattern box in the Corner
Alignment or Midpoint Alignment menu.
The “Left Middle y” setting also controls the “Right Middle”
y-coordinate. Similarly, the “Top Middle x” setting also controls the
“Bottom Middle” x-coordinate.
Note
Tip
Top Left (x, y)
Left
Middle
(x, y)
Right
Middle
(x)
Bottom Left (x, y)
Top Right (x, y)
Bottom Right (x, y)
Top Middle (x, y)
Bottom Middle (y)
Notes:
1. Bottom Middle x = Top Middle x
2. Right Middle y = Left Middle y
3. Smaller “x” values move a point to the left; larger values move it to the right.
4. Smaller “y” values move a point up; larger values move it down.
Center
(x, y)
Note