Figure 3-8 . extractor fan configurations, 5 installing the optional cinewide lens mount, Raise the feet – Runco SC-1 User Manual
Page 41: Figure 3-9 . adjusting the feet, Installing the optional cinewide lens mount, Iminar, 8. extractor fan configurations, 9. adjusting the feet, Pre l iminar y
Runco SC-1 Owner’s Operating Manual
29
PRE
L
IMINAR
Y
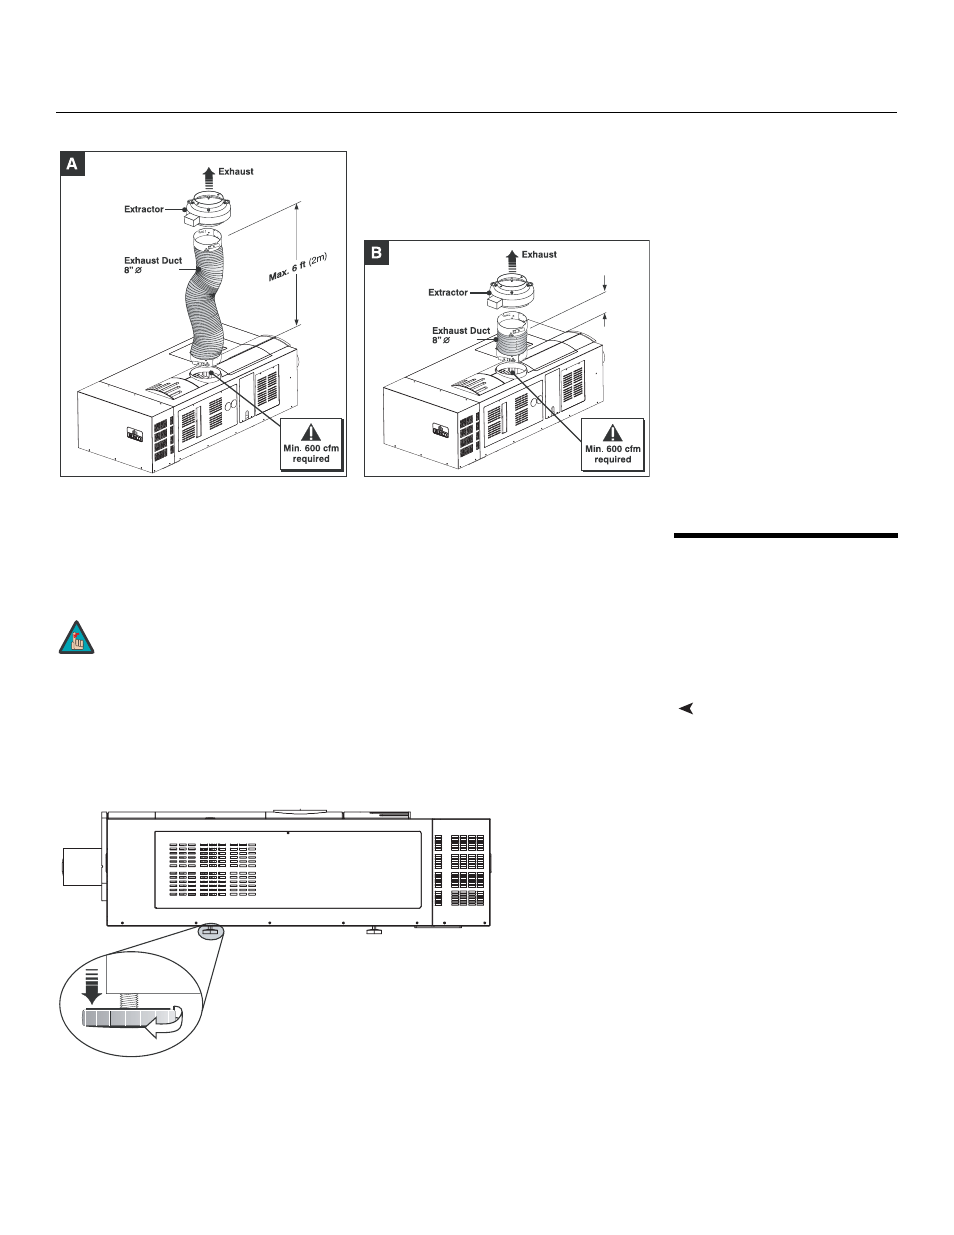
Figure 3-8. Extractor Fan Configurations
3.5
Installing the Optional
CineWide Lens Mount
If you are installing a SC-1 with the optional CineWide with AutoScope system, proceed
as follows to install the anamorphic lens mounting assembly (AutoScope lens motor).
Raise the Feet
Prior to installing the AutoScope lens motor, extend the four feet on the projector by 1/2 to
3/4 of an inch by rotating them counter-clockwise using a crescent wrench; see Figure
3-9. This will allow the projector to lie flat on the mounting surface with the AutoScope
lens motor installed.
Figure 3-9. Adjusting the Feet
Min. 10”
Do not install the CineWide lens yet, only the lens motor. You will
install the CineWide lens after you install the projector and adjust
the primary lens.
Note