Installation, Inst alla tion – Regency Liberty L676 User Manual
Page 31
Regency
®
L676 Direct Vent Gas Fireplace
31
INST
ALLA
TION
LP Conversion Kit Contains:
Qty. Part #
Description
1
910-462
LP Conversion Coil
1
904-573
Cable Tie
1 910-037
LP Pilot Orifi ce
1 904-345
Orifi ce #53 (back)
1 904-241
Orifi ce #56 (front)
1 904-529
Allen Key
1 918-590
LP Conversion Decal
1 908-528
Red Propane Label
1 918-596
Instruction Sheet
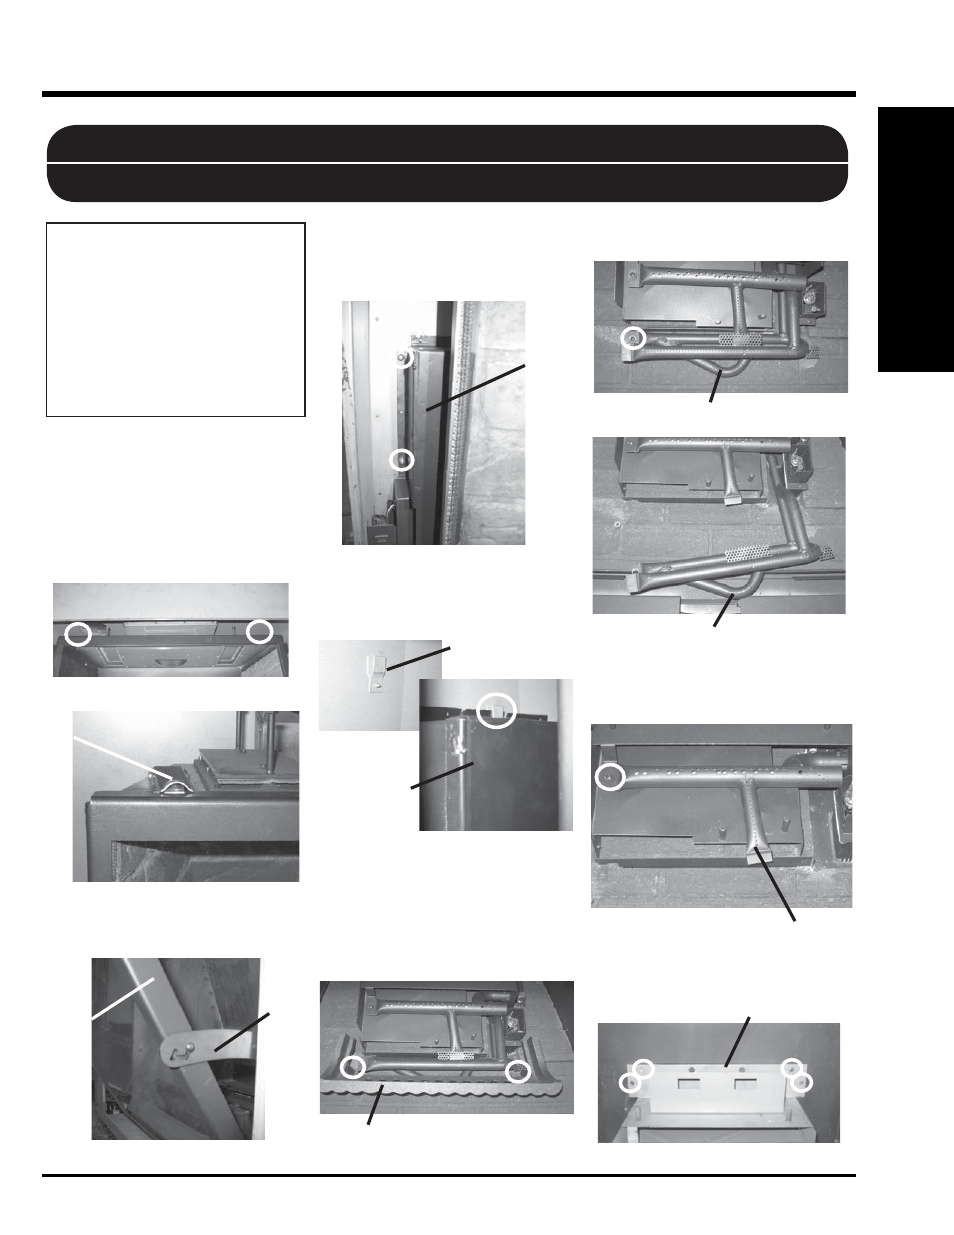
1)
Turn control knob to the OFF position and
shut off the gas supply to the valve.
2)
Remove exterior brick panels, if installed.
3)
Remove the glass door.
a. Release the 2 door latches on the left
and right side at the top of the fi rebox.
b. Swing the door out from the top and
release the hinges on the left and right
side of the door by lifting them up.
Latch
c. Place the door on a soft surface to prevent
scratching.
Hinge
Door
Latch Location
Heat
Shield
4)
Loosen the 2 screws that hold the left side
heat shield in place.
5)
Lift up and pull out the heat shield slightly
to clear the screwheads and then hang it
on the top bracket (located directly above
the heat shield).
Bracket
Heat
Shield
6) Unplug the power source.
7)
Remove the log set, if installed.
8)
Remove interior brick panels, if installed.
9)
Remove the grate by undoing the 2 screws
on the right and left side.
10)
Remove the front burner by removing the
screw.
11)
Remove the back burner by removing the
screw.
12)
Remove the rear log stand by removing
the 4 screws.
Rear Log Stand
THIS CONVERSION MUST BE DONE BY A QUALIFIED GAS FITTER, IF IN DOUBT DO NOT DO THIS CONVERSION!!
LP Conversion instructions for when unit is ALREADY INSTALLED.
Grate
Front Burner
Front Burner Removed
Back Burner
INSTALLATION