Installation, Inst alla tion – Regency Liberty L676 User Manual
Page 30
Regency
®
L676 Direct Vent Gas Fireplace
30
INST
ALLA
TION
17)
Ensure that the new rubber gasket (supplied
with coil) is properly positioned and install
the new modulating pressure regulator as-
sembly to the valve using the screws sup-
plied with the kit. Tighten screws securely.
18)
Install the enclosed identifi cation label to the
valve body where it can be easily seen.
19) Attach the LP conversion decal near or
on top of the serial no. decal.
20)
Replace yellow "Natural Gas" label with red
"Propane" label.
21)
Re-install the right side panel and all
electrical connections to the valve. (2 grey
wires to modulating coil.)
22)
Remove the left side panel by undoing the
8 screws.
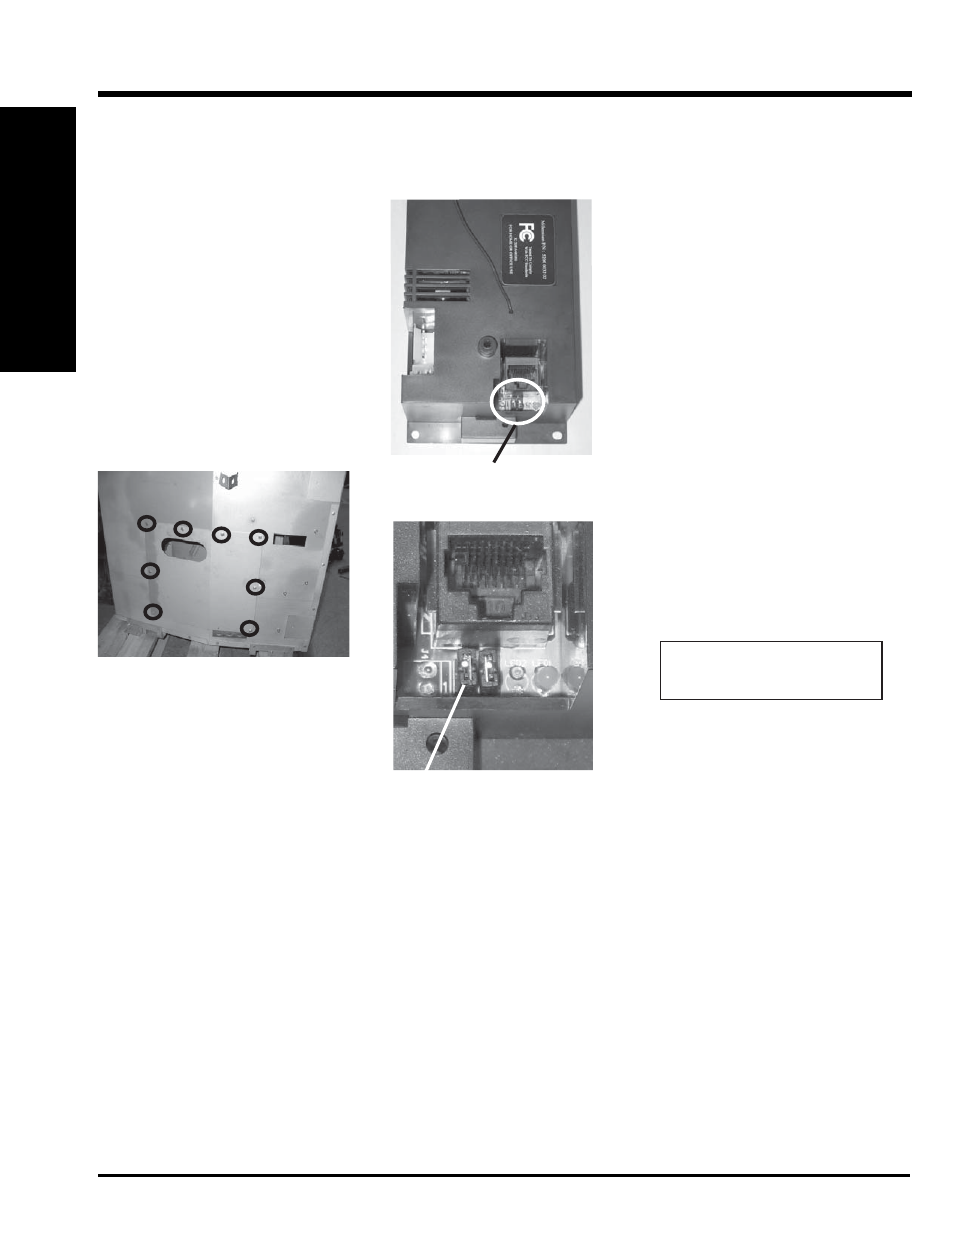
23)
Locate the control box shown below and
remove the J9 jumper using needle nose
pliers.
J9 Jumper Location
24)
Re-install the left side panel.
25)
Re-install the rear log support bracket.
26)
Adjust the burner aeration settings to the LP
settings and install the burners.
Front
Burner 5/16"
Rear
Burner 1/4"
27)
Re-install the grate.
28)
Re-install the glass door.
29)
Re-install the right heat shield.
30)
Continue with completing unit installation.
NOTE:
Once the unit has been installed;
a)
Turn on the gas supply and check for gas
leaks.
b)
Check the inlet (12" WC) and outlet
(10"WC).
c)
Check operation of fl ame control using
the remote control. Refer to FireWizard
operation manual for details.
d)
Check for proper fl ame appearance.
Installer Notice:
This instructions must be left
with
the
appliance.
J9 Jumper
INSTALLATION