Connection examples, Selecting the guitar or bass, 10 preparations to make before performing – Roland GI-20 User Manual
Page 10
10
Preparations to Make Before Performing
Connection Examples
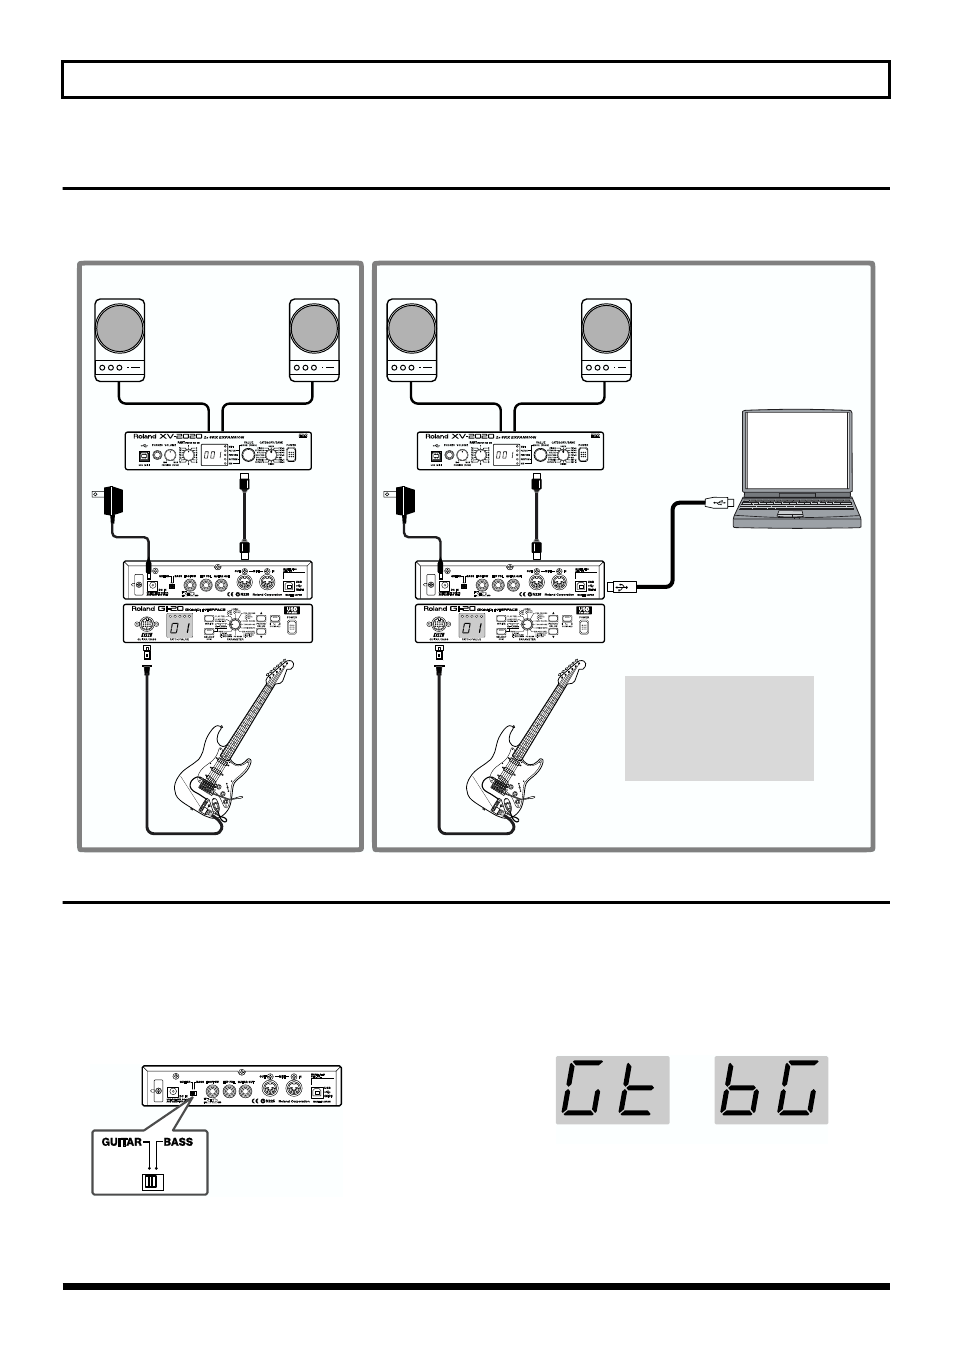
When the guitar or bass is set up, connect the various devices as shown in the connection examples given in the figure.
* The GI-20 connects to sound modules only via MIDI, not USB, even if the sound module is USB equipped.
fig.00-10
Selecting the Guitar or Bass
Set the GUITAR/BASS switch on the rear panel to match the
instrument you are playing, in accordance with the range in
which you are playing. Switch to GUITAR if you are using a
guitar; if using a bass, switch this to BASS.
* Note that the GI-20 may not operate properly if this setting is
not correct.
fig.00-11
After the power is turned on, “Gt” (guitar) or “bG” (bass)
flashes in the display for several seconds, allowing you to
check the status of the GUITAR/BASS switch.
* This does not appear in the display when the GUITAR/BASS
switch setting is changed at a later point.
fig.00-12
* With the factory settings, all of the GI-20’s patch
settings are optimized for guitar.
If you are using a bass, you can carry out a Factory
Reset (p. 34), and change the settings so that they are
suitable for the bass.
Guitar / Bass
Monitor Speakers
(powered)
MIDI Sound Module
MIDI Sound Module
MIDI IN
MIDI OUT
MIDI Cable
GK Cable
Guitar / Bass
Monitor Speakers
(powered)
MIDI IN
MIDI OUT
MIDI Cable
GK Cable
When use GI-20 as a Guitar (Bass) Synthesizer
When use GI-20 as a tool to input data to sequencer softwere
USB Cable
Computer
AC Adaptor
(ACI or ACB)
AC Adaptor
(ACI or ACB)
To prevent malfunction and/or
damage to speakers or other
devices, always turn down the
volume, and turn off the power
on all devices before making
any connections.
* You will need to purchase a
third-party USB cable separately.
GUITAR
BASS