Conversion – Rinnai RHFE-308 FTR User Manual
Page 36
– 36 –
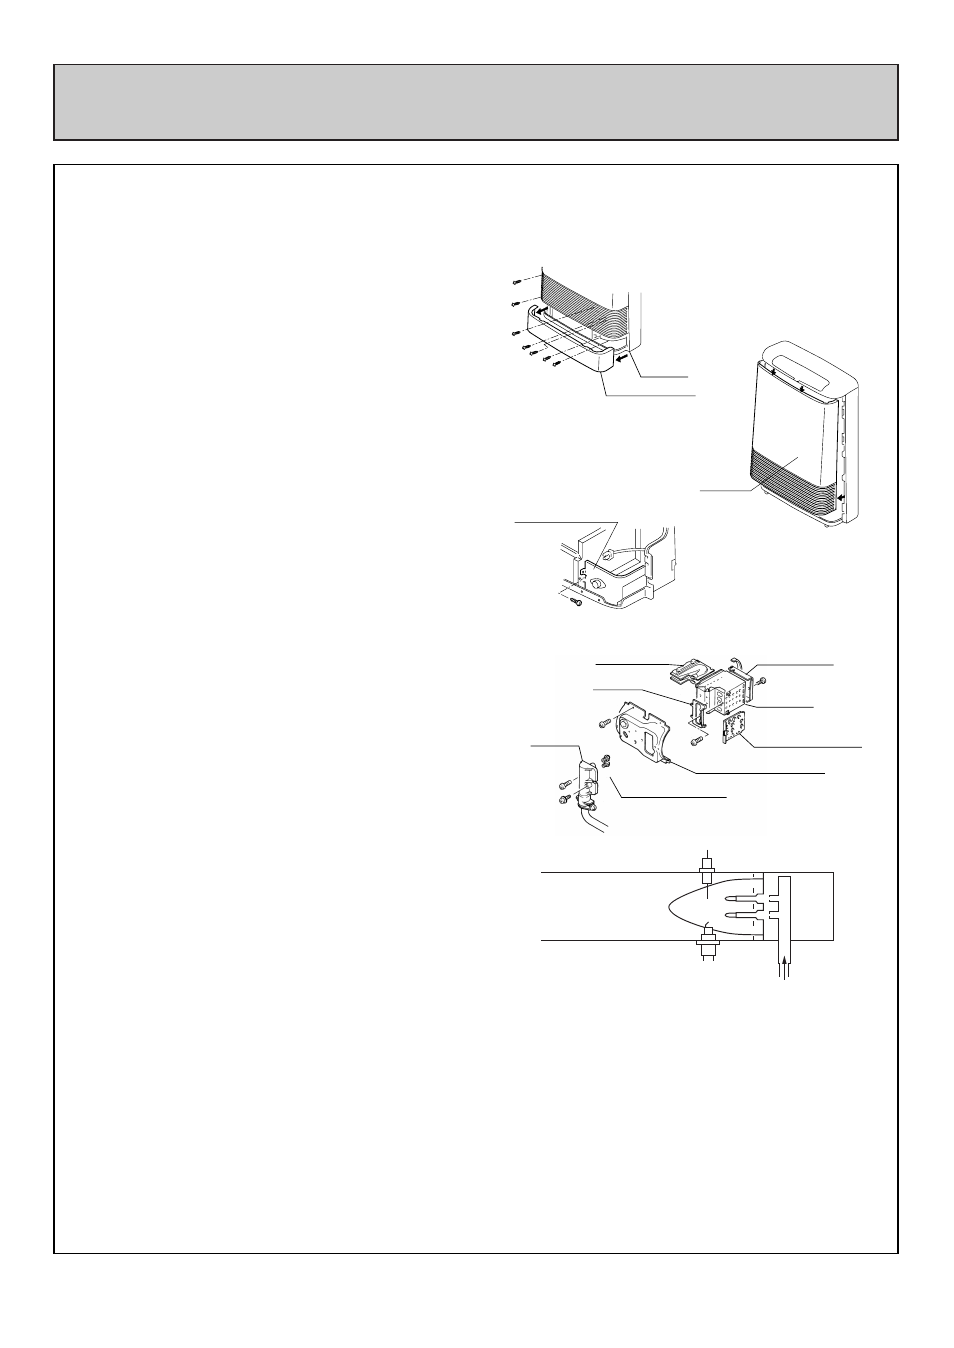
CONVERSION
The following procedure must be followed to
convert the unit from Nat. Gas to LPG.
1. Hold both ends of the bottom cover.
(Undercover ass’y) and pull toward you to
remove the cover. Cover is snapped into place.
(See fig #1)
2. Remove the 7 screws that secure the front
panel and the louver assembly and remove
panel from the unit. Pull the panel out at the
bottom about 100mm and lift up over clips that
hold it in place at the unit’s top. (See fig #1 and
#2)
3. Remove 1 screw from the overheat switch
mounting plate. Place bracket and switch to the
side out of your way. (See fig #3)
4. Remove the nozzle manifold 2 screws. Then
replace all (2) orifices with the proper size for
gas type to be used. (See fig #3 and #4)
5. Remove damper inside burner 1 screw. Then
pull the damper and secondary air damper out
and replace with proper secondary damper.
(See fig #4)
6. Ensure proper relationship of electrode and
flame rod to the burner. (See fig #5)
7. VERY IMPORTANT: Gas type and gas
pressure must now be altered for the type of
gas the unit has been converted to. The
procedure for this is detailed on page 39; Gas
Pressure Setting.
FRONT
PANEL
BOTTOM COVER
LOUVER
OVERHEAT SWITCH
MOUNTING PLATE
Burner Support
Burner Box
Burner Box Mounting Plate
Main Burner Orifices
Burner Assy
Nozzie
Manifold
Damper
Secondarv Air Damper
(Fig #1)
(Fig #3)
(Fig #4)
Flame Rod
Main Heat
Exchanger
Electrode
(Fig #5)
(Fig #2)